1. Project Overview
This project involves building a DIY WiFi Pineapple, a wireless auditing tool, by flashing a compatible router with OpenWRT firmware and a WiFi Pineapple image. The setup enables wireless network penetration testing capabilities, such as rogue access point creation and network scanning, using affordable hardware.
- Objective: Create a cost-effective wireless auditing platform for penetration testing.
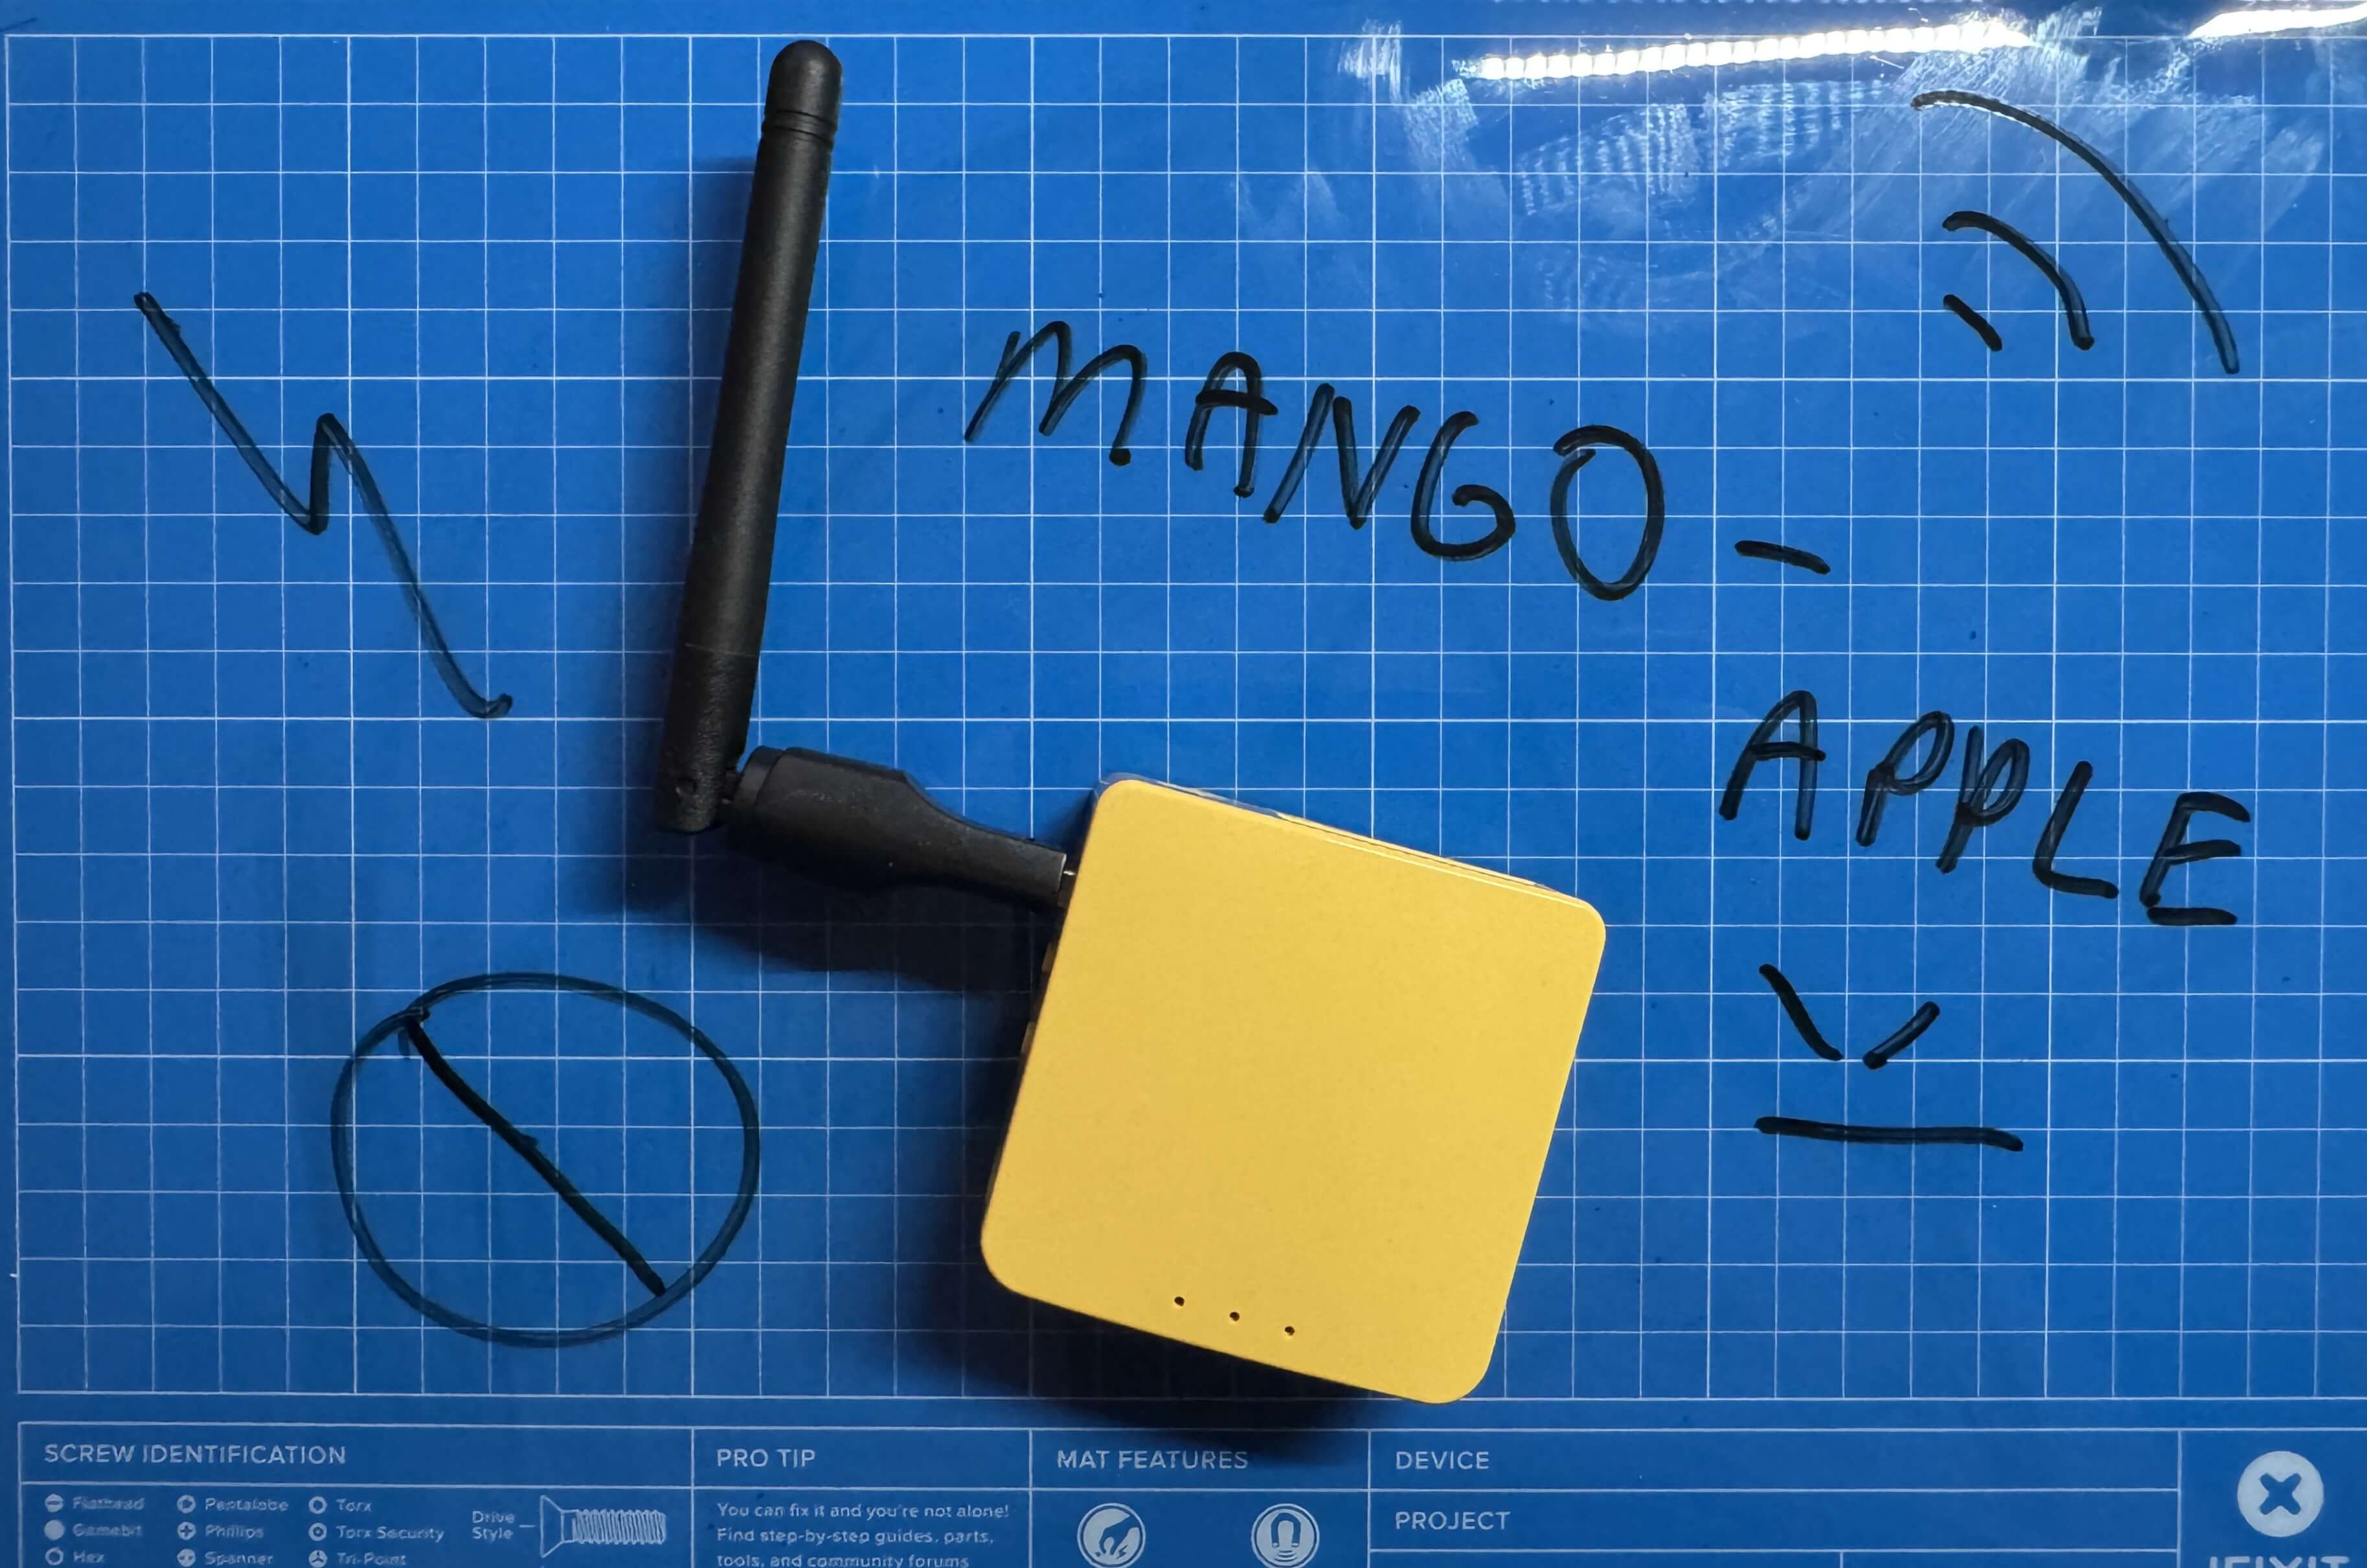
- Hardware Used: Compatible OpenWRT router, USB WiFi adapter, LAN cable, power adapter.
- Software Used: OpenWRT firmware (version 19.07.7), WiFi Pineapple image (custom fork).
- Skills Learned: Router firmware flashing, network interface configuration, wireless auditing setup.
- Amazon Link for Router
- Amazon Link for WiFi Adapter
2. Resources and References
The following resources were essential for setting up the DIY WiFi Pineapple:
-
Resource 1:
Title: DIY WiFi Pineapple - Installation Guide
Usage: Followed this video for step-by-step instructions on flashing OpenWRT and WiFi Pineapple firmware. -
Resource 2:
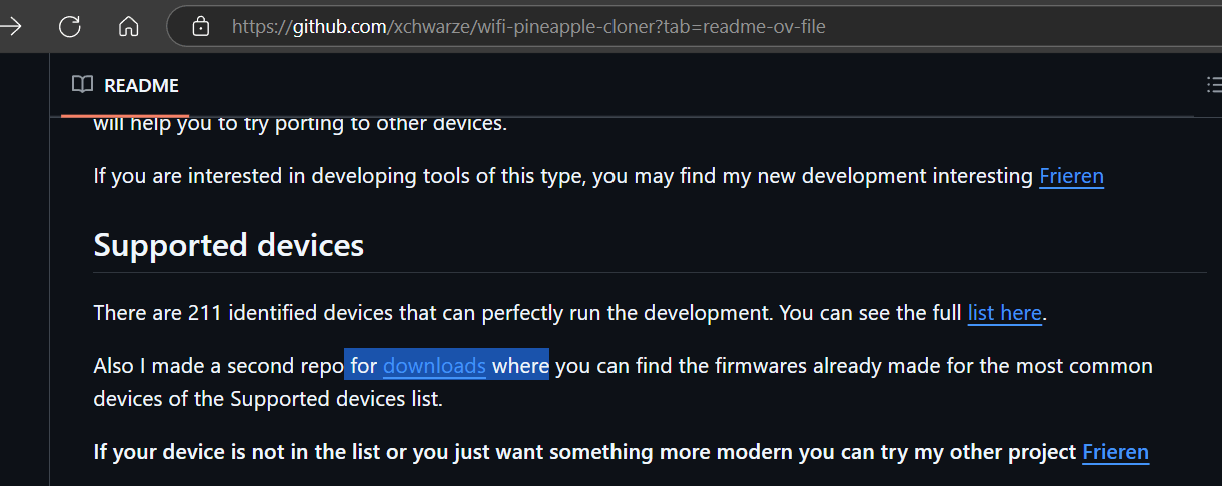
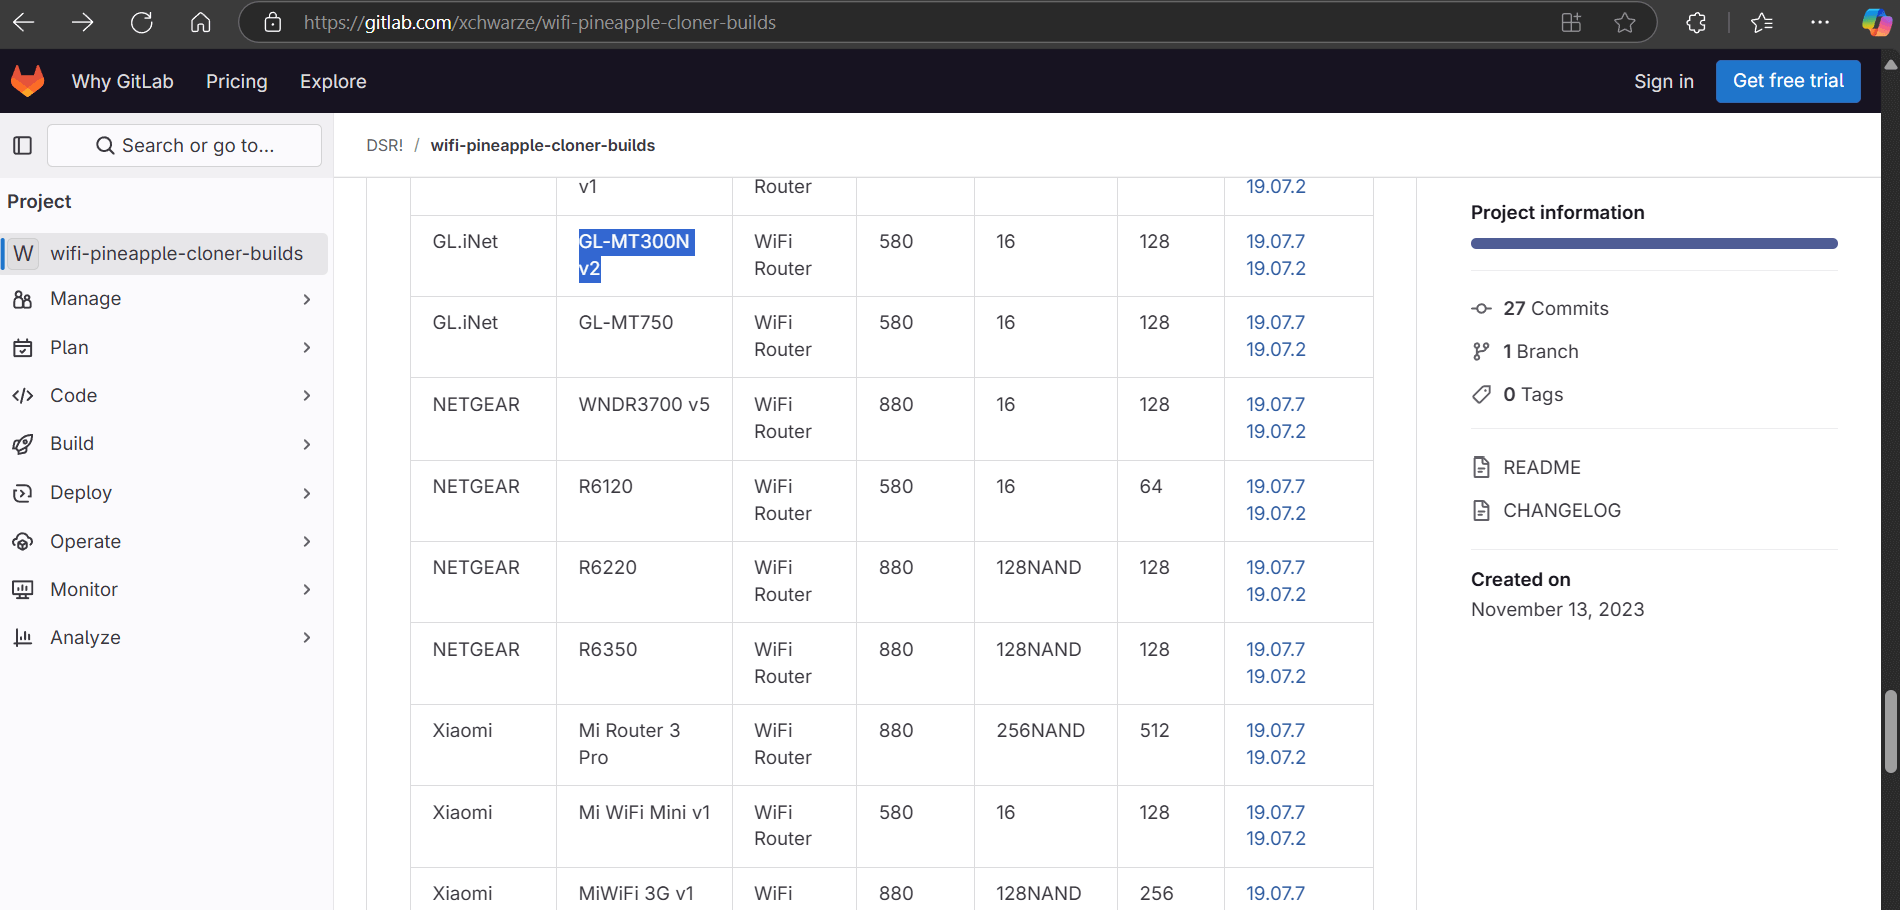
Title: WiFi Pineapple Cloner GitHub Repository
Usage: Downloaded the WiFi Pineapple image and referenced setup instructions. -
Resource 3:
Title: OpenWRT Firmware Selector
Usage: Used to select and download the correct OpenWRT firmware (version 19.07.7) for the router model.
Additional Notes: The YouTube video provided clear visual guidance, while the GitHub repository offered the necessary WiFi Pineapple image. The OpenWRT firmware selector ensured compatibility with the router model.

3. Steps Taken
The step-by-step process to build and deploy the DIY WiFi Pineapple is outlined below:
-
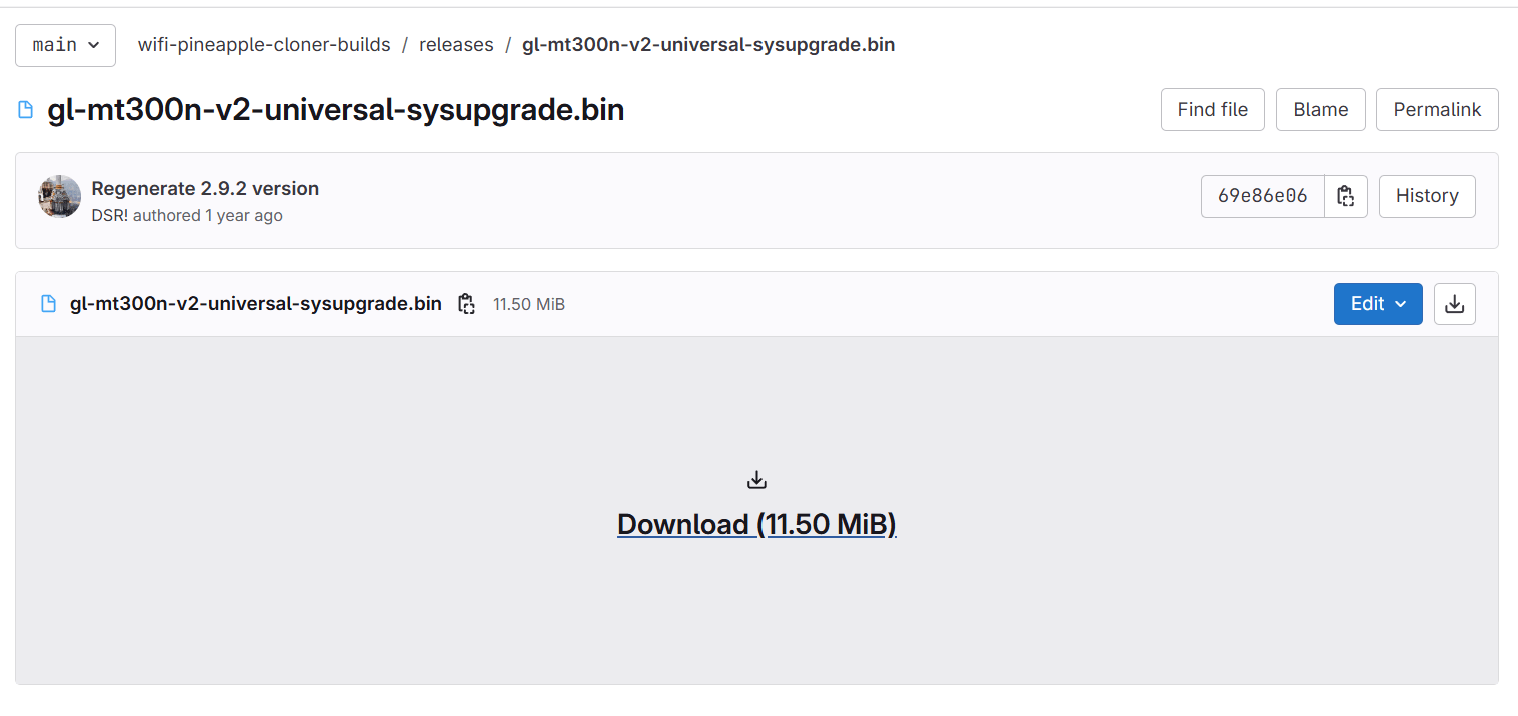
Step 1: Download Firmware
Description: Downloaded the OpenWRT firmware (version 19.07.7 if your using same hardware as me) for the specific router model using the OpenWRT Firmware Selector. Selected the sysupgrade image for flashing.
Challenges: Ensured the correct router model and firmware version were selected to avoid bricking the device.
-
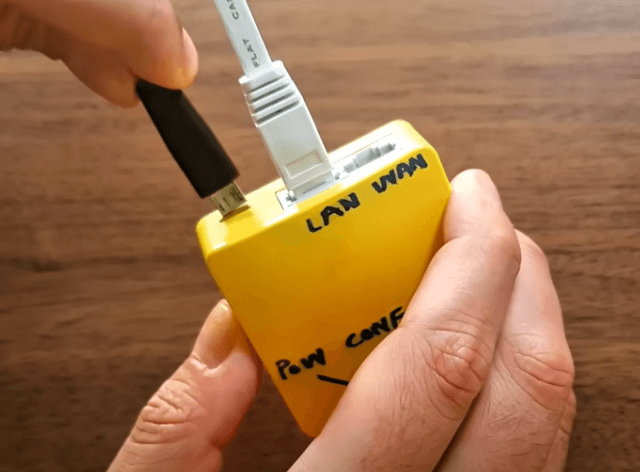
Step 2: Boot to Recovery Mode
Description: Connected the router via a LAN cable to a computer. Pressed and held the reset button while plugging in the power, holding until the lights became solid to enter recovery mode.
Challenges: Timing the reset button press correctly was critical to successfully enter recovery mode.(LAN>RESET>POWER)
-
Step 3: Flashing OpenWRT
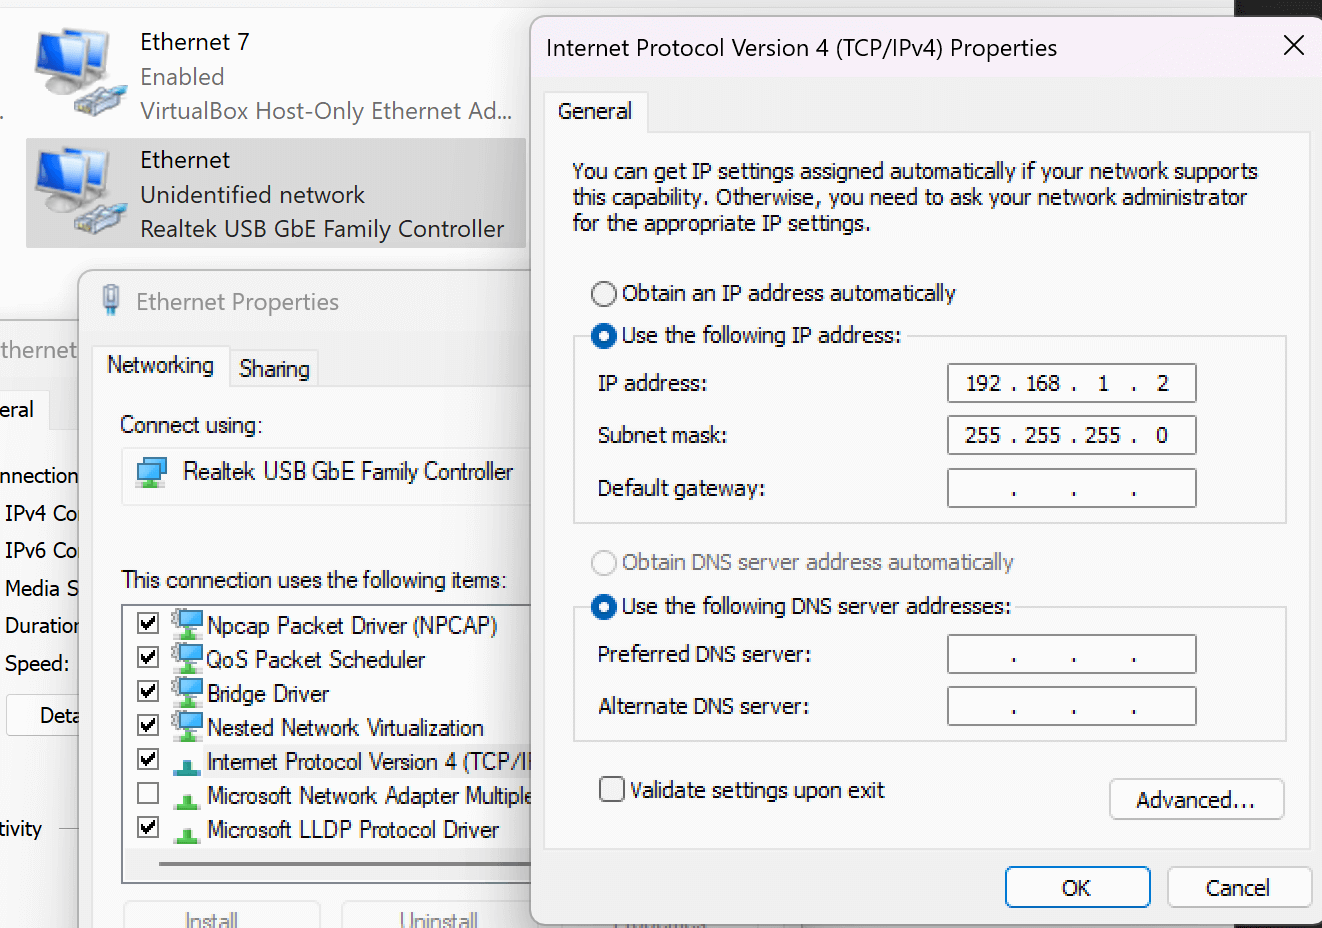
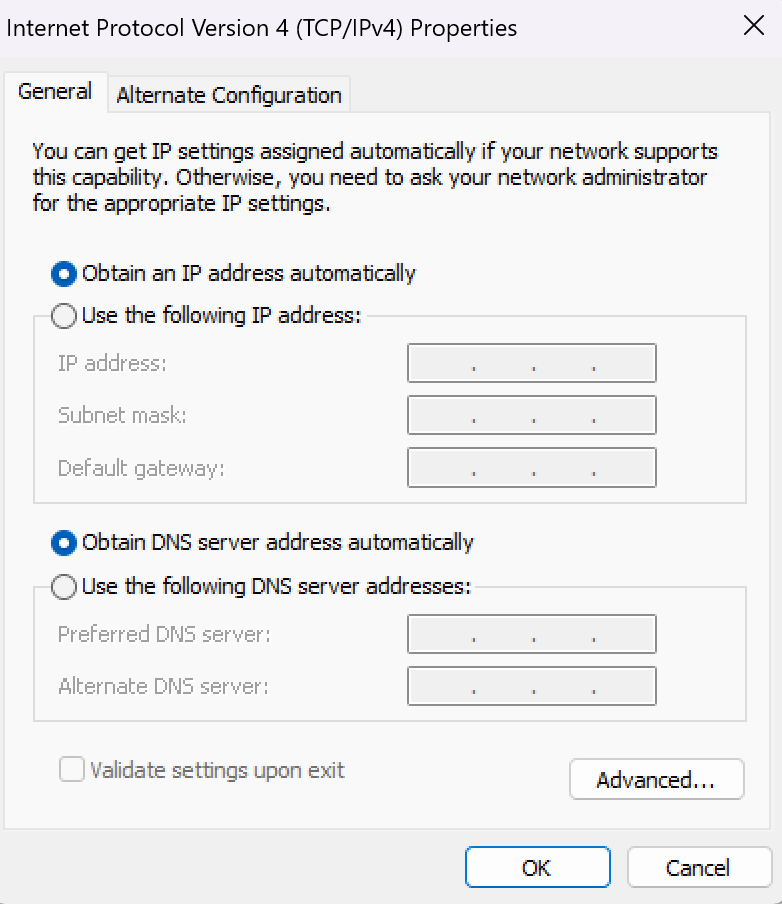
Description: Disabled WiFi on the computer, connected to the router via LAN, and set a static IPv4 address (private IP) in the network interface settings. Accessed the router’s IP via a web browser, selected the OpenWRT firmware, and updated it (process took approximately 2.5 minutes) you know its done when lights go steady..
Challenges: Setting the static IP correctly and ensuring a stable LAN connection were essential for successful flashing.


-
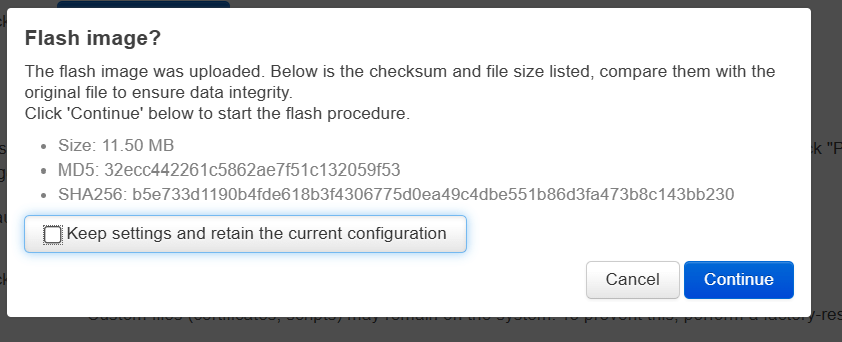
Step 4: Flashing WiFi Pineapple Image
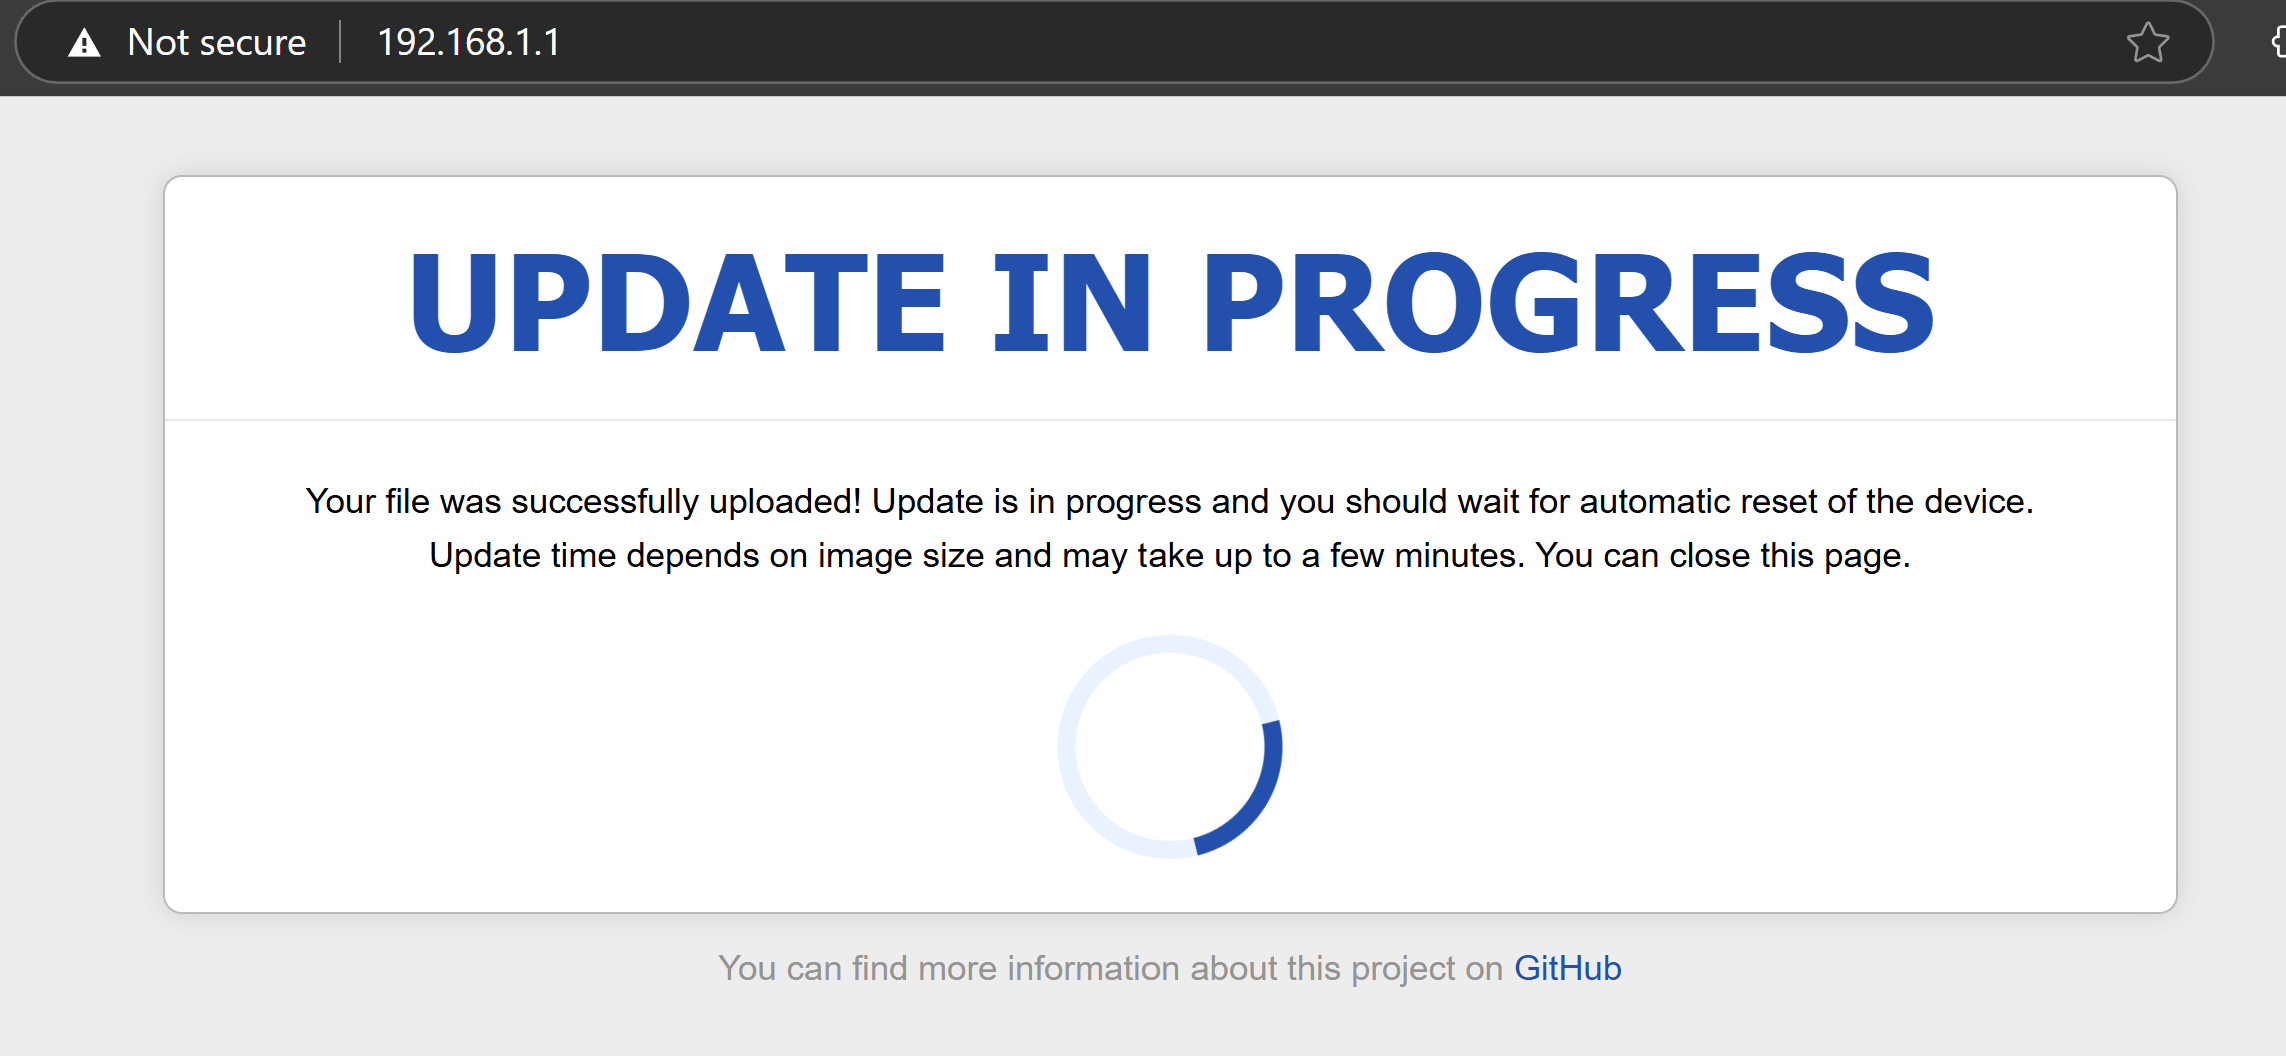
Description: Ignored the update spinning wheel, refreshed the browser, and set a password in the OpenWRT interface. Navigated to System > Backup/Flash Firmware > Flash Image, selected the WiFi Pineapple image, and uploaded it. Unchecked the "Keep Settings" option and waited approximately 3 minutes for all three LEDs to flash steadily.
Challenges: Ensuring the correct image was uploaded and waiting for the LEDs to indicate completion required patience.


-
Step 5: Initial Setup
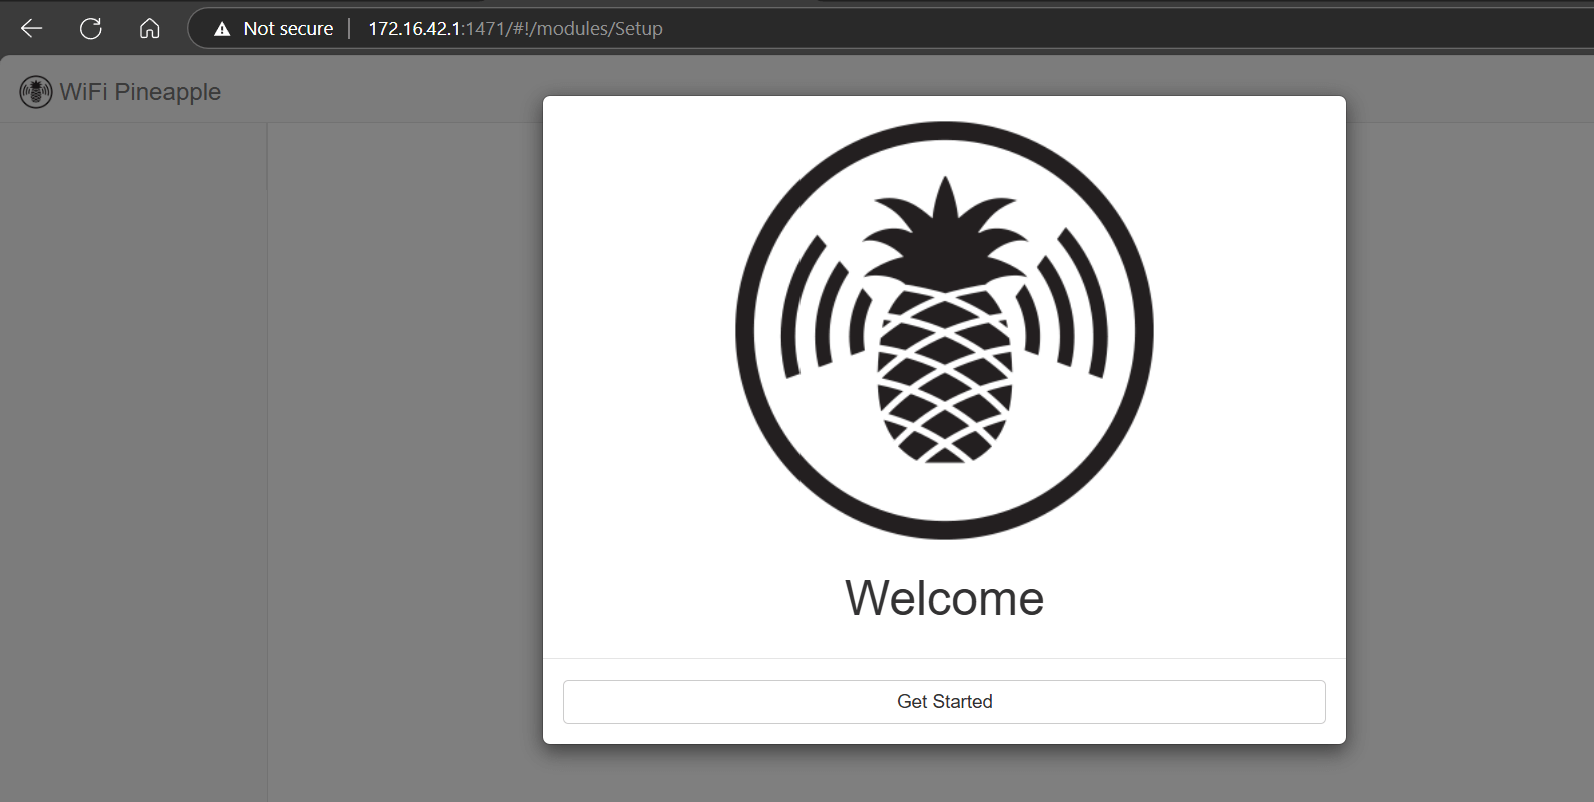
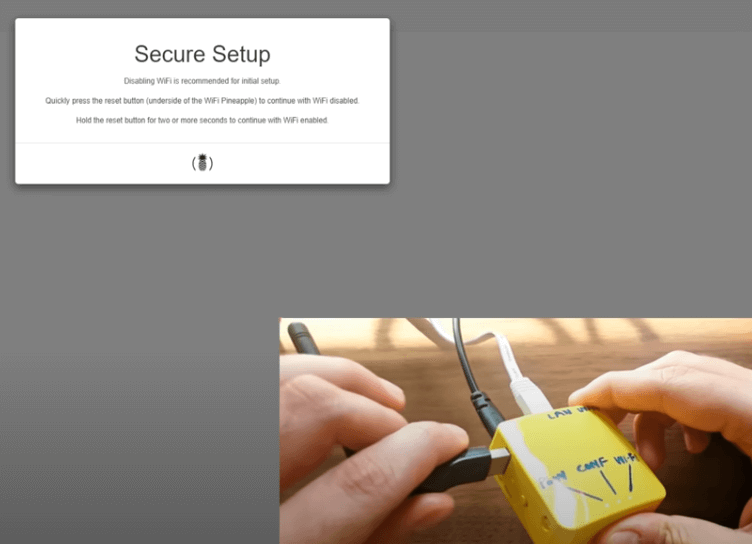
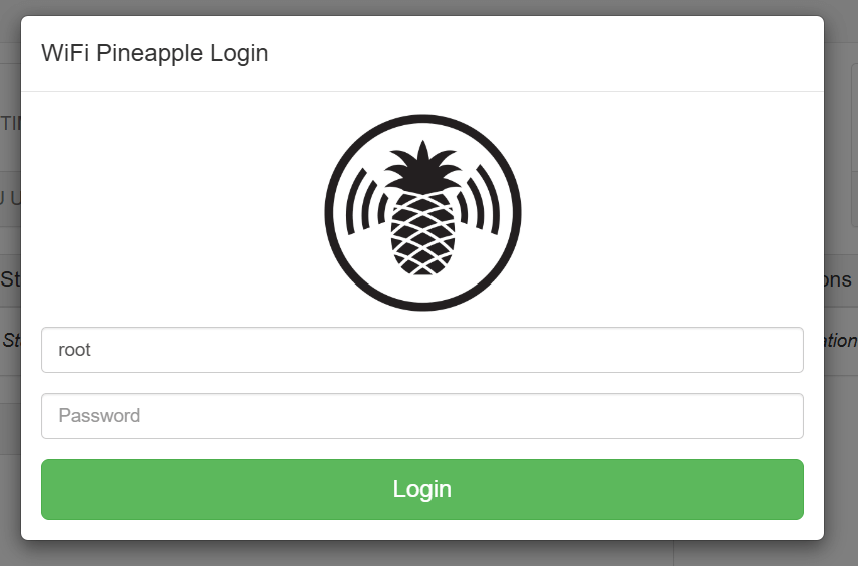
Description: Reverted the computer’s network interface to DHCP from manual. Accessed the WiFi Pineapple interface at http://172.16.42.1:1471, continued through the setup message, once prompted with "Secure Setup: Disable Wifi" attached the WiFi adapter, and pressed the reset button once. Set the root password and saved settings.
Challenges: Ensure to reenable DHCP and Auto DNS, as well as to plug in wifi adapter prior to clicking through "secure setup" prompt.
-
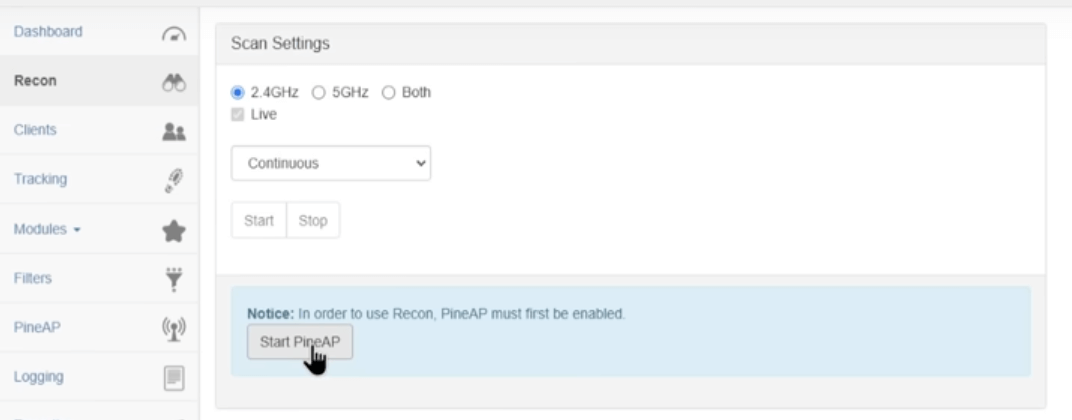
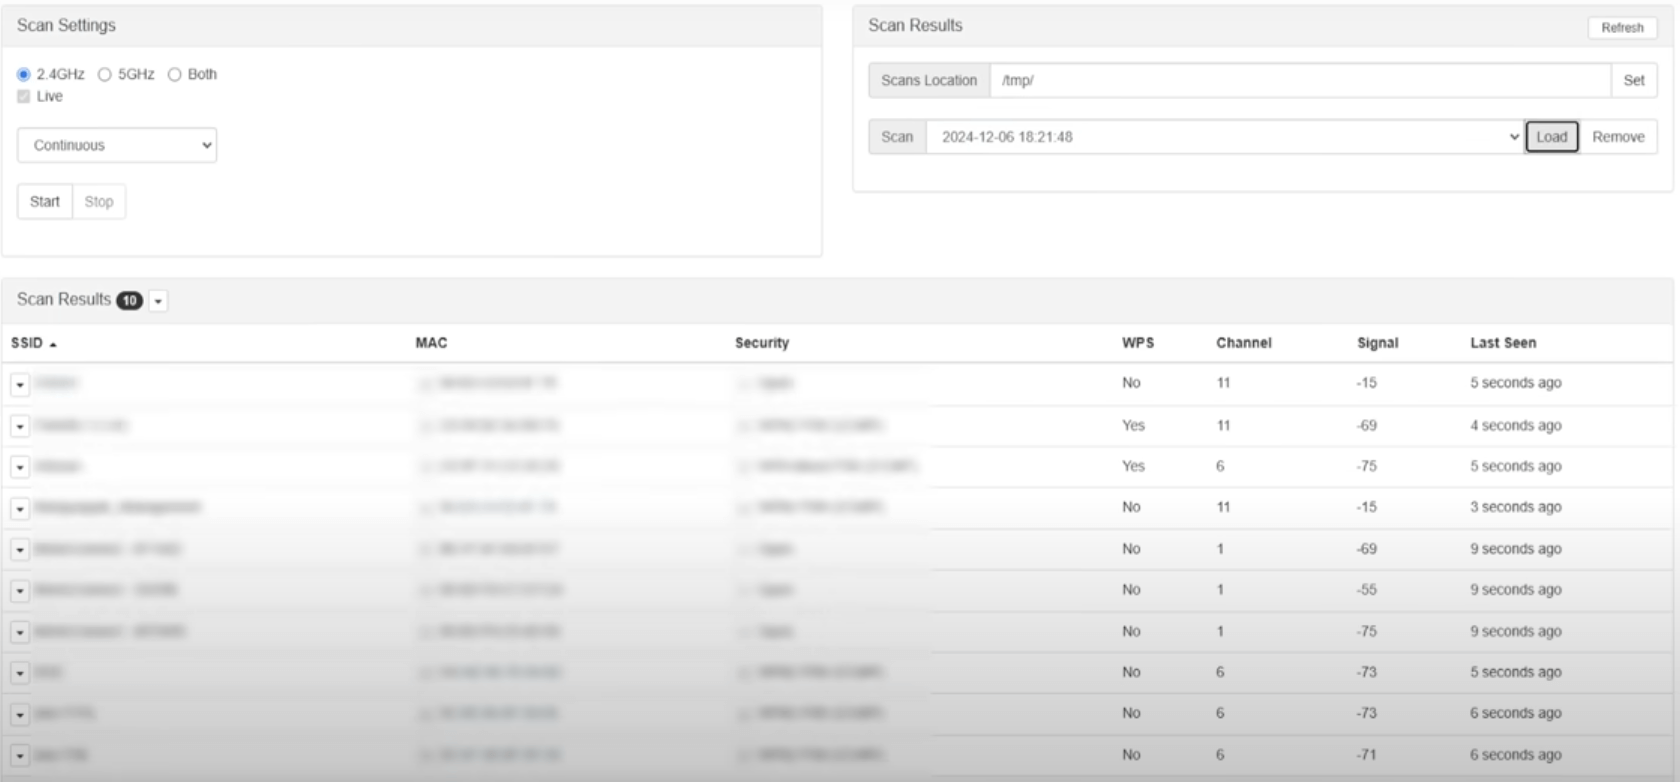
Step 6: Testing WiFi Adapter
Description: Navigated to the PineAP module in the interface, started a scan, stopped it, and loaded the results. Confirmed the WiFi adapter was working if scan results were visible.
Challenges: Ensuring the WiFi adapter was compatible and properly detected by the router.
-
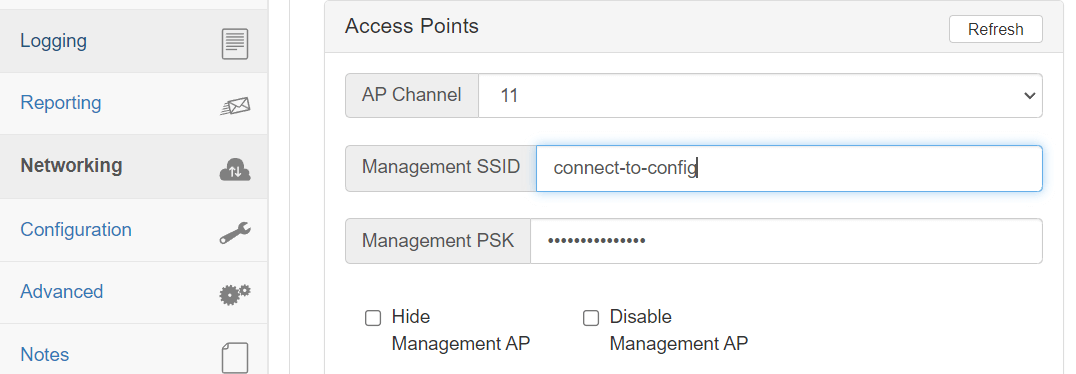
Step 7: Setup Wireless Management SSID
Description: In the Network tab, configured the management SSID by setting a custom SSID name and password, then clicked Update. Rebooted the router via the power icon in the interface. After reboot, connected to the management SSID wirelessly and accessed the same IP and port (172.16.42.1:1471) for wireless configuration access.
Challenges: Verifying the management SSID appeared in the WiFi list and ensuring stable wireless access to the interface.
4. Tips and Lessons Learned
Practical advice and insights gained from the project:
- Tip 1: Verify router model compatibility with OpenWRT and the WiFi Pineapple image before starting to avoid bricking.
- Tip 2: Ensure you have mutiple device to follow along and be able to switch between networking interfaces as you go.
- Tip 3: Dont relay on the screen to tell you when the images are done flashing go off the lights as per the video.
- Lesson Learned: Even though you click update when confiuring management SSID you still have to reboot before it will show up.
- Future Improvements: Explore additional modules for the WiFi Pineapple to enhance auditing capabilities.
5. Conclusion
The DIY WiFi Pineapple was successfully set up on a compatible router, providing a powerful wireless auditing platform for penetration testing. The project enhanced my understanding of router firmware flashing, network configuration, and wireless security testing. Future plans include experimenting with advanced PineAP modules and custom scripts.
6. Additional Notes
- The YouTube guide was invaluable for visualizing the flashing and setup process.
- The GitHub repository by xchwarze provided a reliable WiFi Pineapple image tailored for OpenWRT routers.
- The OpenWRT Firmware Selector simplified the process of finding the correct firmware version for the router.