1. Project Overview
This project involves building a Pwnagotchi, a Wi-Fi handshake capture tool, on a Raspberry Pi Zero W with a Waveshare 2.13-inch e-Paper display. Pwnagotchi autonomously captures Wi-Fi handshakes for penetration testing, using machine learning to optimize its performance in a portable, Tamagotchi-like device.
- Objective: Create a compact Wi-Fi security testing device for capturing handshakes.
- Hardware Used: Raspberry Pi Zero W, Waveshare 2.13-inch e-Paper display, Class 10 MicroSD card.
- Software Used: Pwnagotchi software, Python, Raspberry Pi OS Lite (32-bit, Debian Bookworm).
- Skills Learned: Raspberry Pi setup, Linux configuration, e-Paper display integration, Wi-Fi monitoring. Amazon Link for Hardware used
2. Resources and References
The following resources were critical for setting up the Pwnagotchi:
-
Resource 1:
Title: Pwnagotchi Official Website
Usage: Provided detailed installation instructions and configuration guidelines. -
Resource 2:
Title: Pwnagotchi GitHub Repository
Usage: Offered the official source code, installation scripts, and community-driven troubleshooting. -
Resource 3:
Title: Pwnagotchi Setup Guide
Usage: Delivered a visual walkthrough of hardware assembly and software installation.
Additional Notes: The official website and GitHub provided technical details, while the YouTube video offered practical setup visuals, making them complementary resources.
3. Steps Taken
The step-by-step process to build and deploy the Pwnagotchi is outlined below:
-
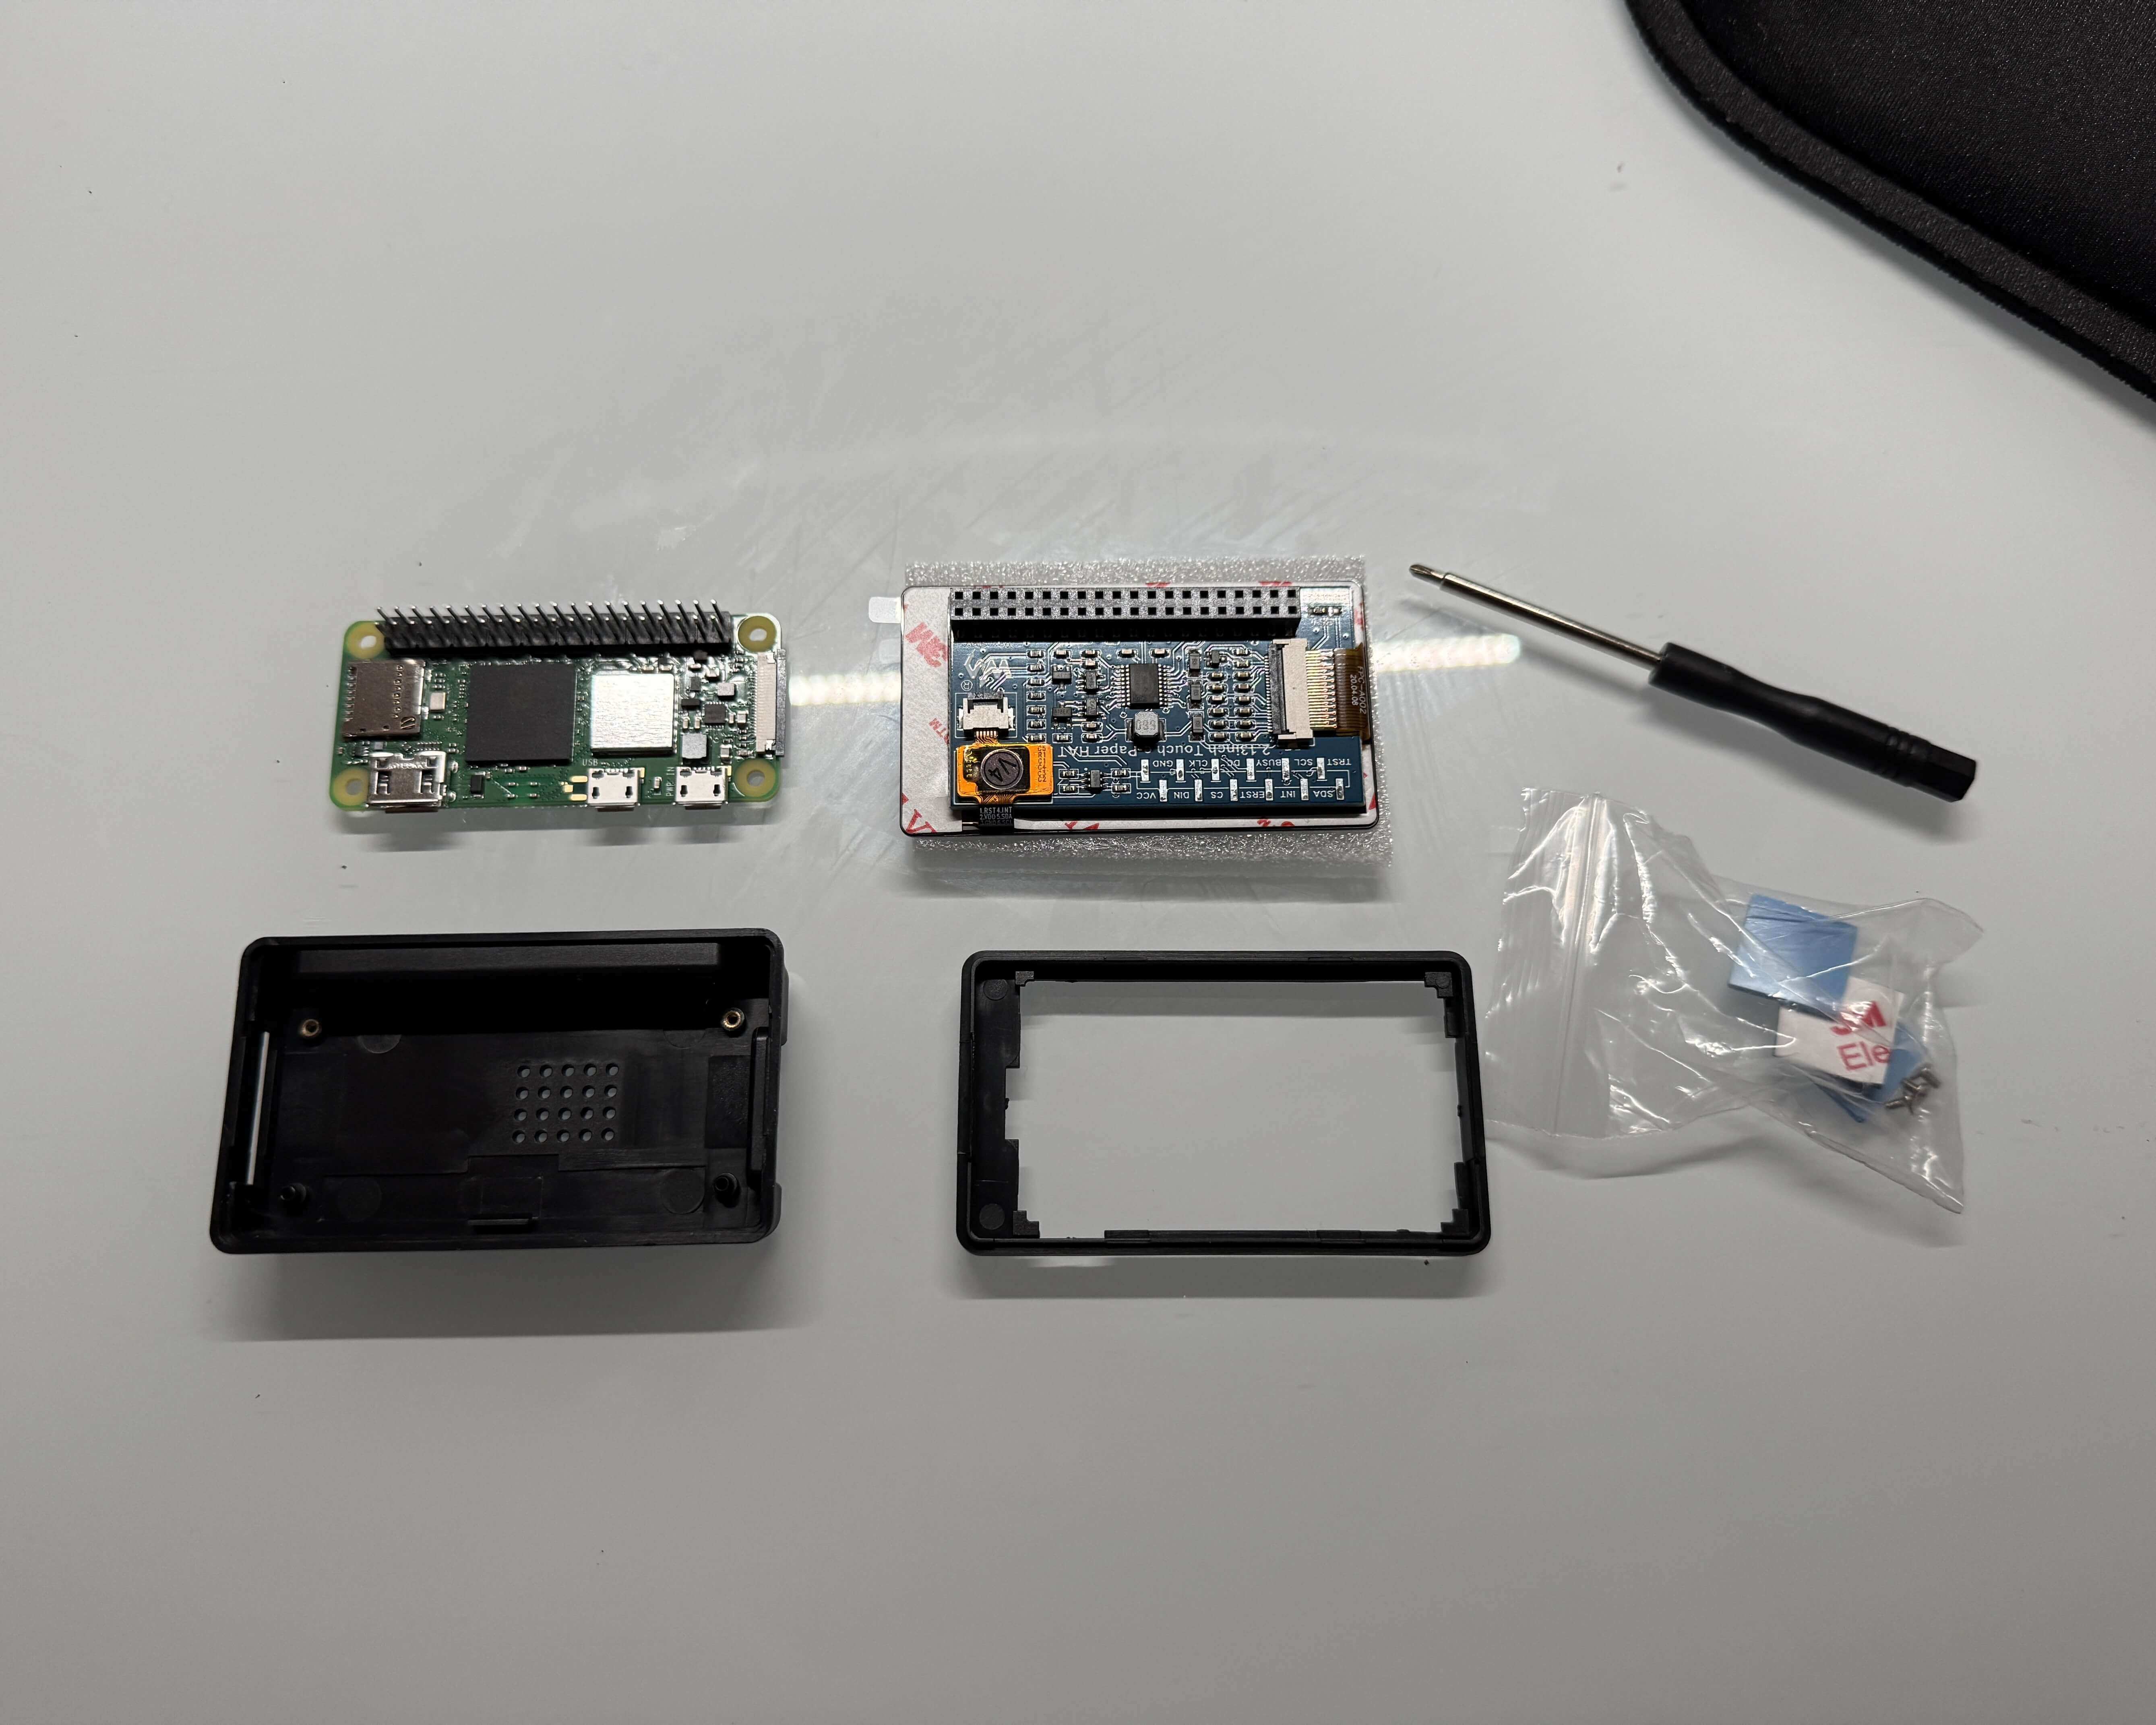
Step 1: Hardware Assembly
Description: Connected the Waveshare 2.13-inch e-Paper display to the Raspberry Pi Zero W using GPIO pins.
Challenges: Ensured proper pin alignment to avoid damaging the display or Pi.
-
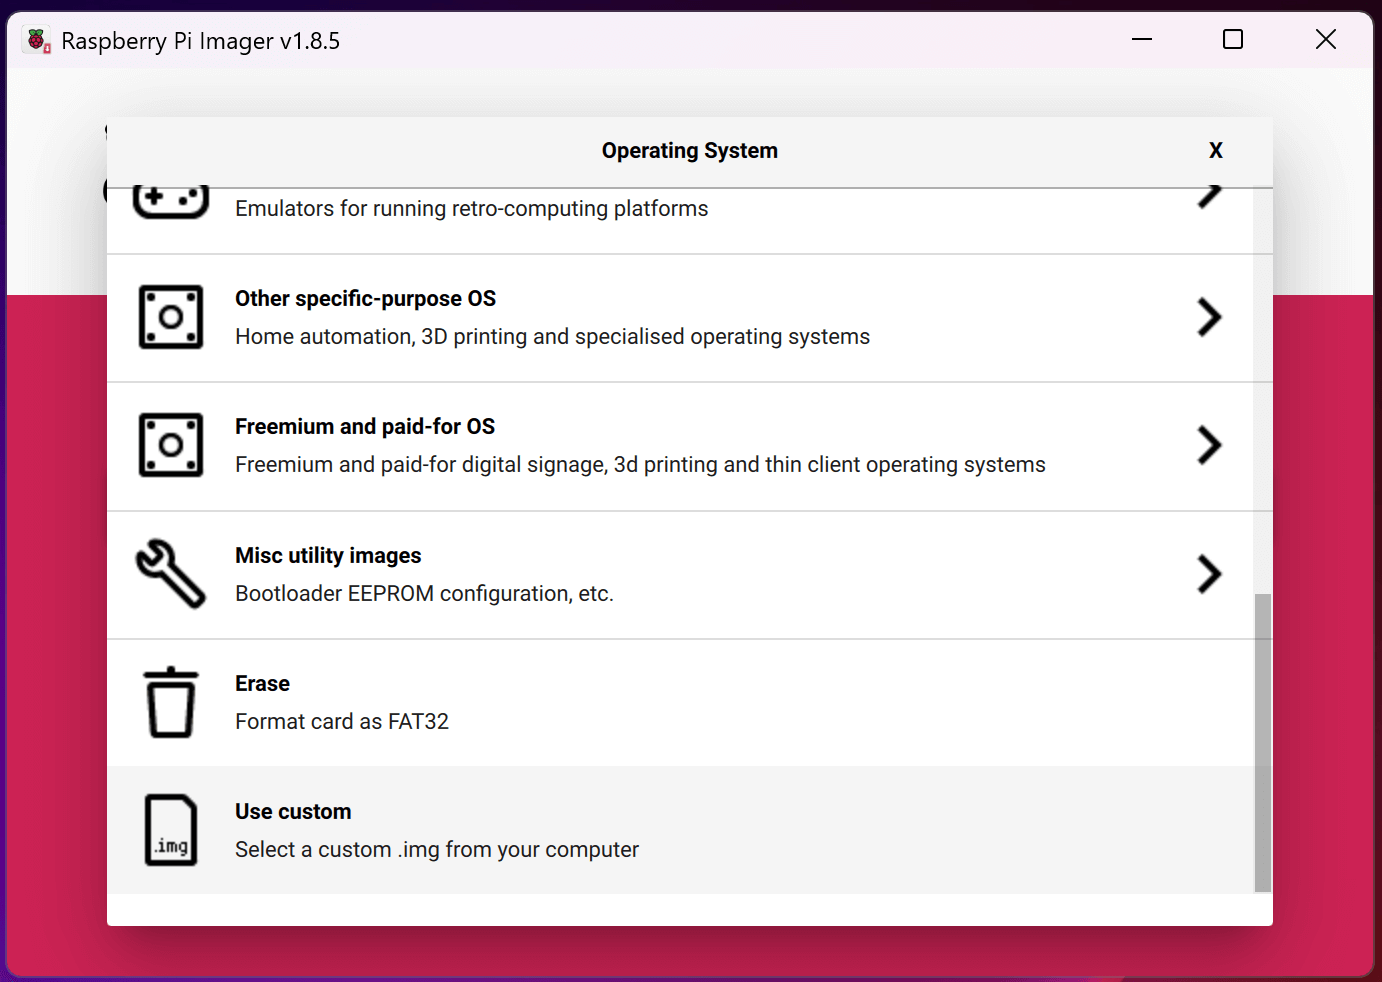
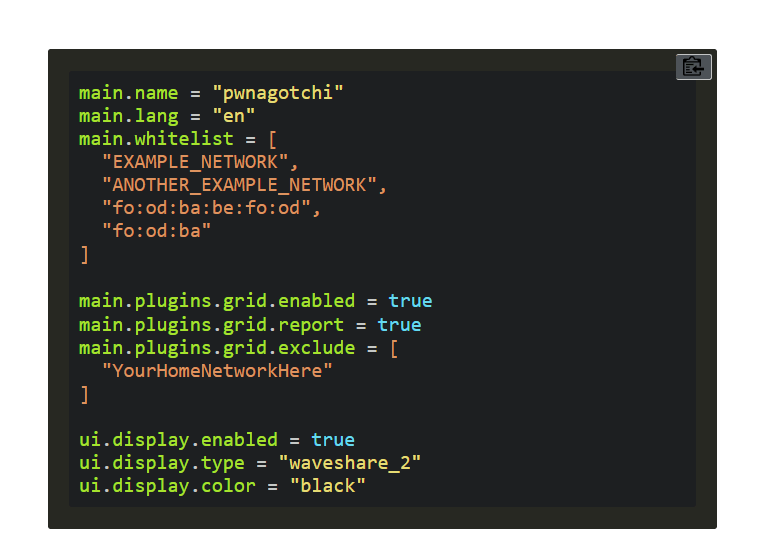
Step 2: OS and Pwnagotchi Image Installation
Description: Downloaded the Pwnagotchi image from the official website and flashed it onto a Class 10 MicroSD card using Raspberry Pi Imager. Configured settings inconfig.toml(whitelist home SSID, setup web ui) to enable automatic connectivity.
Challenges: Verified image integrity and ensured correct configuration to enable SSH access.

-
Step 3: Initial Boot and Configuration
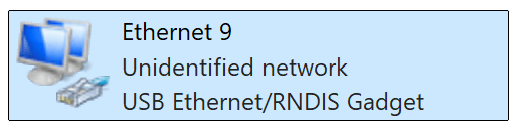
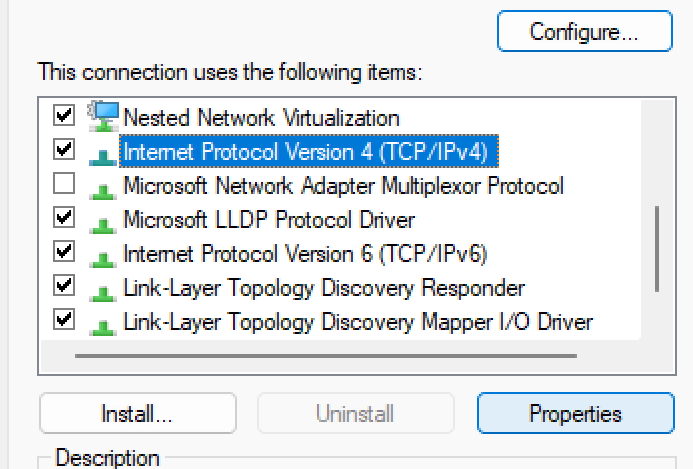
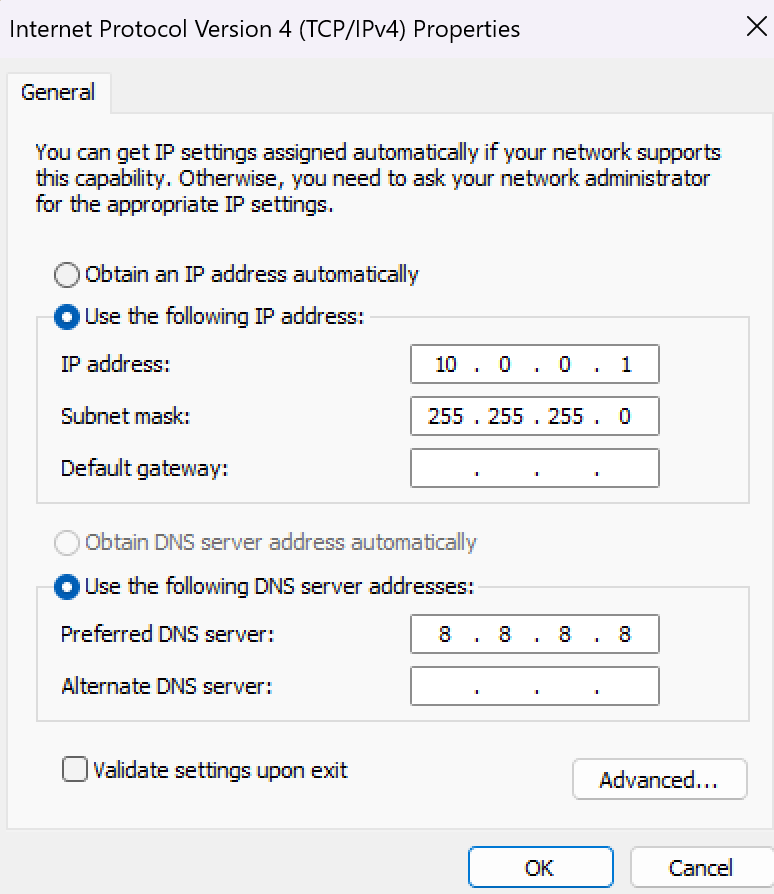
Description: Inserted the MicroSD card, powered on the Raspberry Pi, and connected it to a laptop via a micro-USB cable. Navigated to the network adapter settings to locate the "RNDIS Gadget" adapter. Right-clicked to access properties, then configured the IPv4 settings to use a static IP address as outlined below. This setup enabled access to the Pwnagotchi web UI for further configuration. Challenges: Ensured the correct identification of the "RNDIS Gadget" adapter and verified the static IP configuration to establish a stable connection to the web UI.
-
Step 4: Testing and Validation
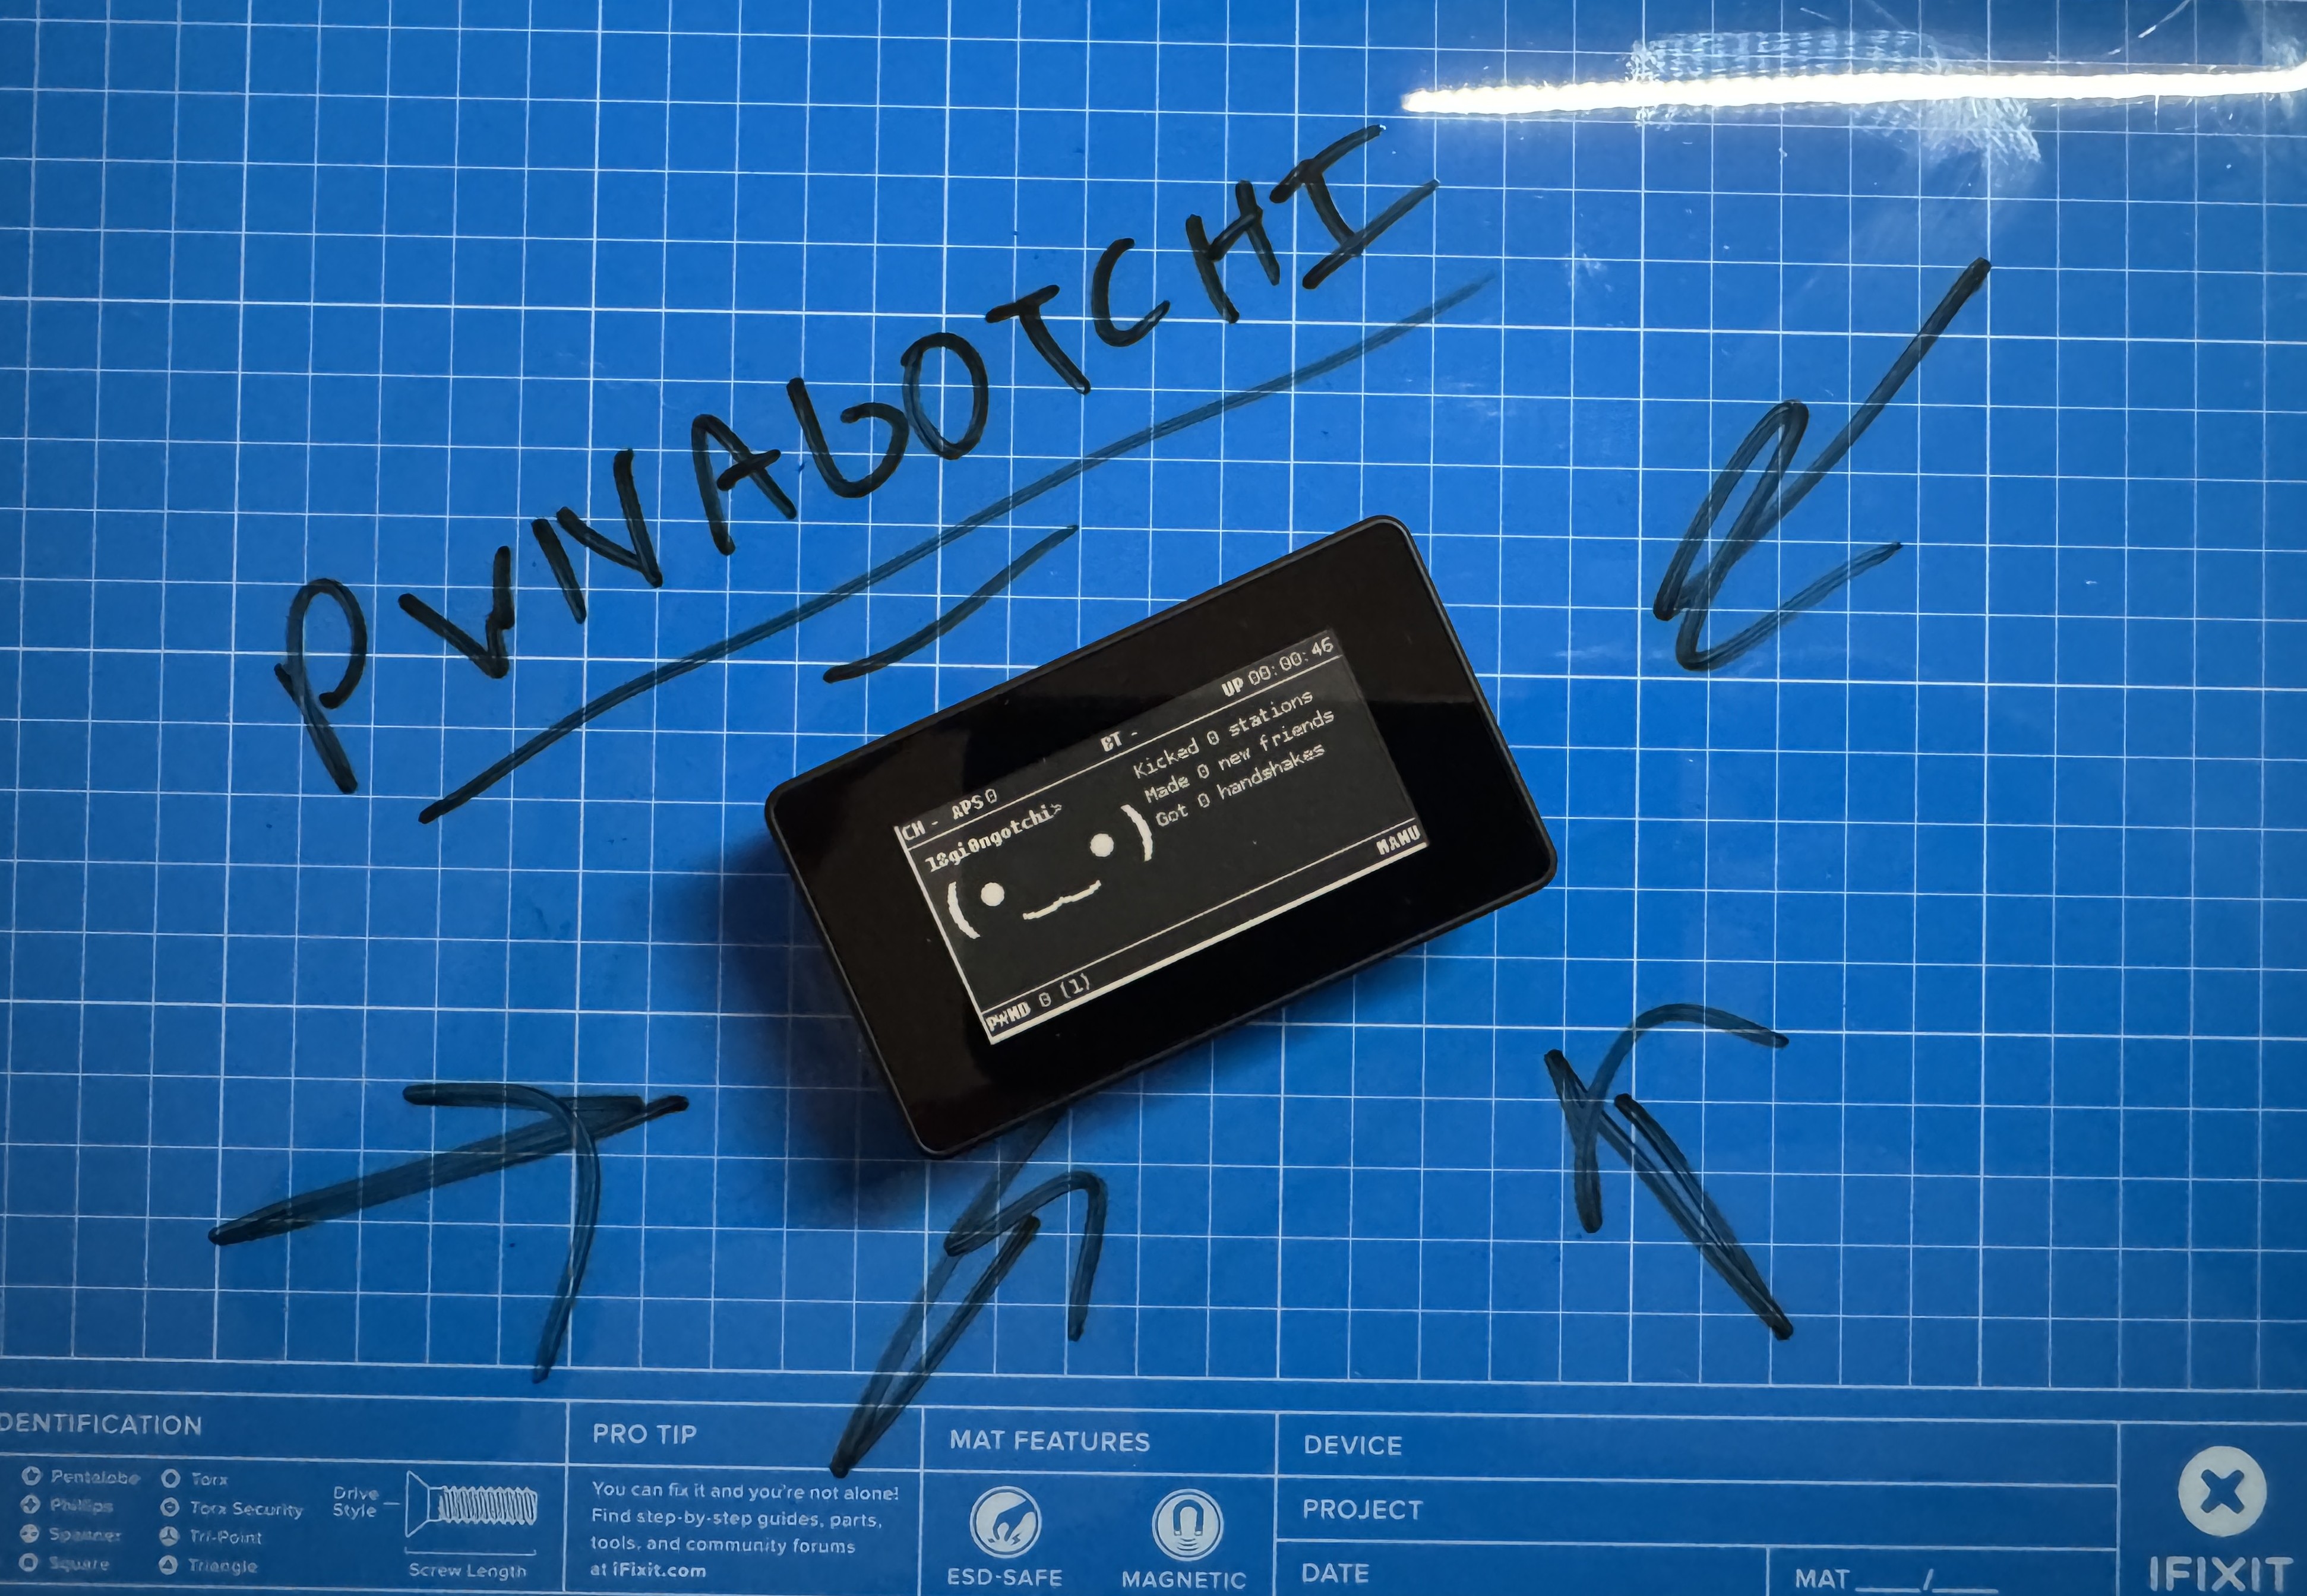
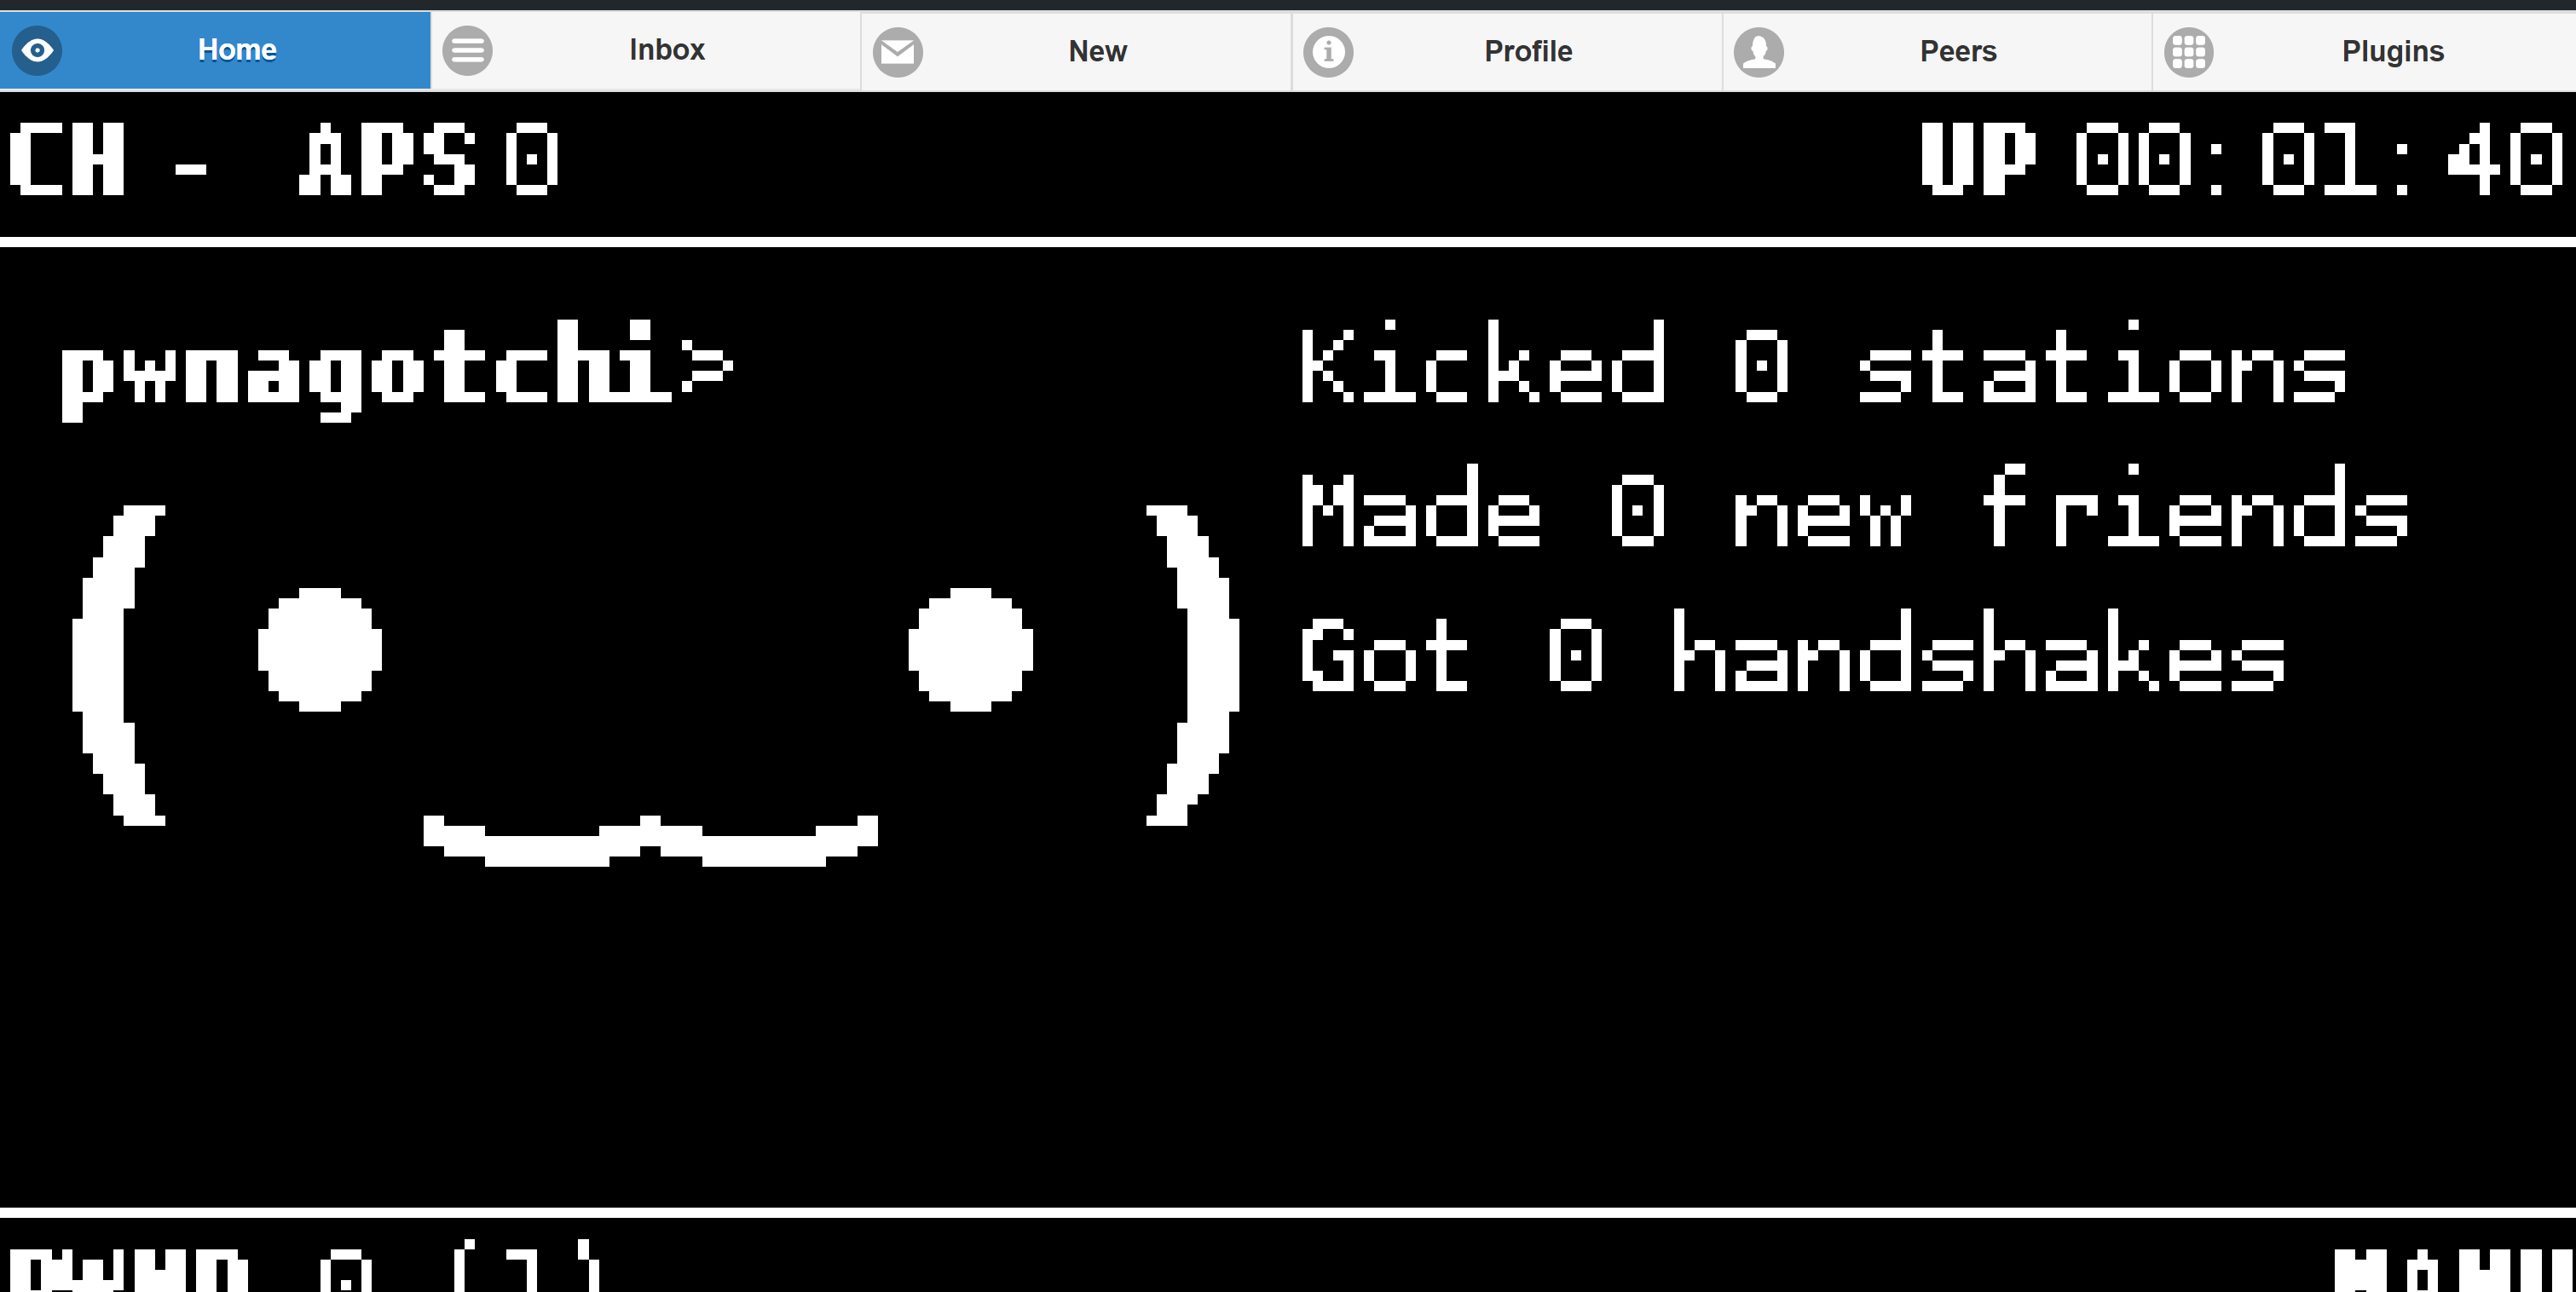
Description: Rebooted the Pi and verified the e-Paper display showed the Pwnagotchi’s status (e.g., “SAD,” “HAPPY”). Tested handshake capture by placing the device near Wi-Fi networks and checked captured files via the web UI at[10.0.0.2]:8080.
Challenges: Adjusted display settings to resolve refresh issues and ensured monitor mode was active for Wi-Fi scanning.

4. Tips and Lessons Learned
Practical advice and insights gained from the project:
- Tip 1: Use a high-quality Class 10 MicroSD card to avoid performance bottlenecks.
- Tip 2: Pre-configure
config.tomlwith Wi-Fi credentials and Webui settings to simplify initial setup. - Tip 3: Verify monitor mode compatibility for the Pi’s Wi-Fi chip to ensure handshake capture works.
- Tip 4: Access the web UI at
[Pi’s IP]:8080to monitor progress and download captured handshakes. - Lesson Learned: Proper e-Paper display configuration is essential for reliable status updates.
- Future Improvements: Add a battery pack for portability and explore plugins to enhance functionality.
5. Conclusion
The Pwnagotchi was successfully assembled and tested, capturing Wi-Fi handshakes and displaying status on the e-Paper display and web interface. This project deepened my understanding of Wi-Fi security and Raspberry Pi-based tools. Future plans include integrating additional plugins and improving portability.
6. Additional Notes
- The YouTube video was crucial for visualizing the assembly and initial boot process.
- The GitHub repository’s community discussions helped troubleshoot display and Wi-Fi issues.