1. Project Overview
This project involves building P4wnP1 A.L.O.A. (A Little Offensive Application), a flexible USB attack platform, on a Raspberry Pi Zero 2W. P4wnP1 A.L.O.A. transforms the Pi into a pentesting tool capable of USB-based attacks, such as keystroke injection and network attacks, without a screen or battery, housed in a compact case for portability.
- Objective: Create a low-cost, stealthy USB attack device for red teaming and pentesting.
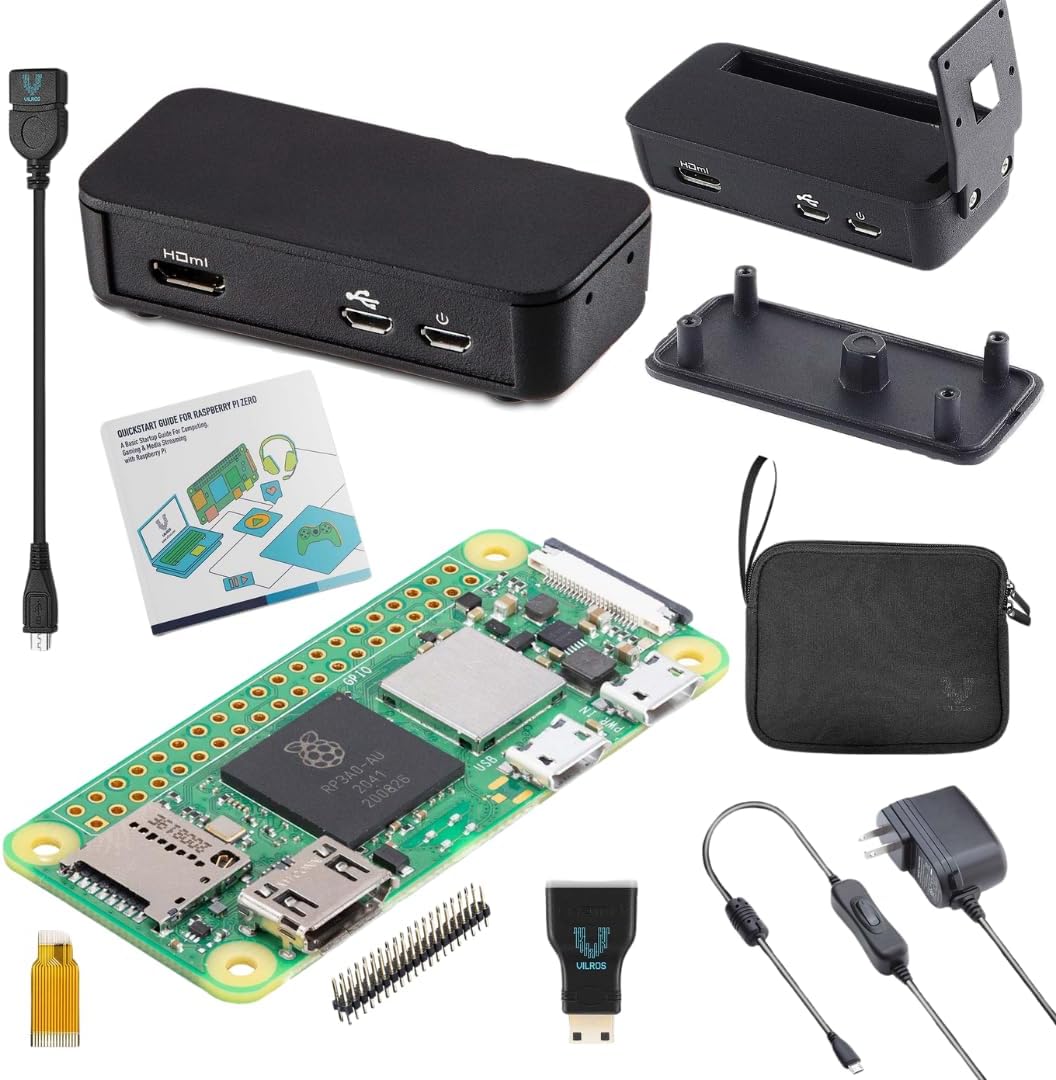
- Hardware Used: Raspberry Pi Zero 2W, Class 10 MicroSD card, aluminum alloy case with heatsink, OTG cable, HDMI adapter, power switch cable.
- Software Used: P4wnP1 A.L.O.A. image (custom fork for Zero 2W), Kali Linux-based.
- Skills Learned: Raspberry Pi Zero 2W configuration, USB attack payload setup, network interface management.
- Amazon Link for Hardware used
2. Resources and References
The following resources were essential for setting up P4wnP1 A.L.O.A.:
-
Resource 1:
Title: P4wnP1 A.L.O.A. on Raspberry Pi Zero 2W - Installation Guide
Usage: Followed this video for flashing the P4wnP1 A.L.O.A. image and initial configuration steps. -
Resource 2:
Title: P4wnP1_aloa GitHub Repository (Zero 2W Fork)
Usage: Downloaded the custom P4wnP1 A.L.O.A. image for Raspberry Pi Zero 2W and referenced setup instructions. -
Resource 3:
Title: Raspberry Pi Zero 2 Case Kit
Usage: Purchased the aluminum alloy case kit with heatsink, OTG cable, HDMI adapter, and power switch for housing the Pi.
Additional Notes: The YouTube video provided a clear visual guide, while the GitHub fork offered a Zero 2W-compatible image, addressing compatibility issues noted in other sources. The Amazon kit ensured proper hardware protection and connectivity.
3. Steps Taken
The step-by-step process to build and deploy P4wnP1 A.L.O.A. is outlined below:
-
Step 1: Hardware Assembly
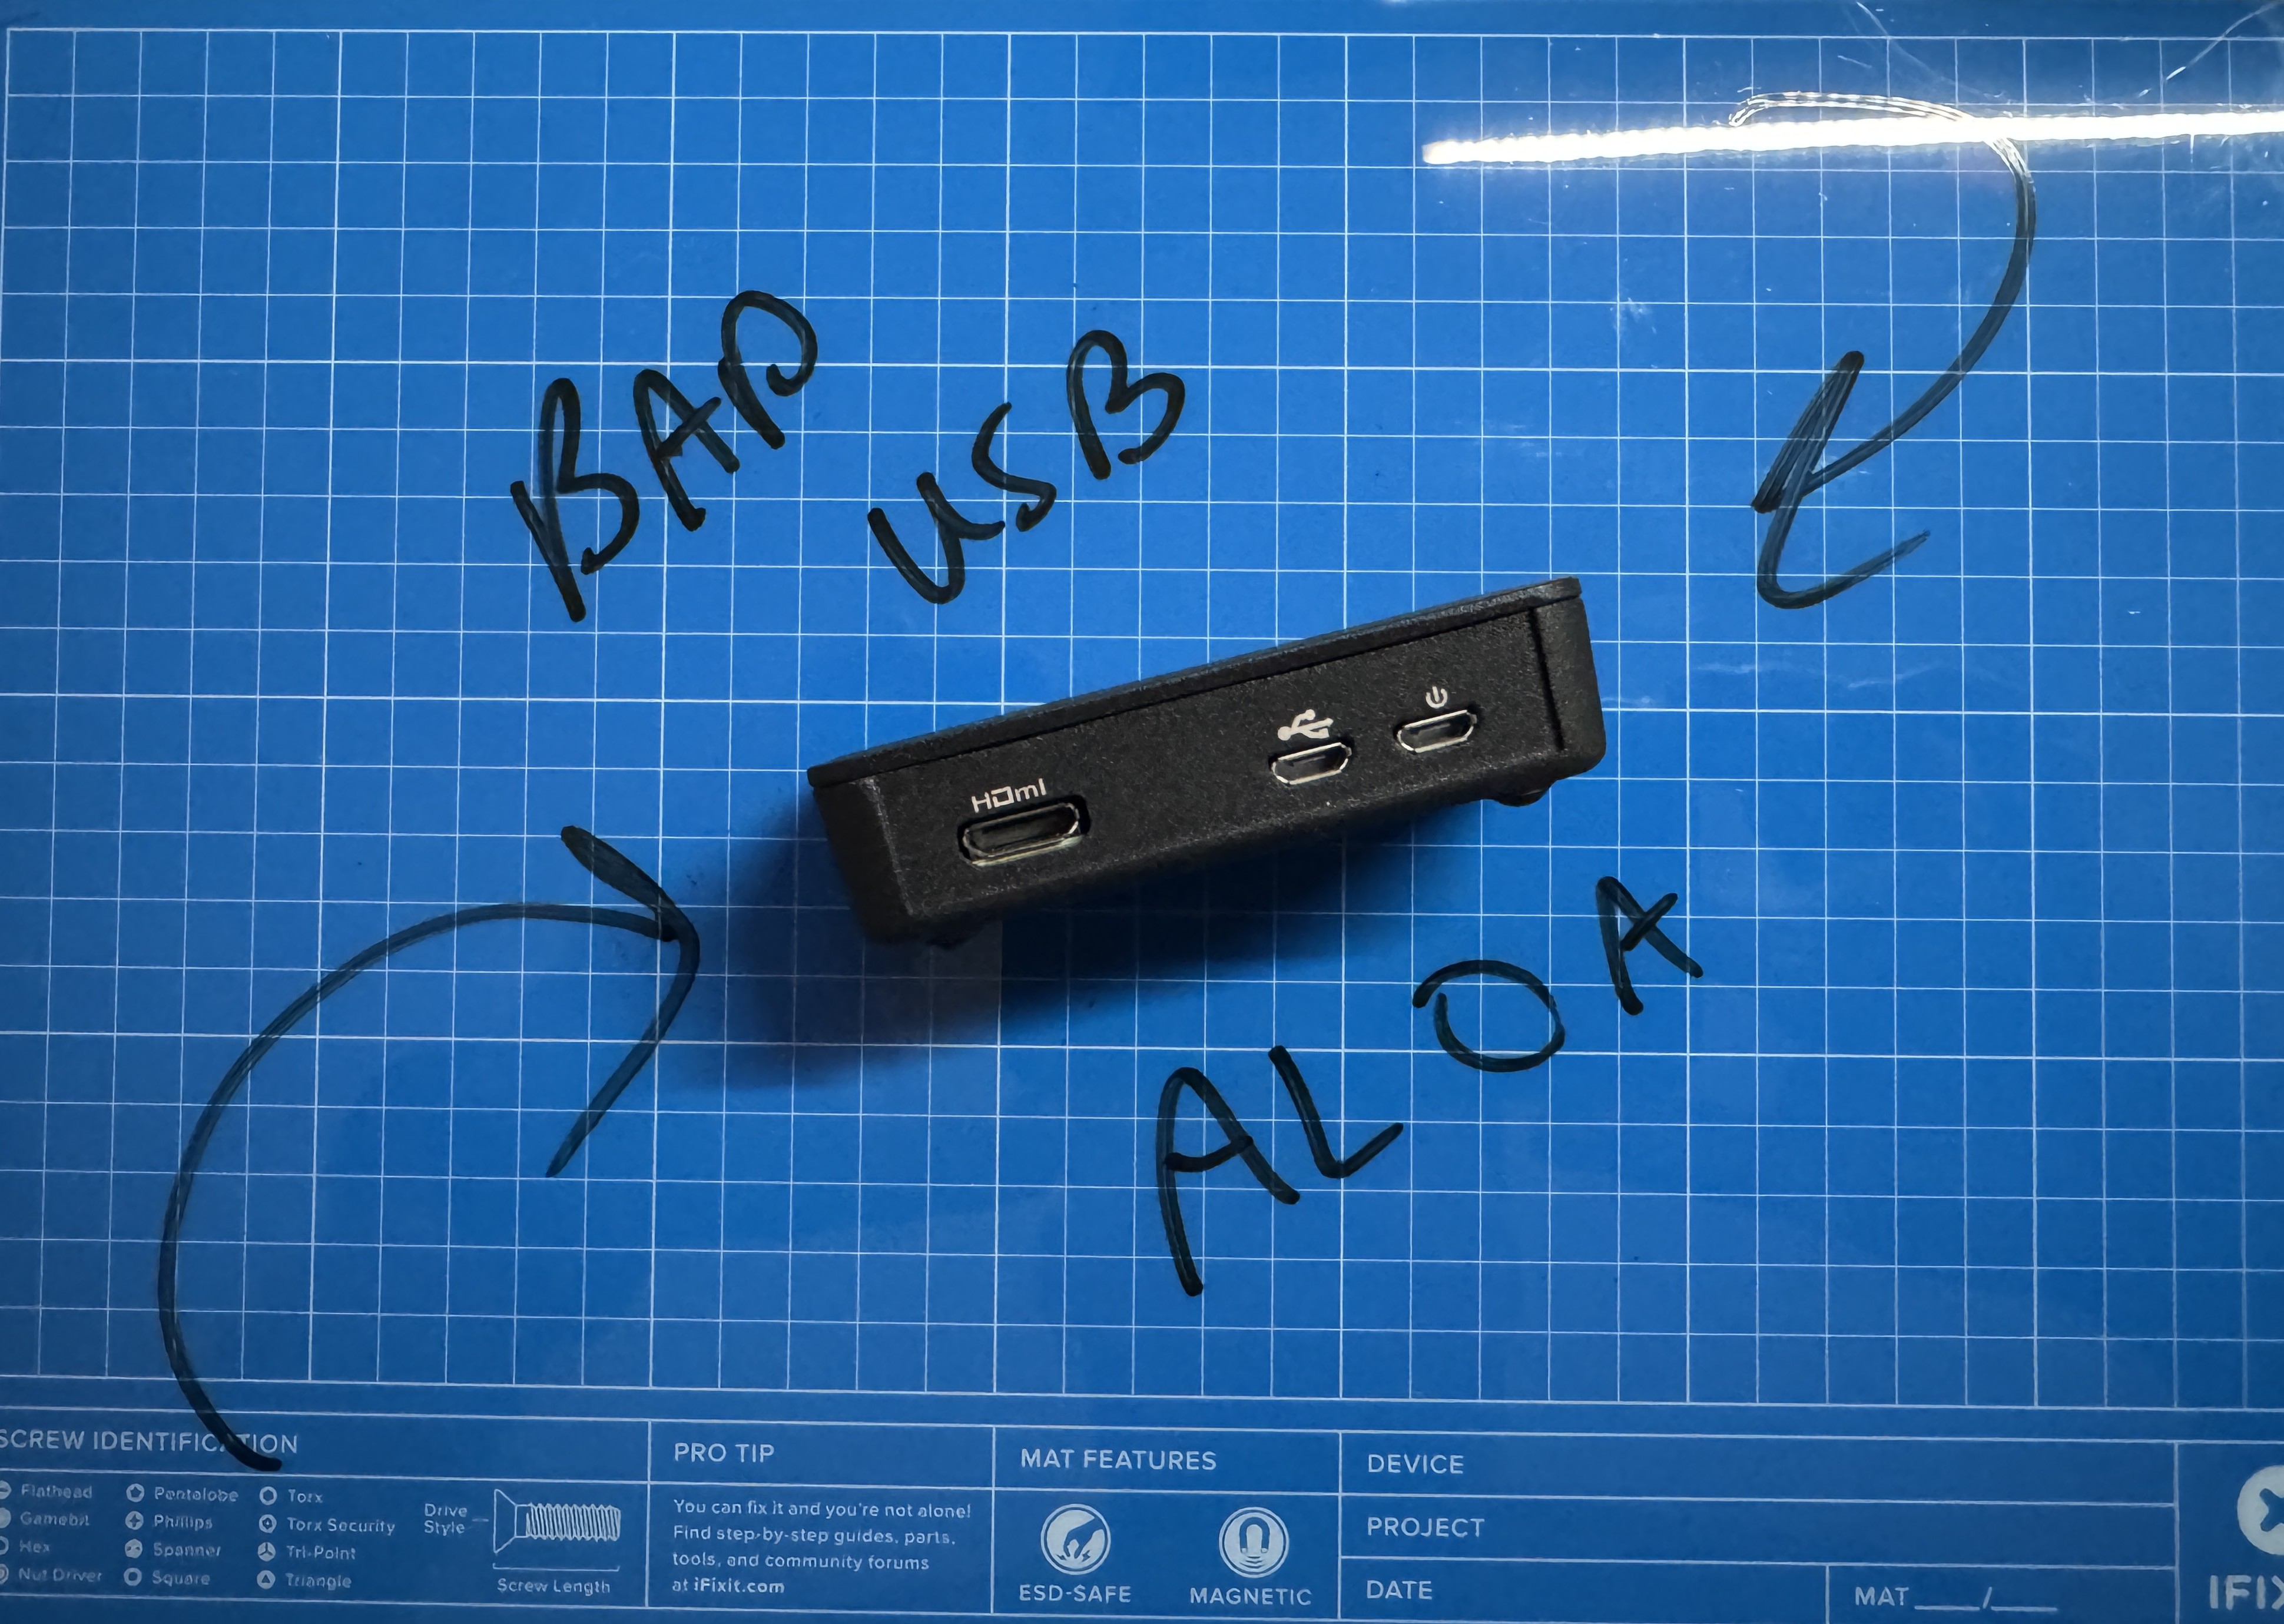
Description: Assembled the Raspberry Pi Zero 2W into the aluminum alloy case, attaching the included heatsink to manage heat dissipation. Connected the OTG cable for USB connectivity and the power switch cable for operation.
Challenges: Ensured proper alignment of the Pi in the case to avoid loose connections; the case’s GPIO cutout required careful handling. Make sure to apply the thermal tape to top of processor prior to closing lid.
-
Step 2: Image Flashing
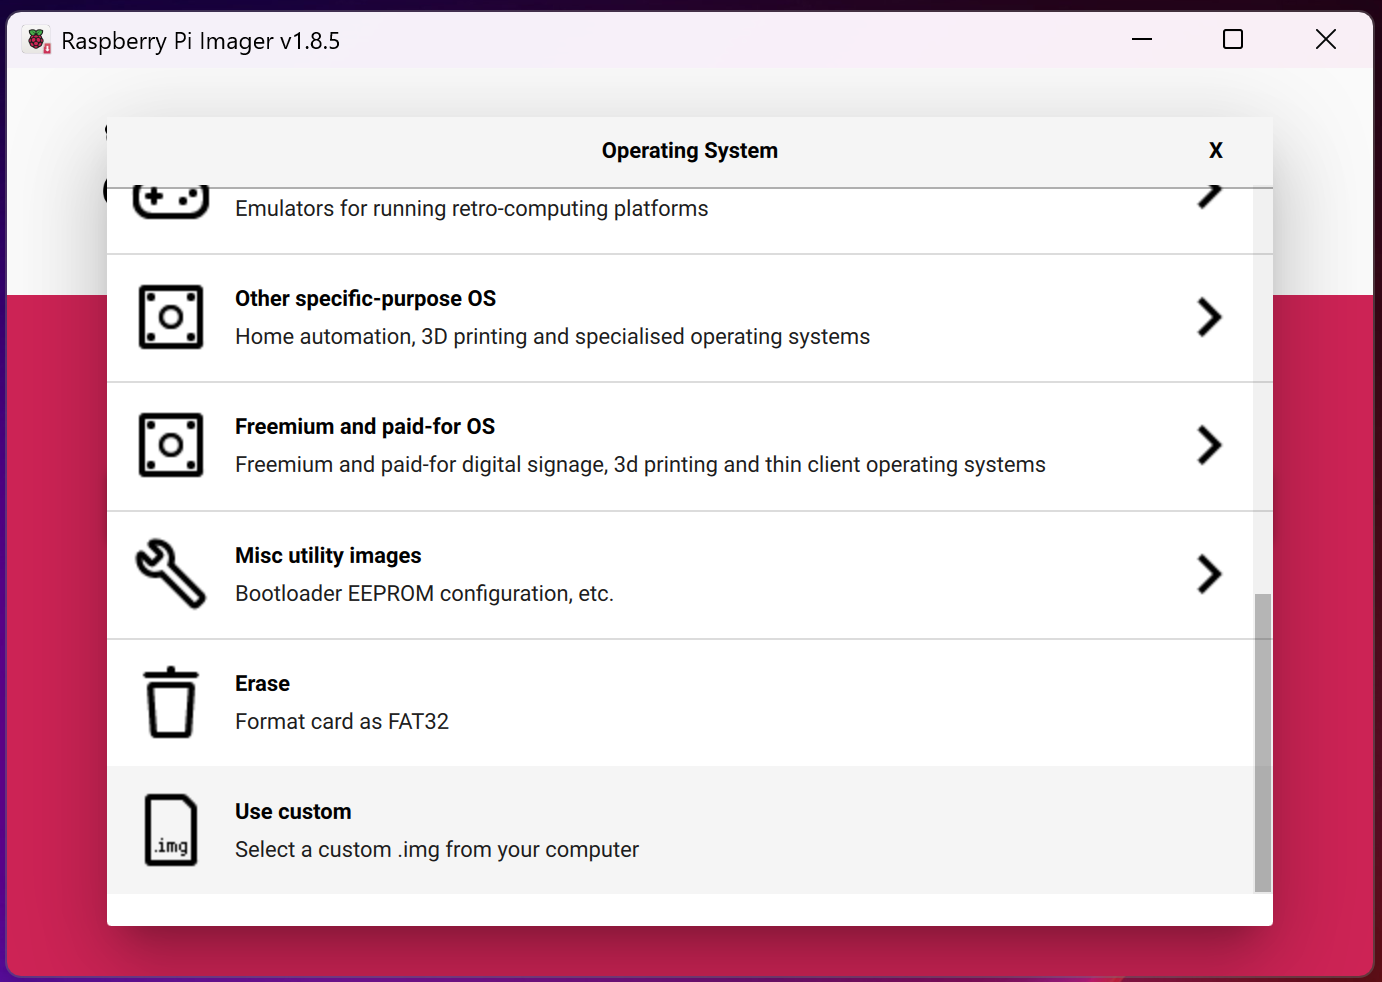
Description: Downloaded the P4wnP1 A.L.O.A. image for Raspberry Pi Zero 2W from the GitHub fork. Flashed the image onto a Class 10 MicroSD card using Raspberry Pi Imager, chose custom OS, and then selected the SD card to write to.
Challenges: Verified the correct image version to ensure Zero 2W compatibility, as standard P4wnP1 images don’t support it.
-
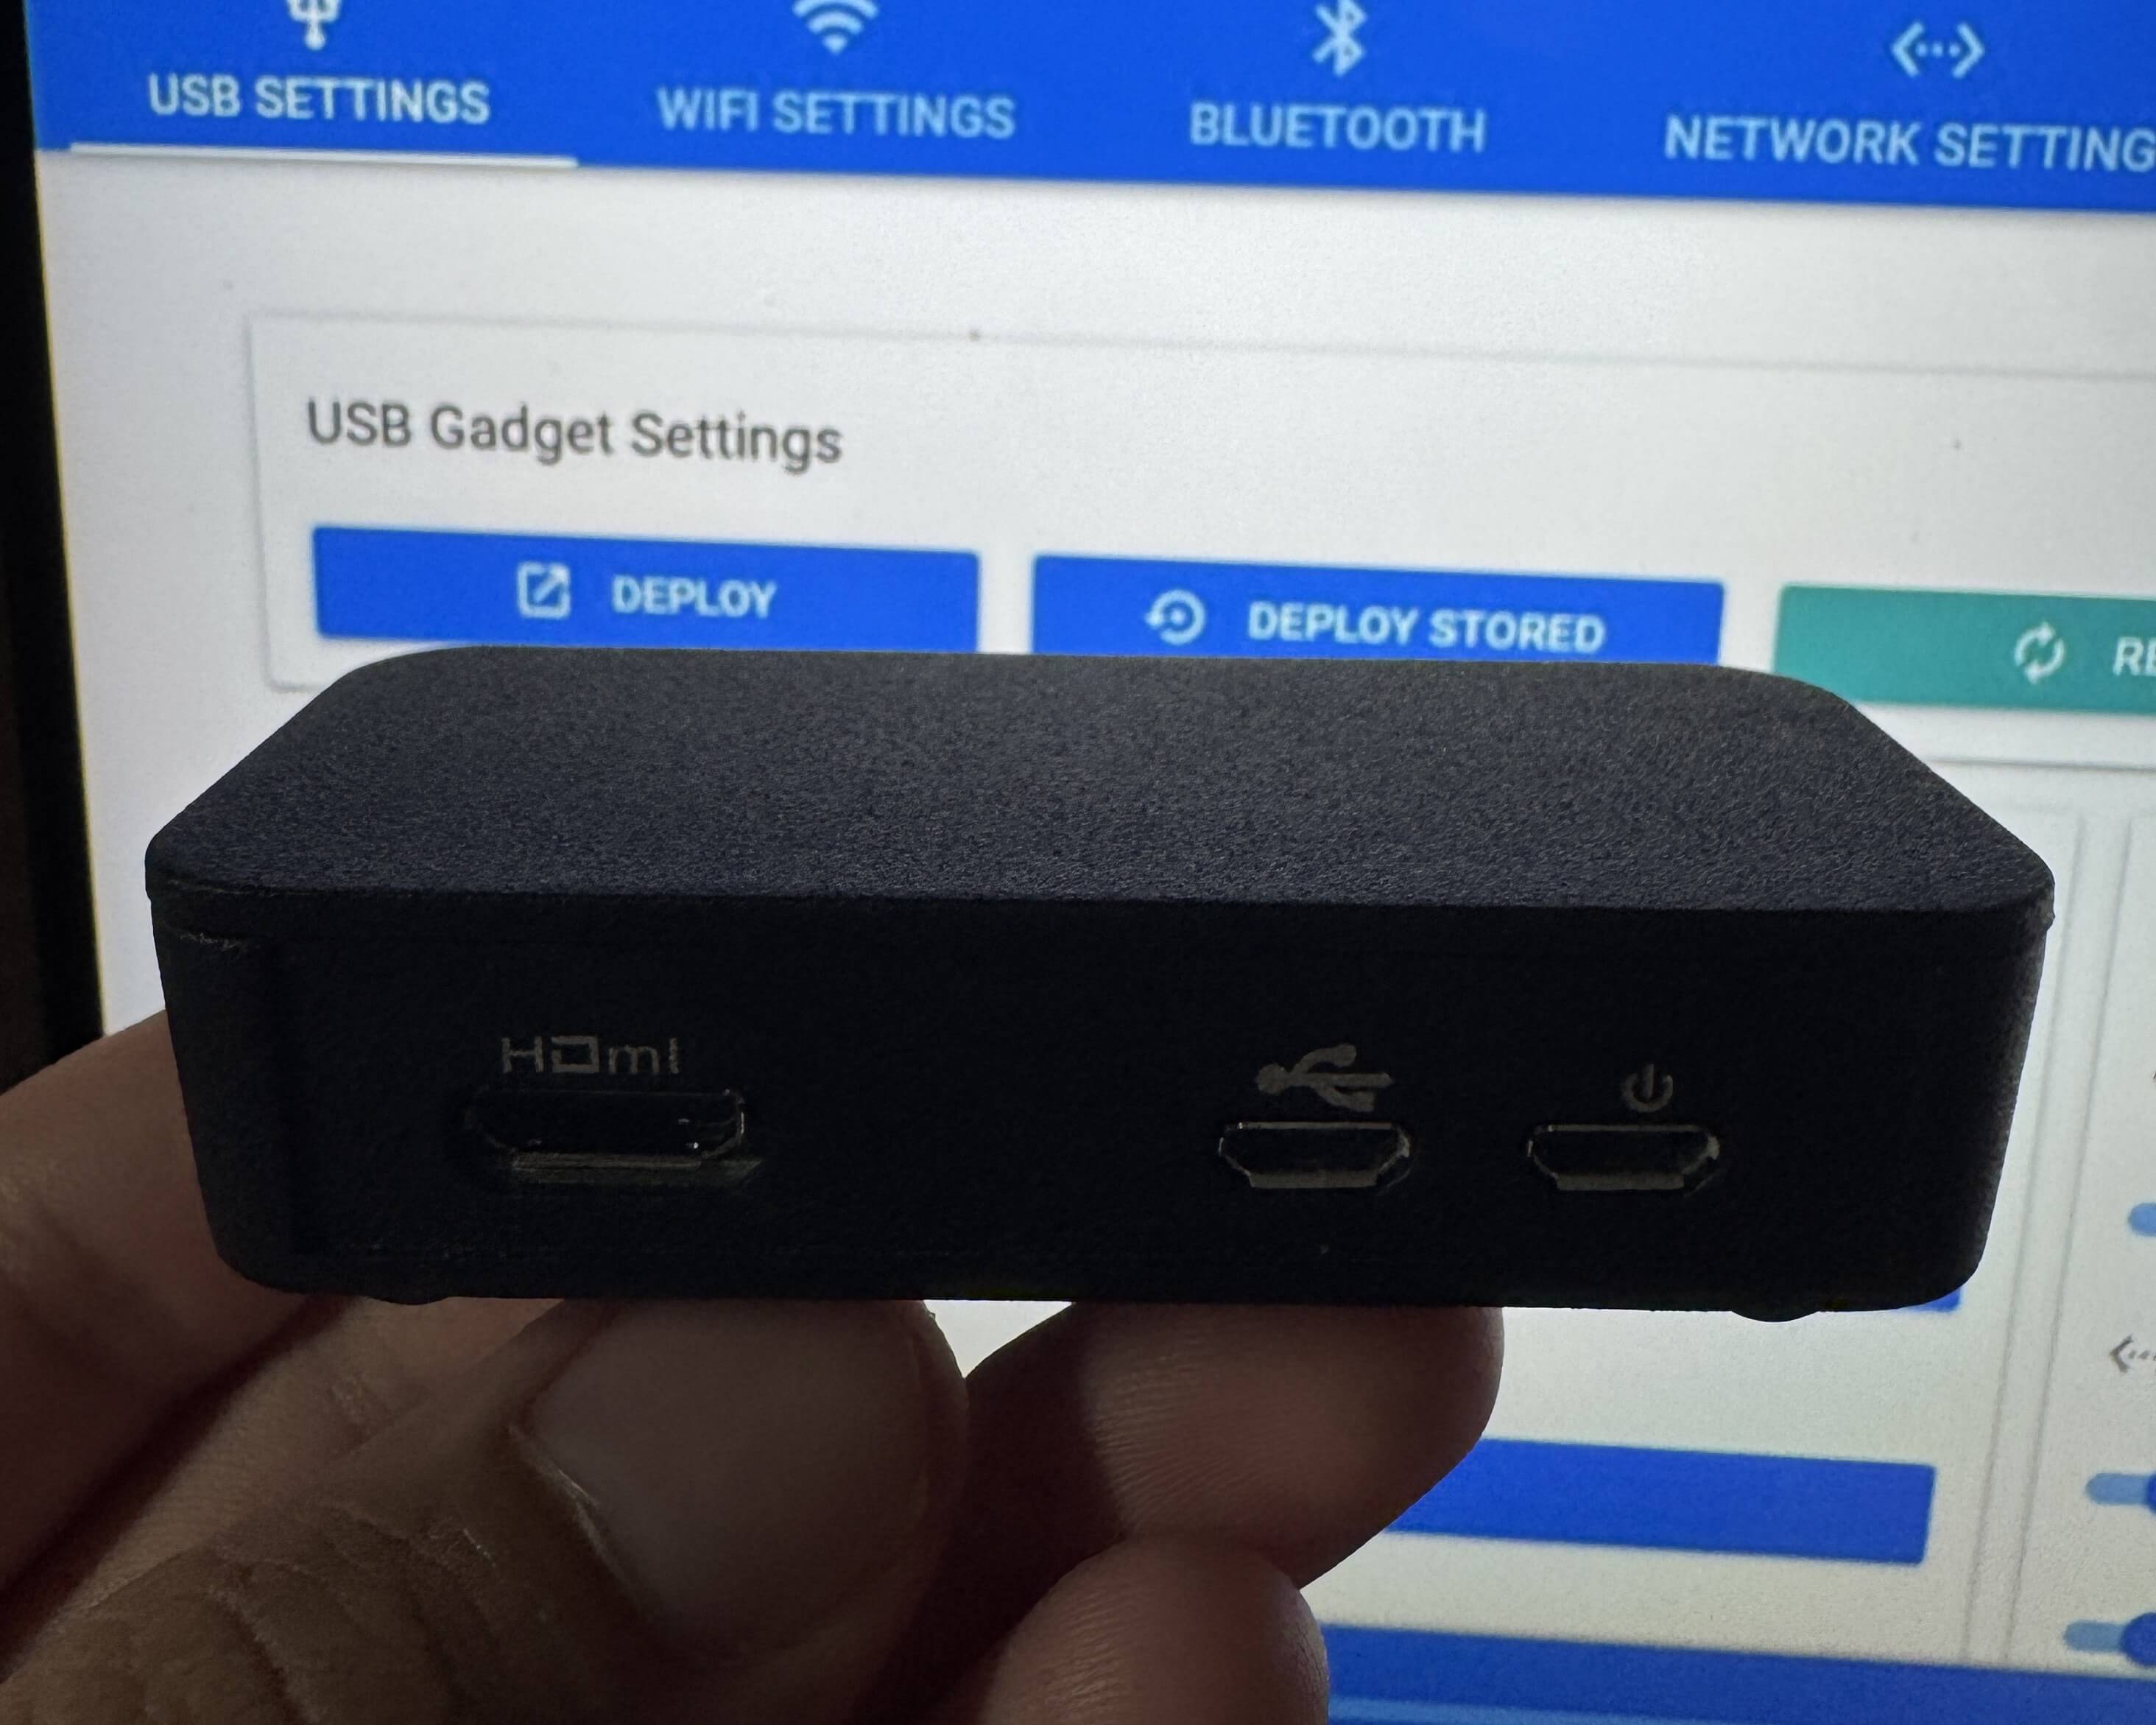
Step 3: Initial Boot and Connectivity
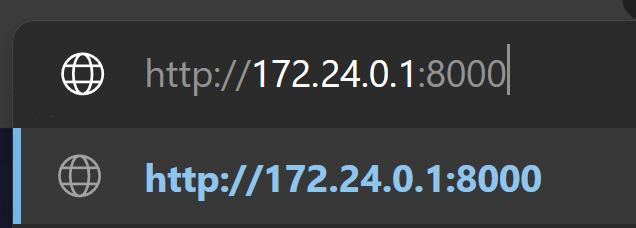
Description: Inserted the MicroSD card into the Pi and powered it via the OTG cable connected to a computer. Connected to the default P4wnP1 Wi-Fi access point (MaMe82-P4wnP1, password: MaMe82-P4wnP1) to access the web interface at http://172.24.0.1:8000.
Challenges: Connected to the device to configure with a different device than the one used for instructions, as you will lose internet connection once you connect.


-
Step 4: Configuration and Testing
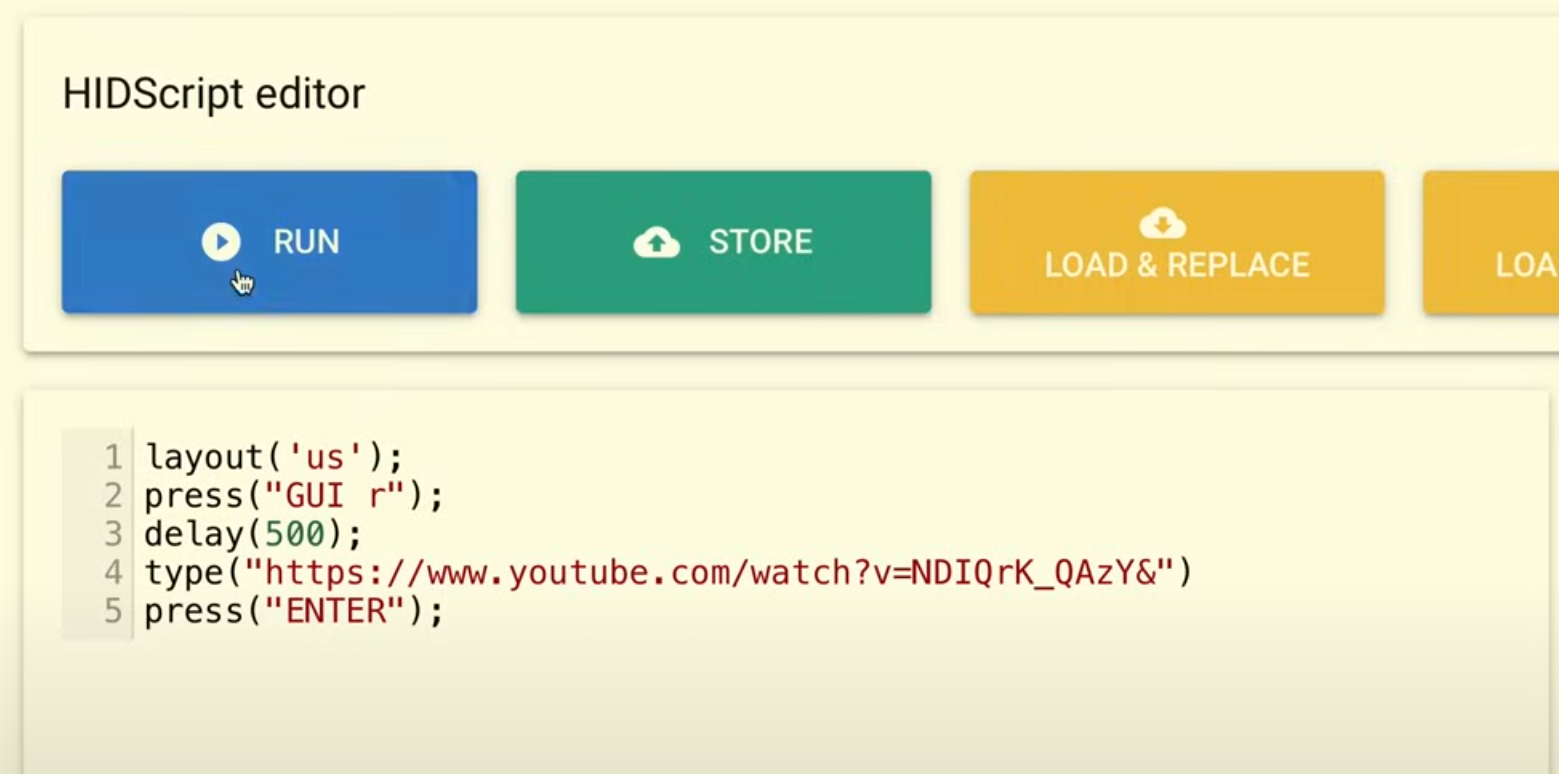
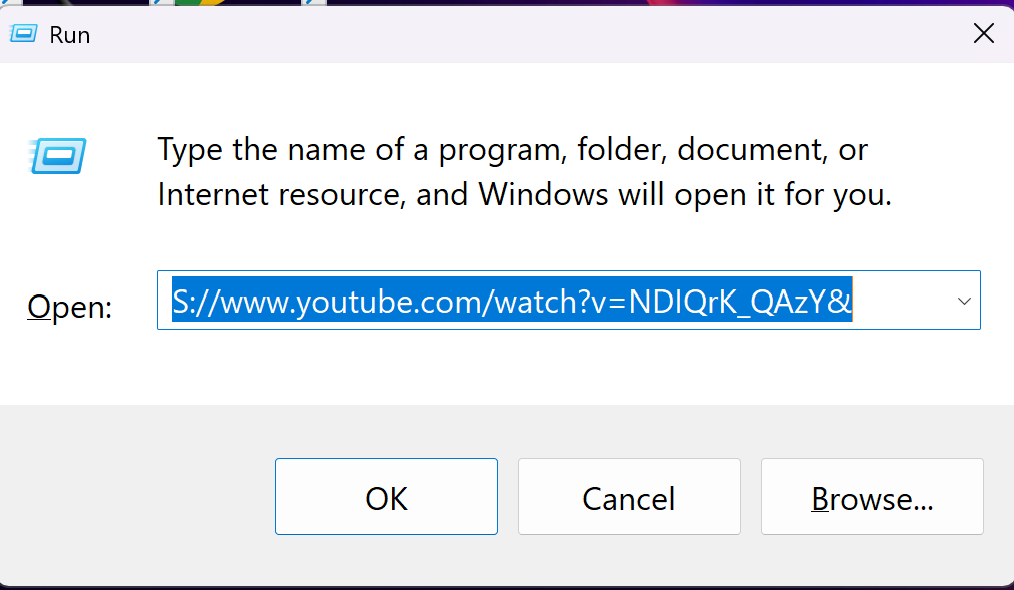
Description: Accessed the web interface to configure USB settings (e.g., HID keyboard mode) and tested a basic payload, such as a keystroke injection script, on a target computer. Validated functionality by observing the Pi’s LED and payload execution. Below demonstrates a quick HID command that opens up a weblink via the Run box and plays a video executed from P4wn.
Challenges: Adjusted USB settings in the web interface to ensure reliable detection by the host computer.

5. Tips and Lessons Learned
Practical advice and insights gained from the project:
- Tip 1: Double-check the GitHub fork for the Zero 2W-specific image, as standard P4wnP1 images are incompatible.
- Tip 2: Test payloads on a safe, controlled environment before deployment to avoid unintended consequences.
- Lesson Learned: The Raspberry Pi Zero 2W requires specific firmware support, making forked images essential for projects like P4wnP1 A.L.O.A.
- Future Improvements: Explore adding a battery for standalone operation.
6. Conclusion
P4wnP1 A.L.O.A. was successfully set up on the Raspberry Pi Zero 2W, functioning as a compact USB attack platform for pentesting. The project deepened my understanding of USB-based attack vectors and Raspberry Pi configuration. Future plans include developing custom payloads to enhance its capabilities for red team engagements.
7. Additional Notes
- The YouTube guide was crucial for visualizing the flashing process, especially for Zero 2W compatibility.
- The GitHub fork by joaquimgrc provided a reliable image, overcoming limitations of the original P4wnP1 project.
- The Amazon case kit was cost-effective and provided essential accessories like the OTG cable and heatsink.