Setting Up AWS Security Lab
1. Overview
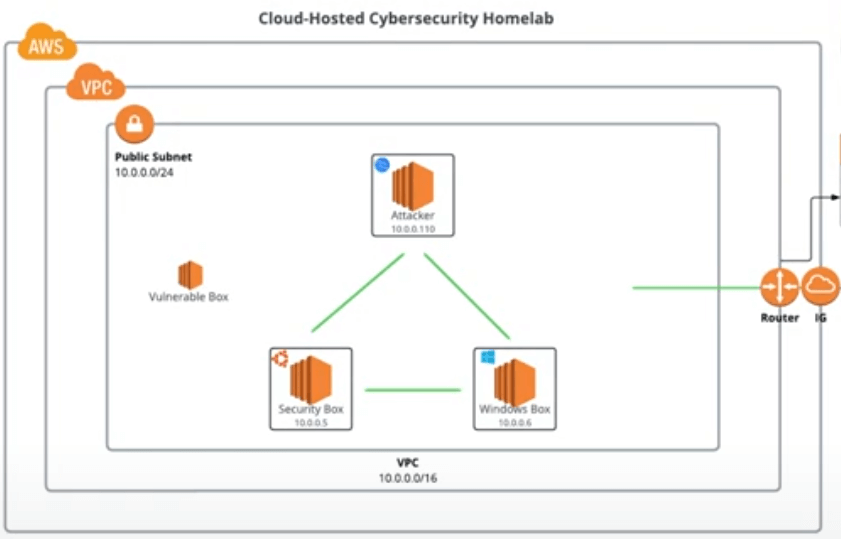
In this project, I set up a cloud-hosted cybersecurity homelab on AWS, consisting of three EC2 instances: a Security Tools box on Ubuntu for monitoring and scanning, an Attacker box on Kali Linux for offensive simulations, and a Victim box on Windows for testing. The setup uses one VPC with a single public subnet. I explored both manual configuration via the AWS Console and automated deployment with Terraform. Tools like Splunk for SIEM and Nessus for vulnerability scanning were installed to enable red team/blue team exercises. This homelab provides a safe, controlled environment for practicing cybersecurity skills without risking real infrastructure.
- Objective: Build a scalable, cost-effective AWS-based lab for cybersecurity training and experimentation.
- Skills Developed: AWS resource management, Infrastructure as Code with Terraform, network configuration, tool installation (Splunk, Nessus), and secure remote access.
- Platform: AWS EC2, VPC, Ubuntu Desktop, Kali Linux, Windows 10.
2. Resources Used
Here are the key resources and tools that guided this setup:
-
Resource:
Title: Build a Cloud Red Team / Blue Team Cybersecurity Homelab - Crash Course
Usage: Comprehensive video tutorial providing step-by-step instructions for the homelab setup, including topology, provisioning options, and tool configurations. -
Resource:
Title: GitHub Repository
Usage: Terraform scripts and configuration files for automating the deployment of VPC, subnets, security groups, and EC2 instances. -
Resource:
Title: Terraform Installation Guide
Usage: Instructions for downloading and installing Terraform to enable automated infrastructure provisioning. -
Resource:
Title: Kali Linux AMI
Usage: AWS Marketplace AMI for subscribing to and launching the Kali Linux instance. -
Resource:
Title: Nessus Download
Usage: Source for downloading the Nessus vulnerability scanner package. -
Resource:
Title: Splunk Download
Usage: Source for downloading Splunk Enterprise and Universal Forwarder packages. -
Resource:
Title: AWS Documentation
Usage: Reference for AWS services like EC2, VPC, IAM, and best practices for security and cost management.
3. Step-by-Step Setup
This section covers the detailed process for preparing the AWS environment, deploying via Terraform or manually, installing tools, and accessing the instances. All commands and configurations are based on the video guide and GitHub repo, with adjustments for my setup.
Step 1: Prepare AWS Account
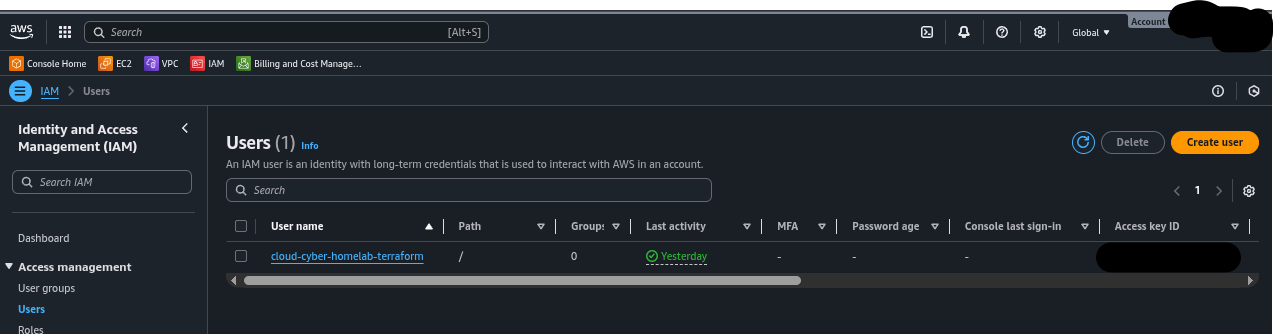
Start by creating a free AWS account if you don't have one. Enable Multi-Factor Authentication (MFA) for security. Add billing information to activate services. Then, create a new IAM user for the homelab (e.g., "cloud-cyber-homelab-terraform") and attach necessary permission policies, such as AmazonEC2FullAccess and AmazonVPCFullAccess. Generate an access key for this user and configure it securely on your local machine using the AWS CLI.
How to Create a AWS AccountHow to Configure AWS CLI
Commands:
sudo apt install awscli
aws configure
Why: This ensures secure, programmatic access to AWS resources without using root account credentials, following least privilege principles.
Step 2: Create SSH Key Pairs
In the AWS EC2 console, navigate to Key Pairs and create a new pair (e.g., "Home-lab-key-1"). Download the .pem file and save it in your local ~/.ssh directory. Set permissions to 400 for security.
Commands:
chmod 400 ~/.ssh/Home-lab-key-1.pemWhy: SSH keys provide secure, passwordless access to Linux instances like Kali and Ubuntu.

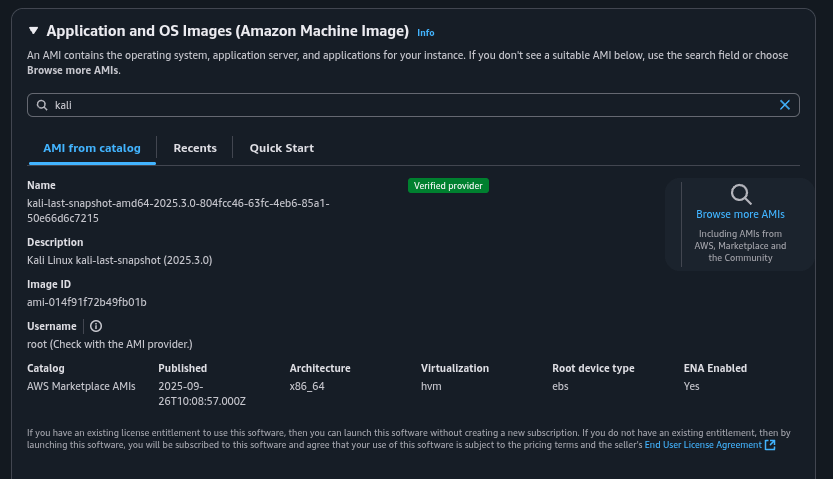
Step 3: Subscribe to AMIs
In the AWS Marketplace, search for and subscribe to the required AMIs: Kali Linux, Ubuntu Desktop (e.g., Netspectrum Ubuntu Desktop 22.04 LTS), and Windows 10 Workstation. Ensure the AMIs are available in your chosen region (e.g., us-east-1).
Why: Subscribing grants access to pre-configured OS images tailored for the homelab roles.
Terraform Setup
Download and install Terraform. Clone the GitHub repo and navigate to the directory. Edit provider.tf to set your region and key path. Update main.tf with region-specific AMI IDs and ensure instance types (e.g., t2.micro for Kali/Windows, t3.large for Ubuntu) meet requirements like TPM support. Initialize, plan, and apply the configuration.
Commands:
git clone https://github.com/collinsmc23/cloud-cybersecurity-homelab
cd cloud-cybersecurity-homelab
terraform init
terraform plan
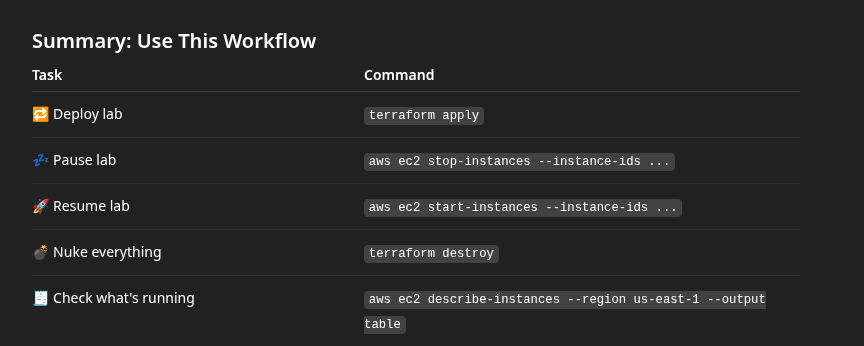
terraform apply -var="aws-key=~/.ssh/Home-lab-key-1.pem"
Why: Terraform automates the creation of VPC, subnet, security groups, and instances, making the setup repeatable and efficient.
To retrieve instance IDs for stopping/starting:
aws ec2 describe-instances \
  --filters "Name=tag:Name,Values=Cybersecurity Homelab*" \
  --query "Reservations[].Instances[].InstanceId" \
  --region us-east-1 \
  --output text
Use with:
aws ec2 stop-instances --instance-ids [IDs]
aws ec2 start-instances --instance-ids [IDs]
Verify cleanup after destroy:
aws ec2 describe-instances --region us-east-1 --query 'Reservations[*].Instances[*].[InstanceId,State.Name]' --output table
aws ec2 describe-volumes --region us-east-1 --query 'Volumes[*].[VolumeId,State,Size]' --output table
aws ec2 describe-addresses --region us-east-1 --output table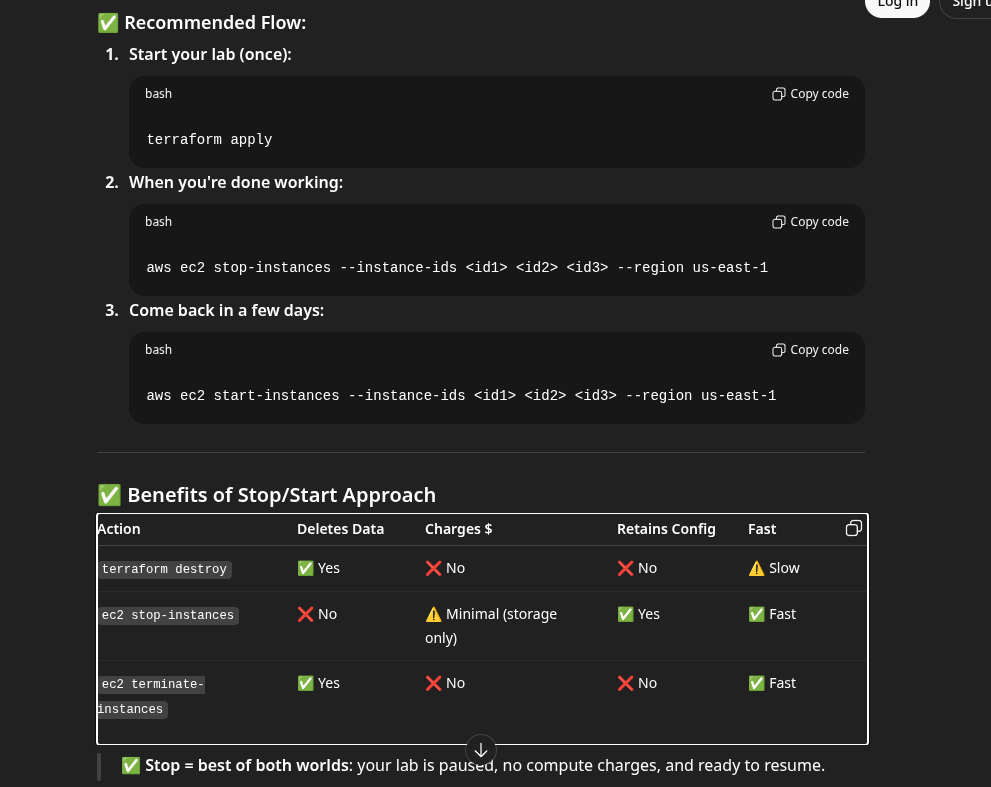

Manual Setup
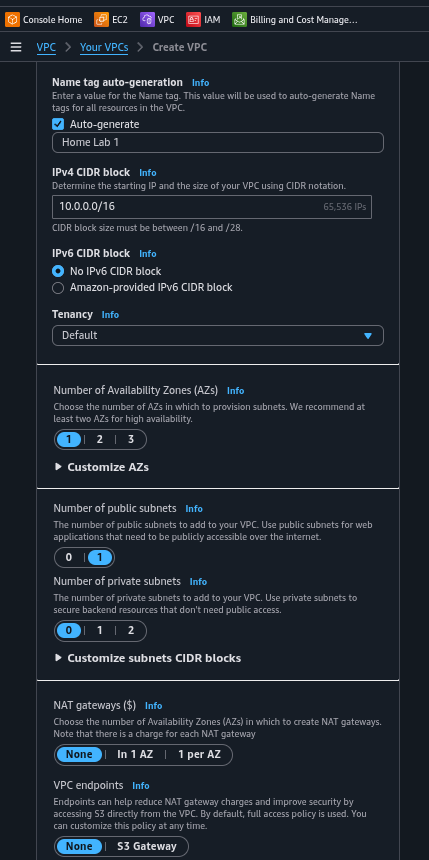
Log into the AWS Console. Create a VPC with "VPC and more" wizard: one AZ, one public subnet, no private subnets, no NAT gateways, no VPC endpoints. Name it appropriately (e.g., "Home Lab 1 - vpc").
Why: A simple public subnet setup keeps costs low and allows direct internet access for homelab purposes.
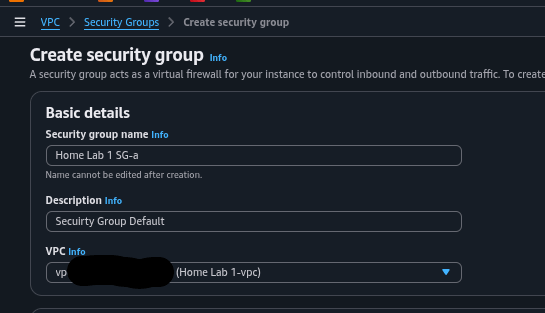
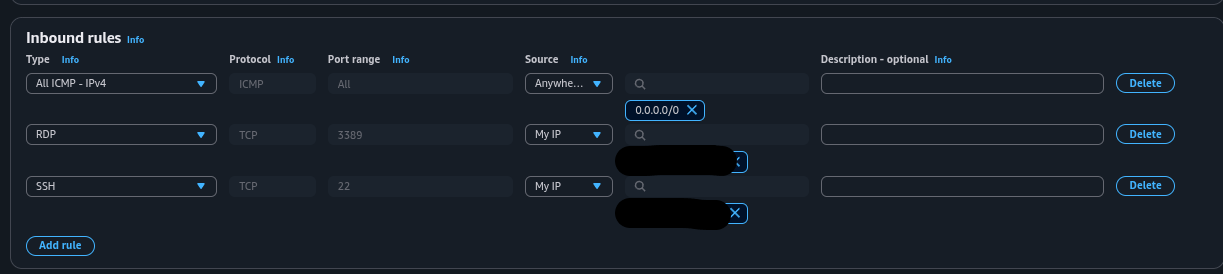
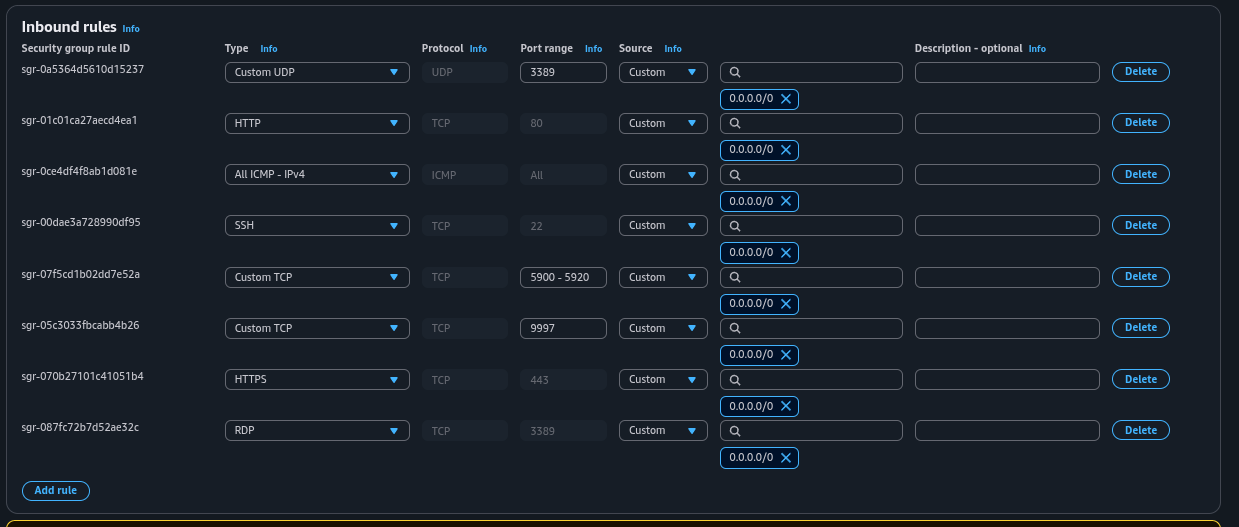
Step 4: Create Security Groups
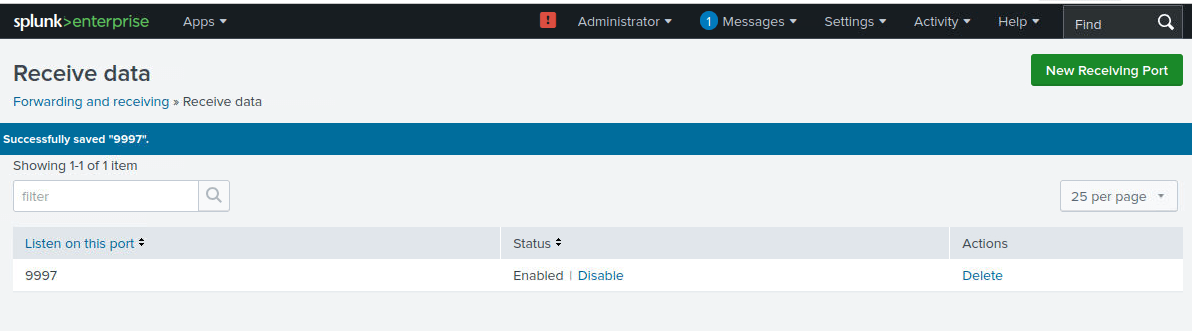
Create a security group in your VPC (e.g., "Home Lab 1 SG-A"). Add inbound rules: ICMP (IPv4) from anywhere for ping, SSH (TCP 22) from your IP, RDP (TCP 3389) from your IP. For the Security Tools box, edit its default group to add Custom TCP 9997 for Splunk forwarding. Leave outbound rules as default (all traffic allowed).
Why: Security groups act as stateful firewalls, controlling traffic to prevent unauthorized access while enabling management.
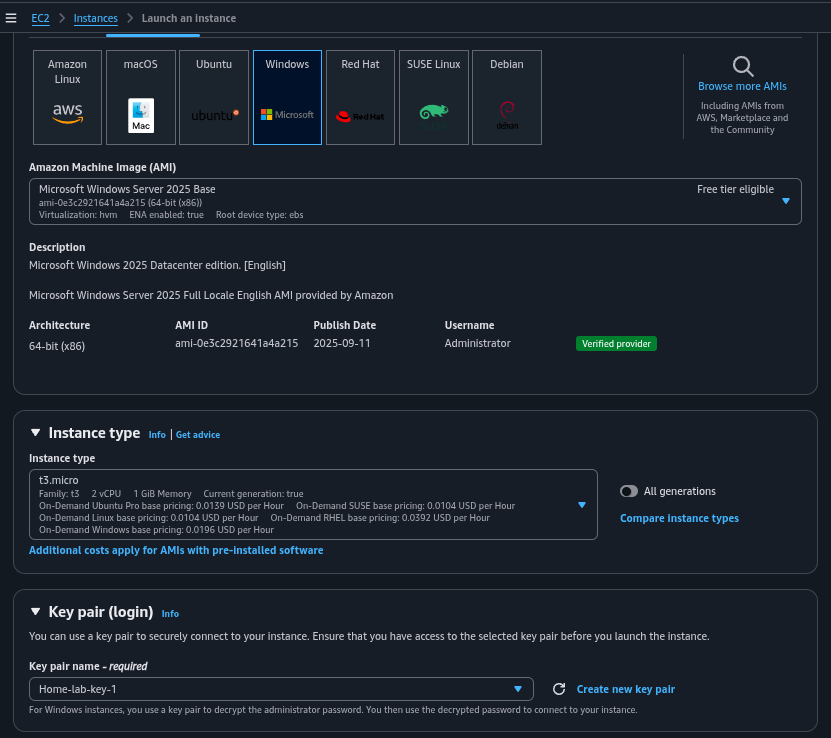
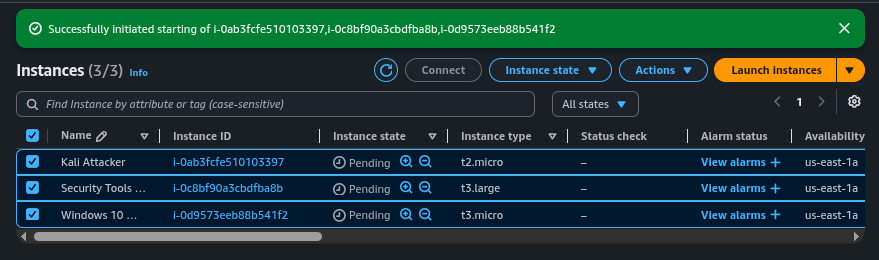
Step 5: Launch Instances
Launch each instance from the subscribed AMIs. For Kali: t2.micro, 12 GB storage, custom security group. For Security Tools (Ubuntu): t3.large, 30 GB storage, default group with added rules (HTTP/HTTPS/SSH/RDP/9997). For Victim (Windows): t3.micro, 30 GB storage, same custom group as Kali. Select your VPC, enable public IP auto-assign, and choose the key pair.
Why: These specs balance cost and performance; larger storage for tools like Splunk/Nessus.

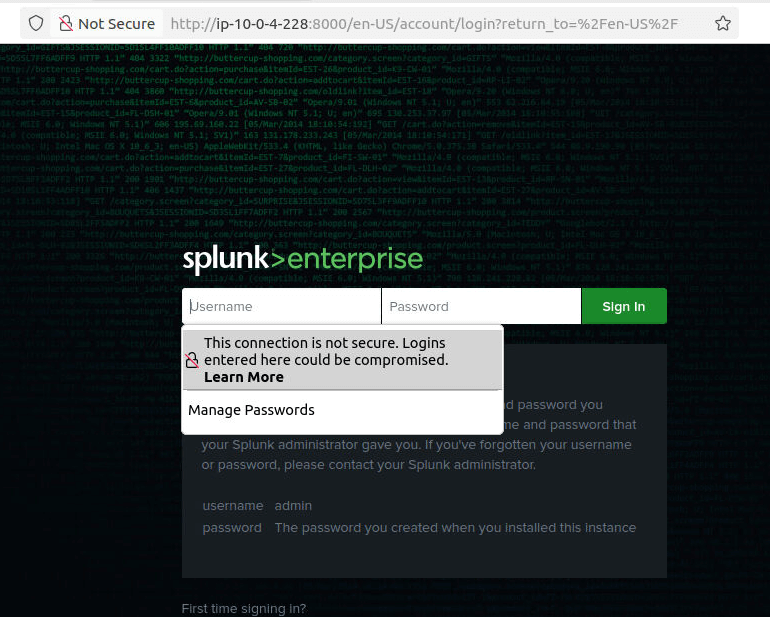
Splunk Setup
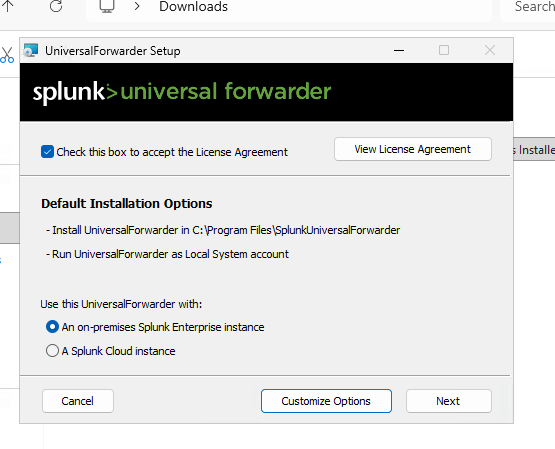
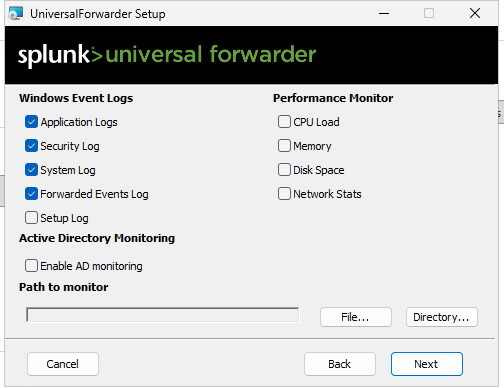
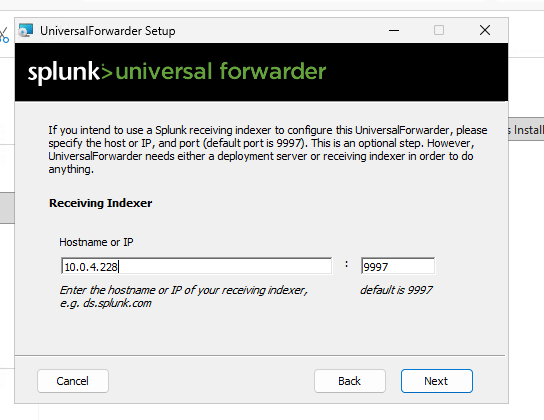
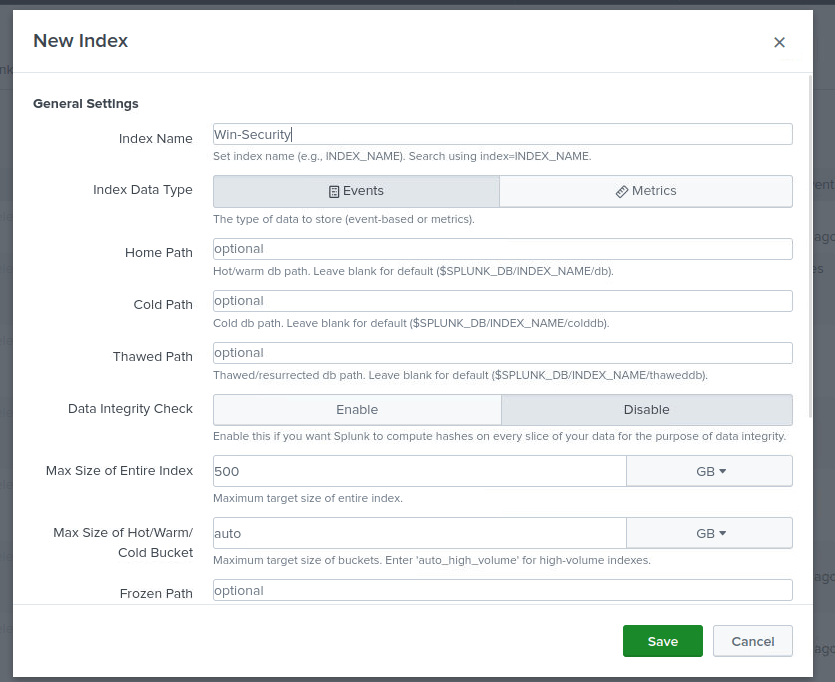
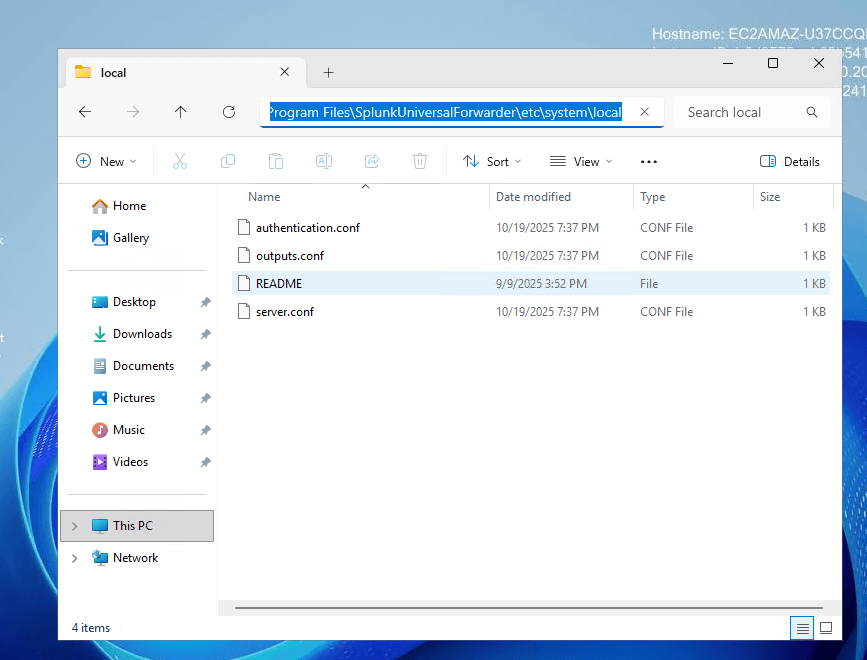
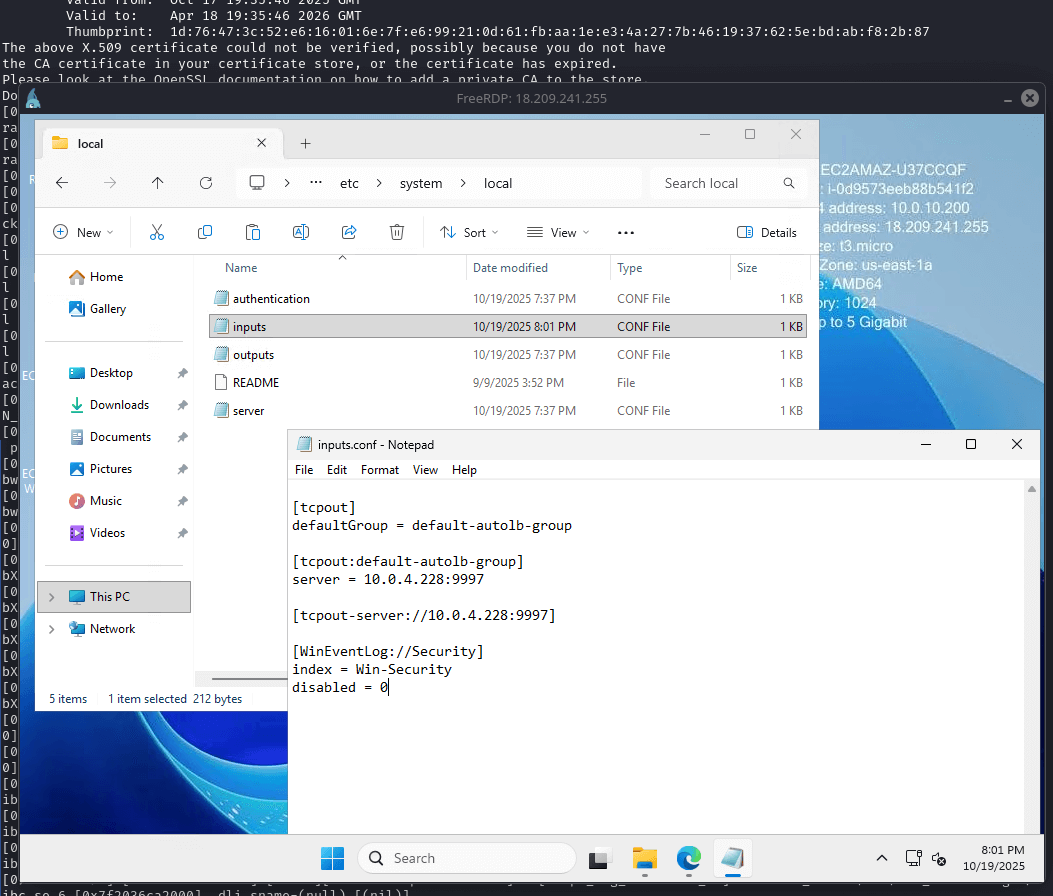
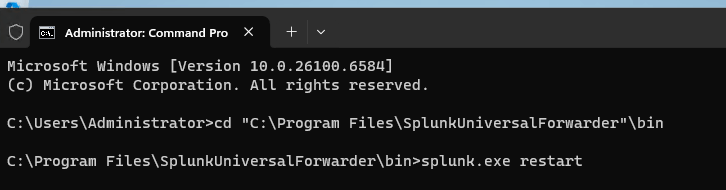
On the Security Tools instance (Ubuntu), download the Splunk Enterprise .deb package and install it. Start Splunk, accept the license, and set admin credentials. Configure forwarding/receiving on port 9997 (ensure security group allows it). Create a new index (e.g., "win-security"). On the Victim (Windows), download and install the Universal Forwarder MSI. Edit inputs.conf to monitor Windows Event Logs (Application, Security, System) and forward to the Security Tools IP on 9997, using the "win-security" index. Restart the forwarder.
Commands (Security Instance):
wget -O splunk.deb "https://www.splunk.com/en_us/download/splunk-enterprise.html?platform=linux&version=latest"
sudo dpkg -i splunk.deb
cd /opt/splunk/bin
sudo ./splunk start --accept-license --answer-yes --no-prompt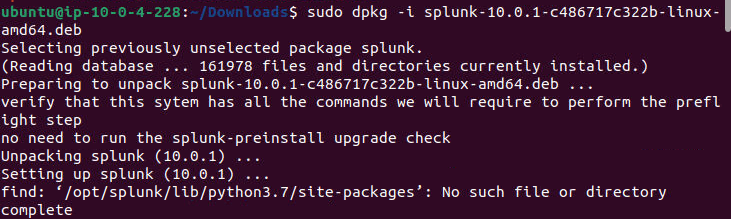
inputs.conf Example (Windows):
[WinEventLog://Application]
disabled = 0
index = win-security

[WinEventLog://Security]
disabled = 0
index = win-security

[WinEventLog://System]
disabled = 0
index = win-security
Why: Splunk enables centralized log collection and analysis, crucial for blue team monitoring.
Nessus Setup
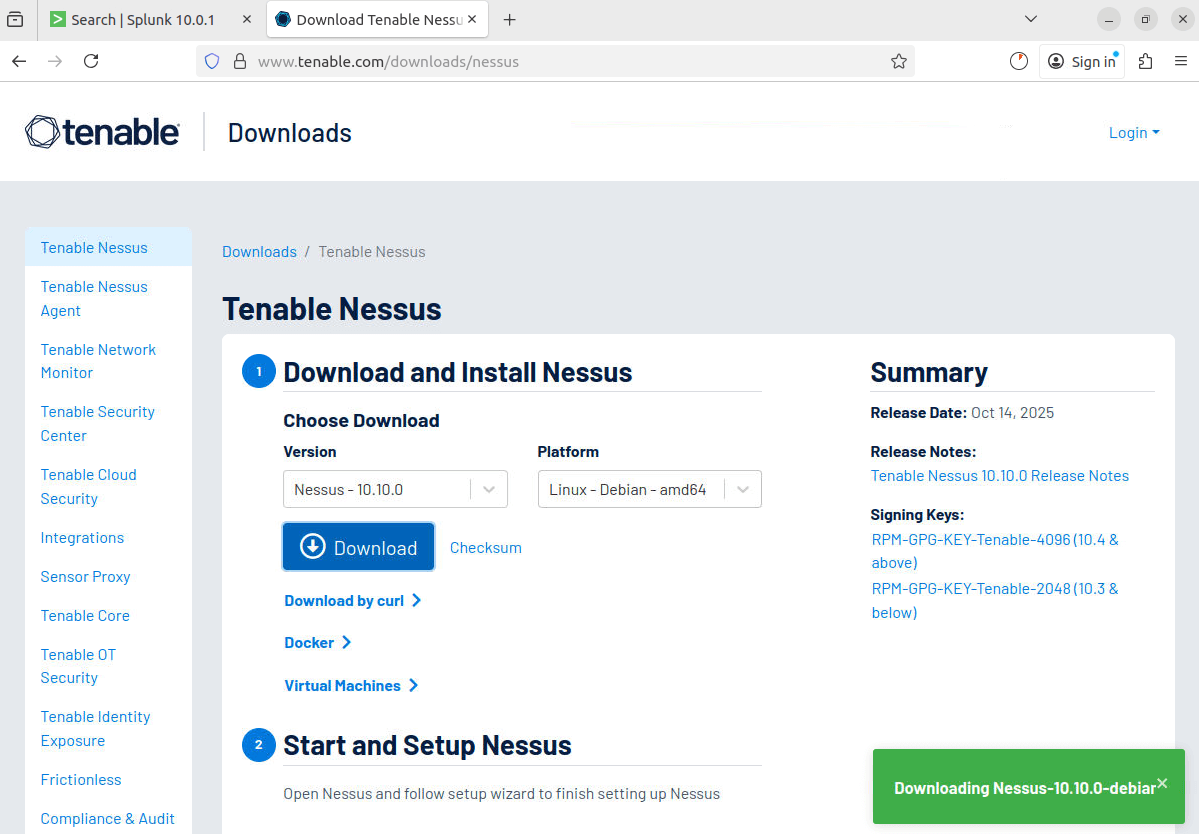
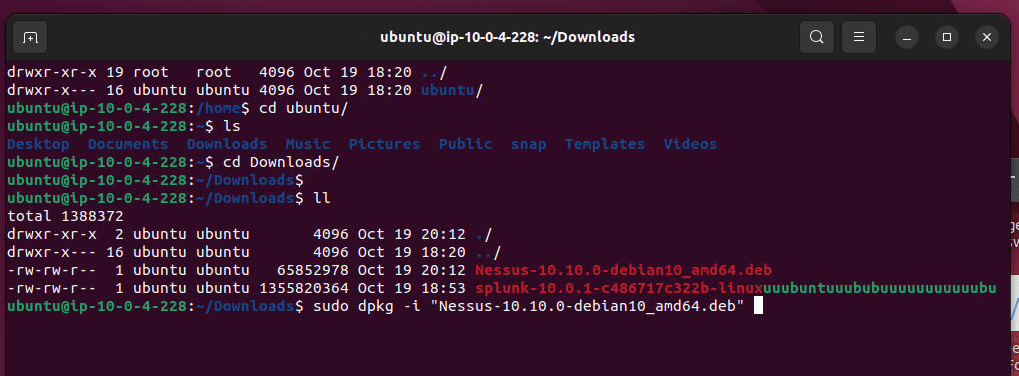
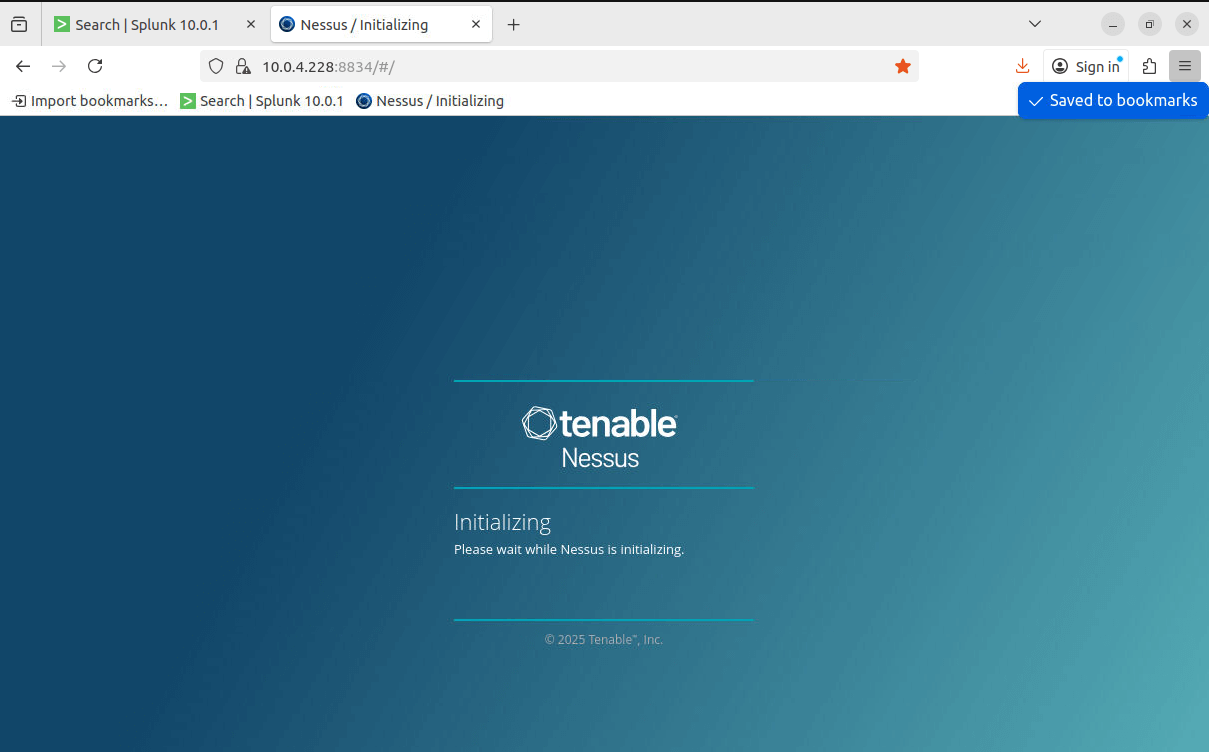
On the Security Tools instance, download the Nessus .deb from Tenable and install it. Start the nessusd service. Access the web interface at https://[instance-ip]:8834/, select Nessus Essentials, register for a free license, and set up credentials.
Commands:
wget -O nessus.deb "https://www.tenable.com/downloads/nessus"
sudo dpkg -i nessus.deb
sudo systemctl start nessusd
Why: Nessus adds vulnerability scanning, enhancing the lab’s defensive capabilities.
Accessing Instances
- Kali: Use SSH with your .pem key and public DNS. Install VNC for GUI access if needed.
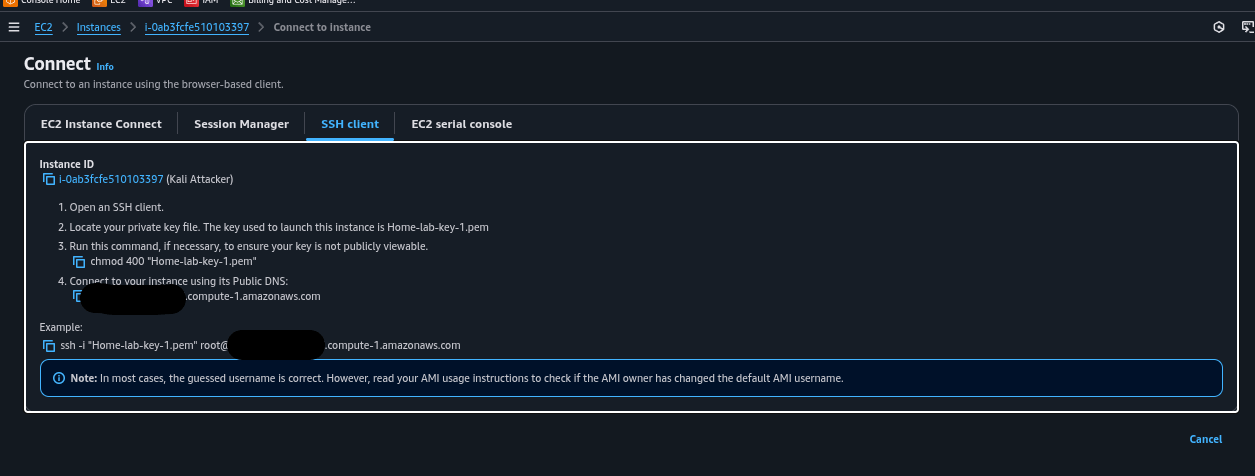
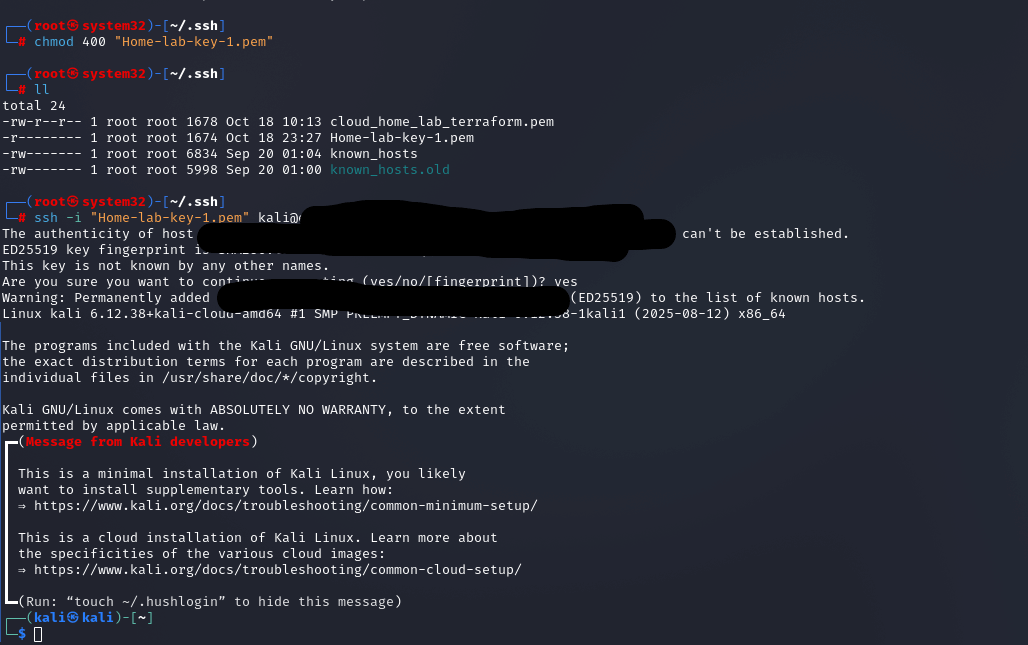
Commands (Kali):
ssh -i "~/.ssh/Home-lab-key-1.pem" kali@[public-dns]
sudo apt install tigervnc-standalone-server xfce4 xfce4-goodies -y
vncserver :1
ssh -i "~/.ssh/Home-lab-key-1.pem" -L 5901:localhost:5901 kali@[public-dns]
vncviewer 127.0.0.1:5901.png)
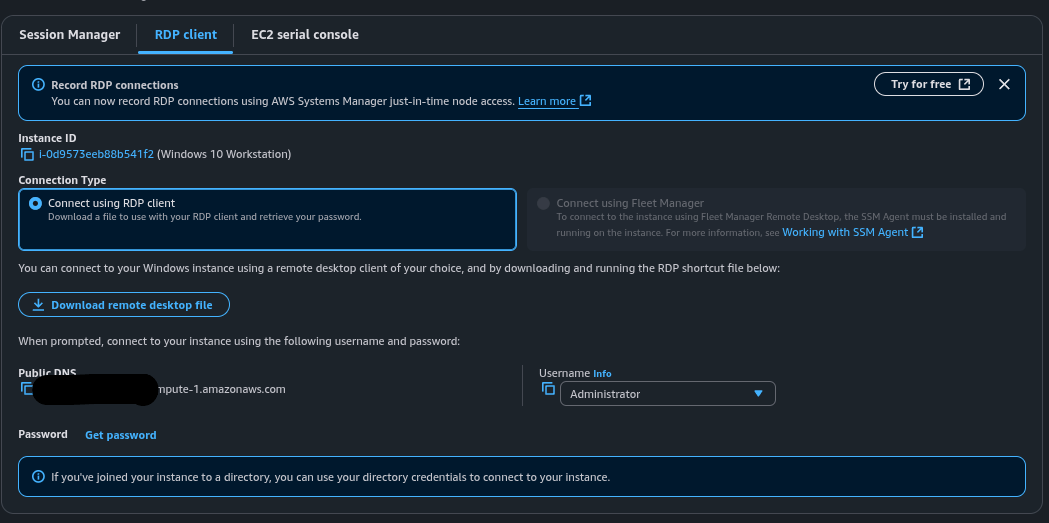

Commands (Windows RDP from Linux):
xfreerdp3 /v:[public-ip] /u:Administrator /p:'[decrypted-pwd]'Why: Secure remote access is essential for managing and testing the lab.
4. Lessons Learned and Tips
Key takeaways from this project:
- Tip 1: Always redact sensitive data (e.g., access keys, passwords) in public notes or screenshots.
- Tip 2: Use stop/start to pause instances and save costs without losing data.
- Tip 3: Verify all resources are terminated after terraform destroy to avoid unexpected charges.
- Key Lesson: Terraform speeds up deployment, but manual setup deepens understanding of AWS architecture.
- Future Goals: Integrate additional tools like Zeek or Suricata for network monitoring.
5. Conclusion
This AWS security lab project has been a rewarding journey into cloud-based cybersecurity practice. By leveraging Terraform and manual methods, along with Splunk and Nessus, I’ve created a versatile platform for simulating attack and defense scenarios. Keeping an eye on costs and securing credentials are key to maintaining this setup. I’m excited to expand it further—stay tuned for updates!
6. Additional Notes
- Change default passwords and enable MFA for enhanced security.
- Consider private subnets and NAT gateways for production-like setups in the future.
- Stop instances when idle to minimize expenses.