
This guide provides a step-by-step process to set up your Ansible environment for automation, including controller configuration, inventory files, secrets management, and building your first playbook.
1. How Ansible Works
Ansible is an open-source automation tool that uses a simple, human-readable language (YAML) to automate tasks across multiple systems. It operates in a push-based model, where an Ansible control node executes playbooks to manage remote hosts via SSH, requiring no agents on the managed nodes.

Key Components:
- Control Node: The machine running Ansible to execute playbooks.
- Managed Nodes: The remote systems Ansible manages.
- Inventory: A file listing the managed nodes.
- Playbooks: YAML files defining tasks to automate.
2. Setting Up the Ansible Controller
Install Ansible on your control node and configure ansible.cfg to customize defaults for better
control.
    # ===============================
    # Ansible Configuration File
    # ===============================
    # Save this file as "ansible.cfg" in your project root.
    # It customizes Ansible behavior and saves you from typing long CLI options.

    [defaults]
    # --- Inventory file location ---
    # The inventory is where Ansible finds your target hosts.
    inventory = ./inventory

    # --- Default remote user ---
    # This is the SSH user Ansible will use to connect to remote hosts.
    # You can override it per host or in playbooks.
    remote_user = ubuntu

    # --- Whether to ask for SSH password ---
    # If using key-based SSH (recommended), keep this 'false'.
    ask_pass = false

    # --- Roles path ---
    # Defines where Ansible looks for roles when you use "roles:" in playbooks.
    roles_path = ./roles

    # --- Disabling host key checking ---
    # This avoids interactive SSH authenticity prompts.
    # WARNING: Only disable in trusted environments.
    host_key_checking = False

    # --- Retry files ---
    # Controls creation of .retry files after failed runs.
    # Set to 'False' to disable creating those files.
    retry_files_enabled = False

    # --- Output verbosity / color ---
    # Keeps output clean and colored for readability.
    stdout_callback = yaml
    bin_ansible_callbacks = True

    # --- Log file (optional) ---
    # Uncomment to log all Ansible output to a file.
    # log_path = ./ansible.log

    [privilege_escalation]
    # --- Become settings ---
    # Enables privilege escalation (sudo) by default.
    become = True
    become_method = sudo
    become_user = root
    become_ask_pass = False

    [ssh_connection]
    # --- SSH optimizations ---
    # Enables SSH pipelining to reduce overhead and speed up execution.
    pipelining = True

    # --- Control persist settings ---
    # Keeps SSH connections open for reuse, improving performance.
    ssh_args = -o ControlMaster=auto -o ControlPersist=60s

    # --- Timeout for SSH connections ---
    # Default is 10 seconds; increase if remote hosts are slow to respond.
    timeout = 15
Note: The ansible.cfg file is optional but allows you to set defaults like
inventory file location, remote user, or disable host key checking for ease of use.
3. Setting Up Inventory Files
Create an inventory file in YAML format to define the hosts Ansible will manage. Keep it simple without variables or encryption for now.
    all:
      hosts:
        server1:
          ansible_host: 10.0.2.4
        server2:
          ansible_host: 10.0.2.15
Why No Encryption? Inventory files typically contain host details (e.g., IPs or hostnames) that are not sensitive. Sensitive data like passwords should be stored in encrypted files (e.g., using Ansible Vault).
4. Setting Up Secrets with Ansible Vault
Create an encrypted secrets.yml file to store sensitive variables like usernames and passwords.
    # Create encrypted file
    ansible-vault create secrets.yml

    # Example content of secrets.yml (encrypted)
    username: john
    pwd1:  12345
Commands for Managing Vault:
- View:
ansible-vault view secrets.yml - Edit:
ansible-vault edit secrets.yml - Decrypt:
ansible-vault decrypt secrets.yml
Security Note: Always use Ansible Vault for sensitive data to prevent unauthorized access.
5. Building Your First Playbook
Create a simple playbook to test your setup. This example checks if a service is running and displays the result. A playbook is a YAML file that defines automation tasks, organized into key components that tell Ansible what to do and how to do it.
Playbook Components Explained:
- Vars (Variables): Define reusable data, like usernames or file paths, to make the playbook
flexible. Here, we load sensitive data from
secrets.ymlto securely access credentials. - Tasks: The actions Ansible performs, such as checking a service or running a command. Each task is a step in the automation process.
- Register: Captures the output of a task (e.g., service status) into a variable, allowing you to use or display it later, like showing if a service is running.
- Become: Enables privilege escalation (e.g., running tasks as root). Use it when tasks require higher permissions, like managing system services, to ensure they execute successfully.
    ---
    - name: First Ansible Playbook
      hosts: all
      vars_files:
        - secrets.yml
      vars:
        ansible_password: "{{ pwd1 }}"
        ansible_user: "{{ username }}"
        ansible_become_method: sudo
        ansible_become_password: "{{ pwd1 }}"
        ansible_become: yes
      tasks:
        - name: Check if sshd service is running
          ansible.builtin.systemd:
            name: sshd
            state: started
          become: yes
          become_user: root
          become_method: sudo
          register: sshd
          ignore_errors: yes
          changed_when: false

        - name: Display sshd status
          ansible.builtin.debug:
            msg: "SSH is {{ 'running' if sshd.status.ActiveState == 'active' else 'not running' }}"
          when: sshd.status is defined
Key Elements:
- Vars: Load variables from
secrets.ymlusingvars_files. - Tasks: Define actions like checking service status.
- Register: Capture task output (e.g., service status) for display or further use.
- Become: Use
become: yesto escalate privileges (e.g., for root-level tasks). Use it when tasks require elevated permissions, like managing services.
6. Example
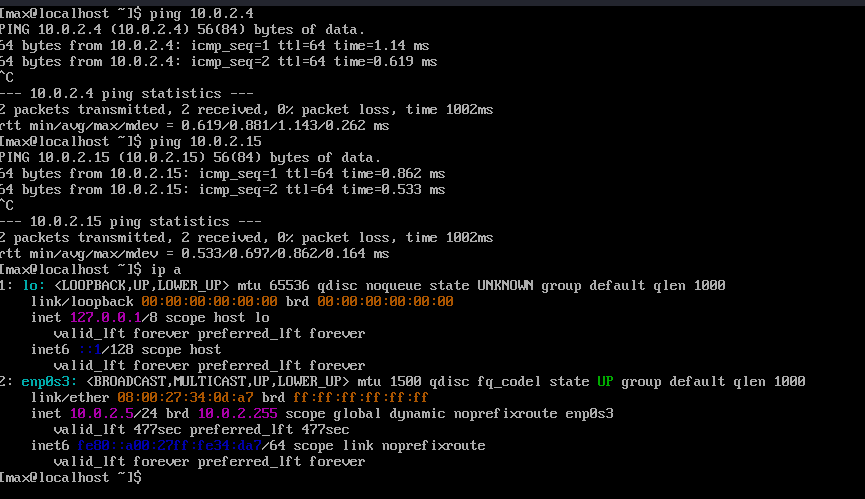
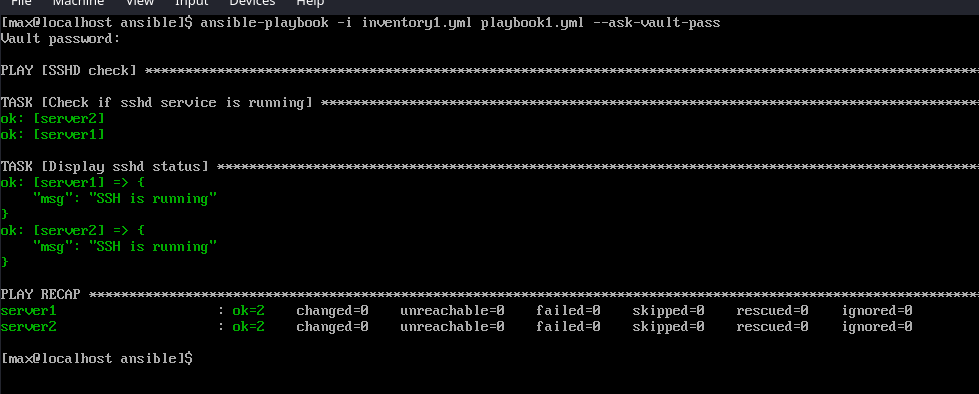
In the example below I setup a lan with 3 linux VMS. User john has a account on all vms. We are going to use templates from above to conduct a simple service check from controller (10.0.2.5) to the other 2 host (10.0.2.4, 10.0.2.15) and once done we will display service status.
- 1: Host Involved~ This screenshot shows the 3 host involved.
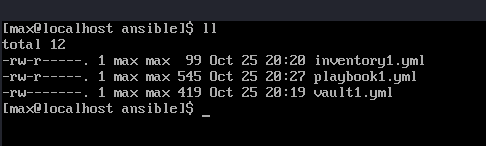
- 2: File Check~ Here we check to ensure that we have a inventory a playbook and a vault file.
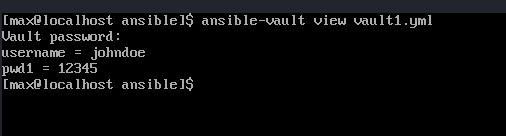
- 3:Vault file View~ Use
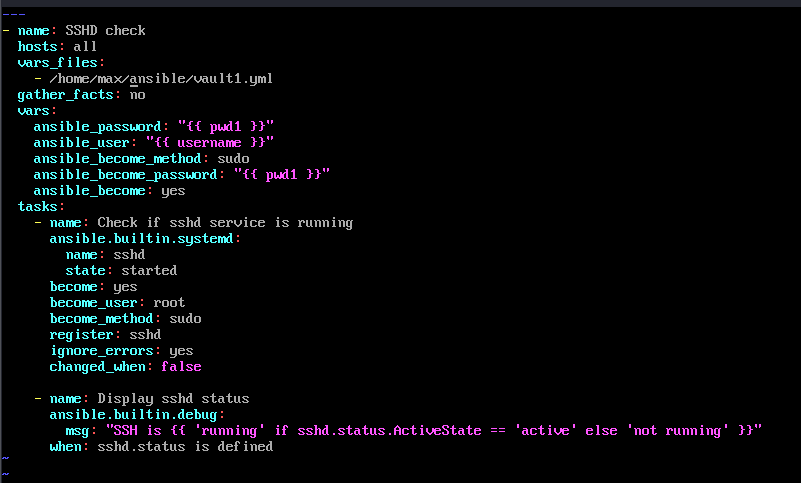
ansible-vault -viewto view key value pairs in vault. - 4: Playbook~ Here we show playbook about to be run.
- 5: Output~ This below output shows the successful run of playbook and corresponding
output.
ansible-playbook -i inventory1 playbook1 --ask-vault-pass
7. Tips and Best Practices
Lessons and tips to enhance your Ansible setup:
- Tip 1: Always encrypt sensitive data with Ansible Vault.
- Tip 2: IMO leave inventories and playbook unencrptyed to allow for easy sharing and reference all pwd and user names in playbooks with varibles that refernce back to secrets.yml. This will require authenication before it will pass pwd in on varible call.
- Tip 3: Use
ansible-playbook --checkto dry-run playbooks without making changes. - Lesson Learned: Clear inventory files make scaling easier; group hosts logically for better management.
- Future Improvements: Automate playbook execution with tools like Ansible Tower or cron jobs.
8. Conclusion
This guide covers the essentials of setting up an Ansible environment, from installing the controller to building your first playbook. With this foundation, you can automate system administration tasks efficiently and securely. If you are looking for playbooks to start using please visit my Ansible Collection to find some basic playbooks to get started.