1. Project Overview
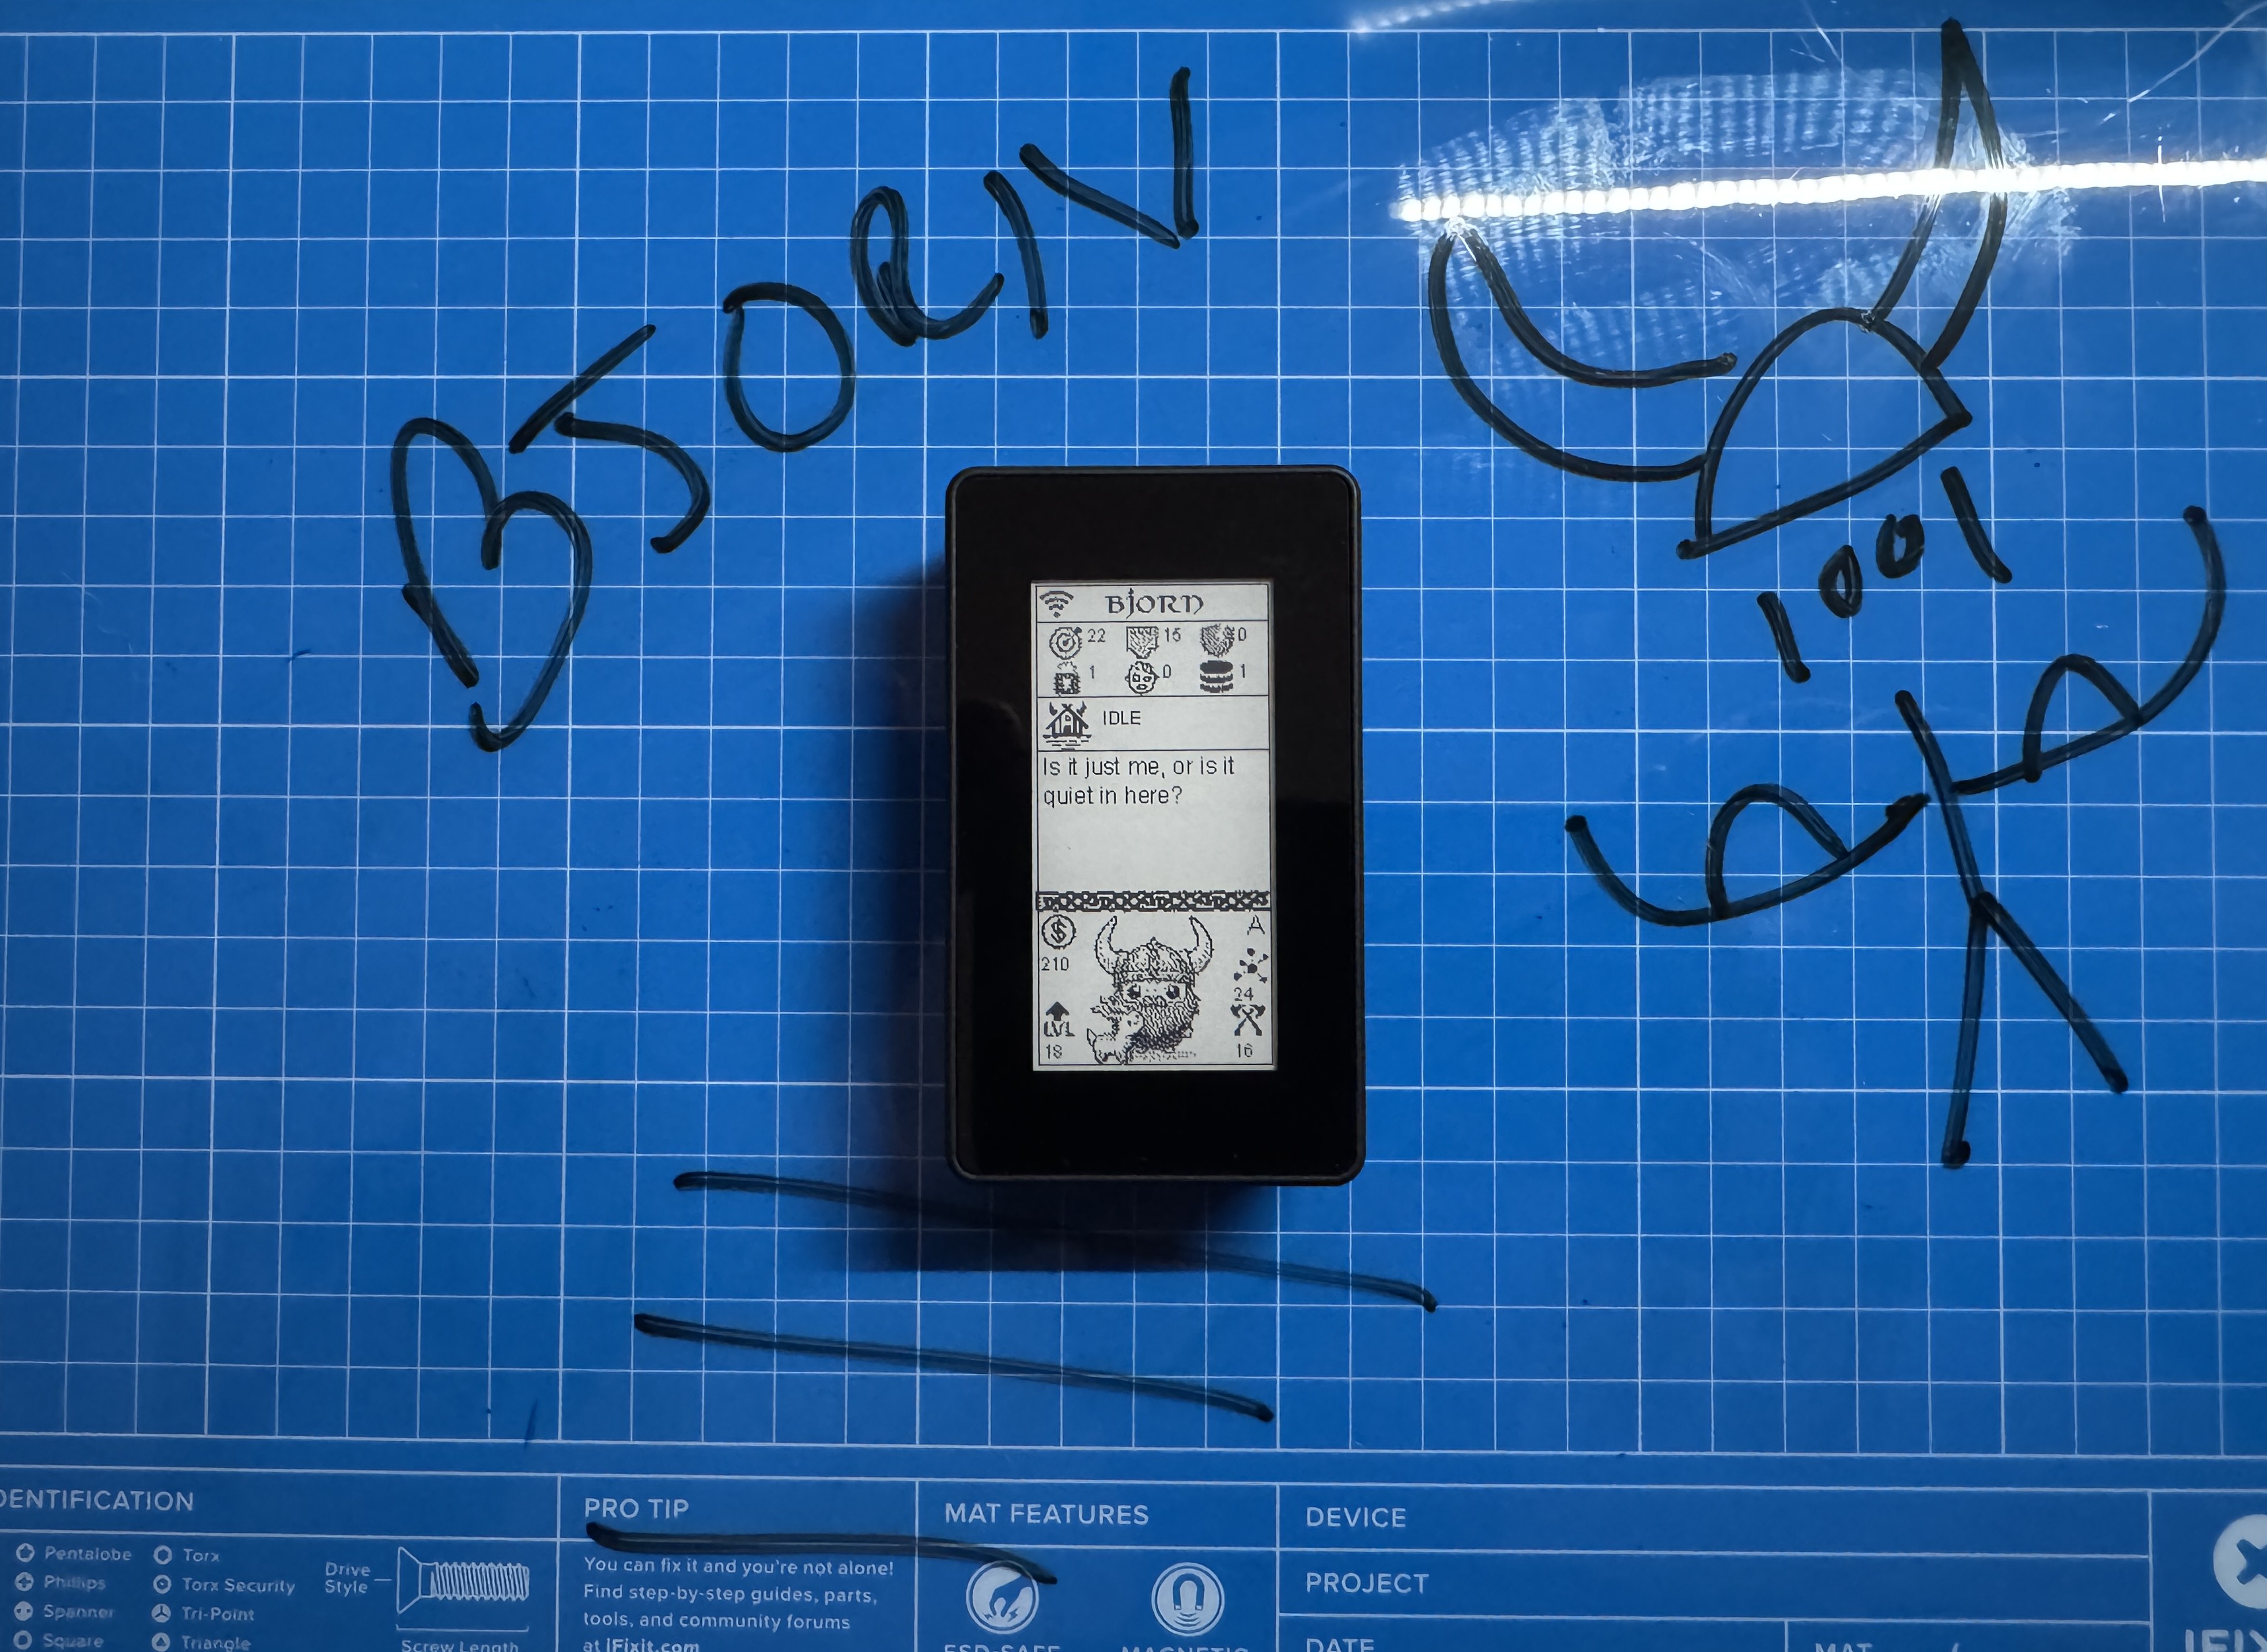
This project involves building BJORN, a network scanning and offensive security tool, on a Raspberry Pi Zero 2 W with a Waveshare 2.13-inch e-Paper HAT. BJORN autonomously scans networks to identify open ports, exposed services, and vulnerabilities, supporting features like brute force attacks and custom scripts in a portable, Tamagotchi-like device.
- Objective: Create a compact pentesting device for network security testing.
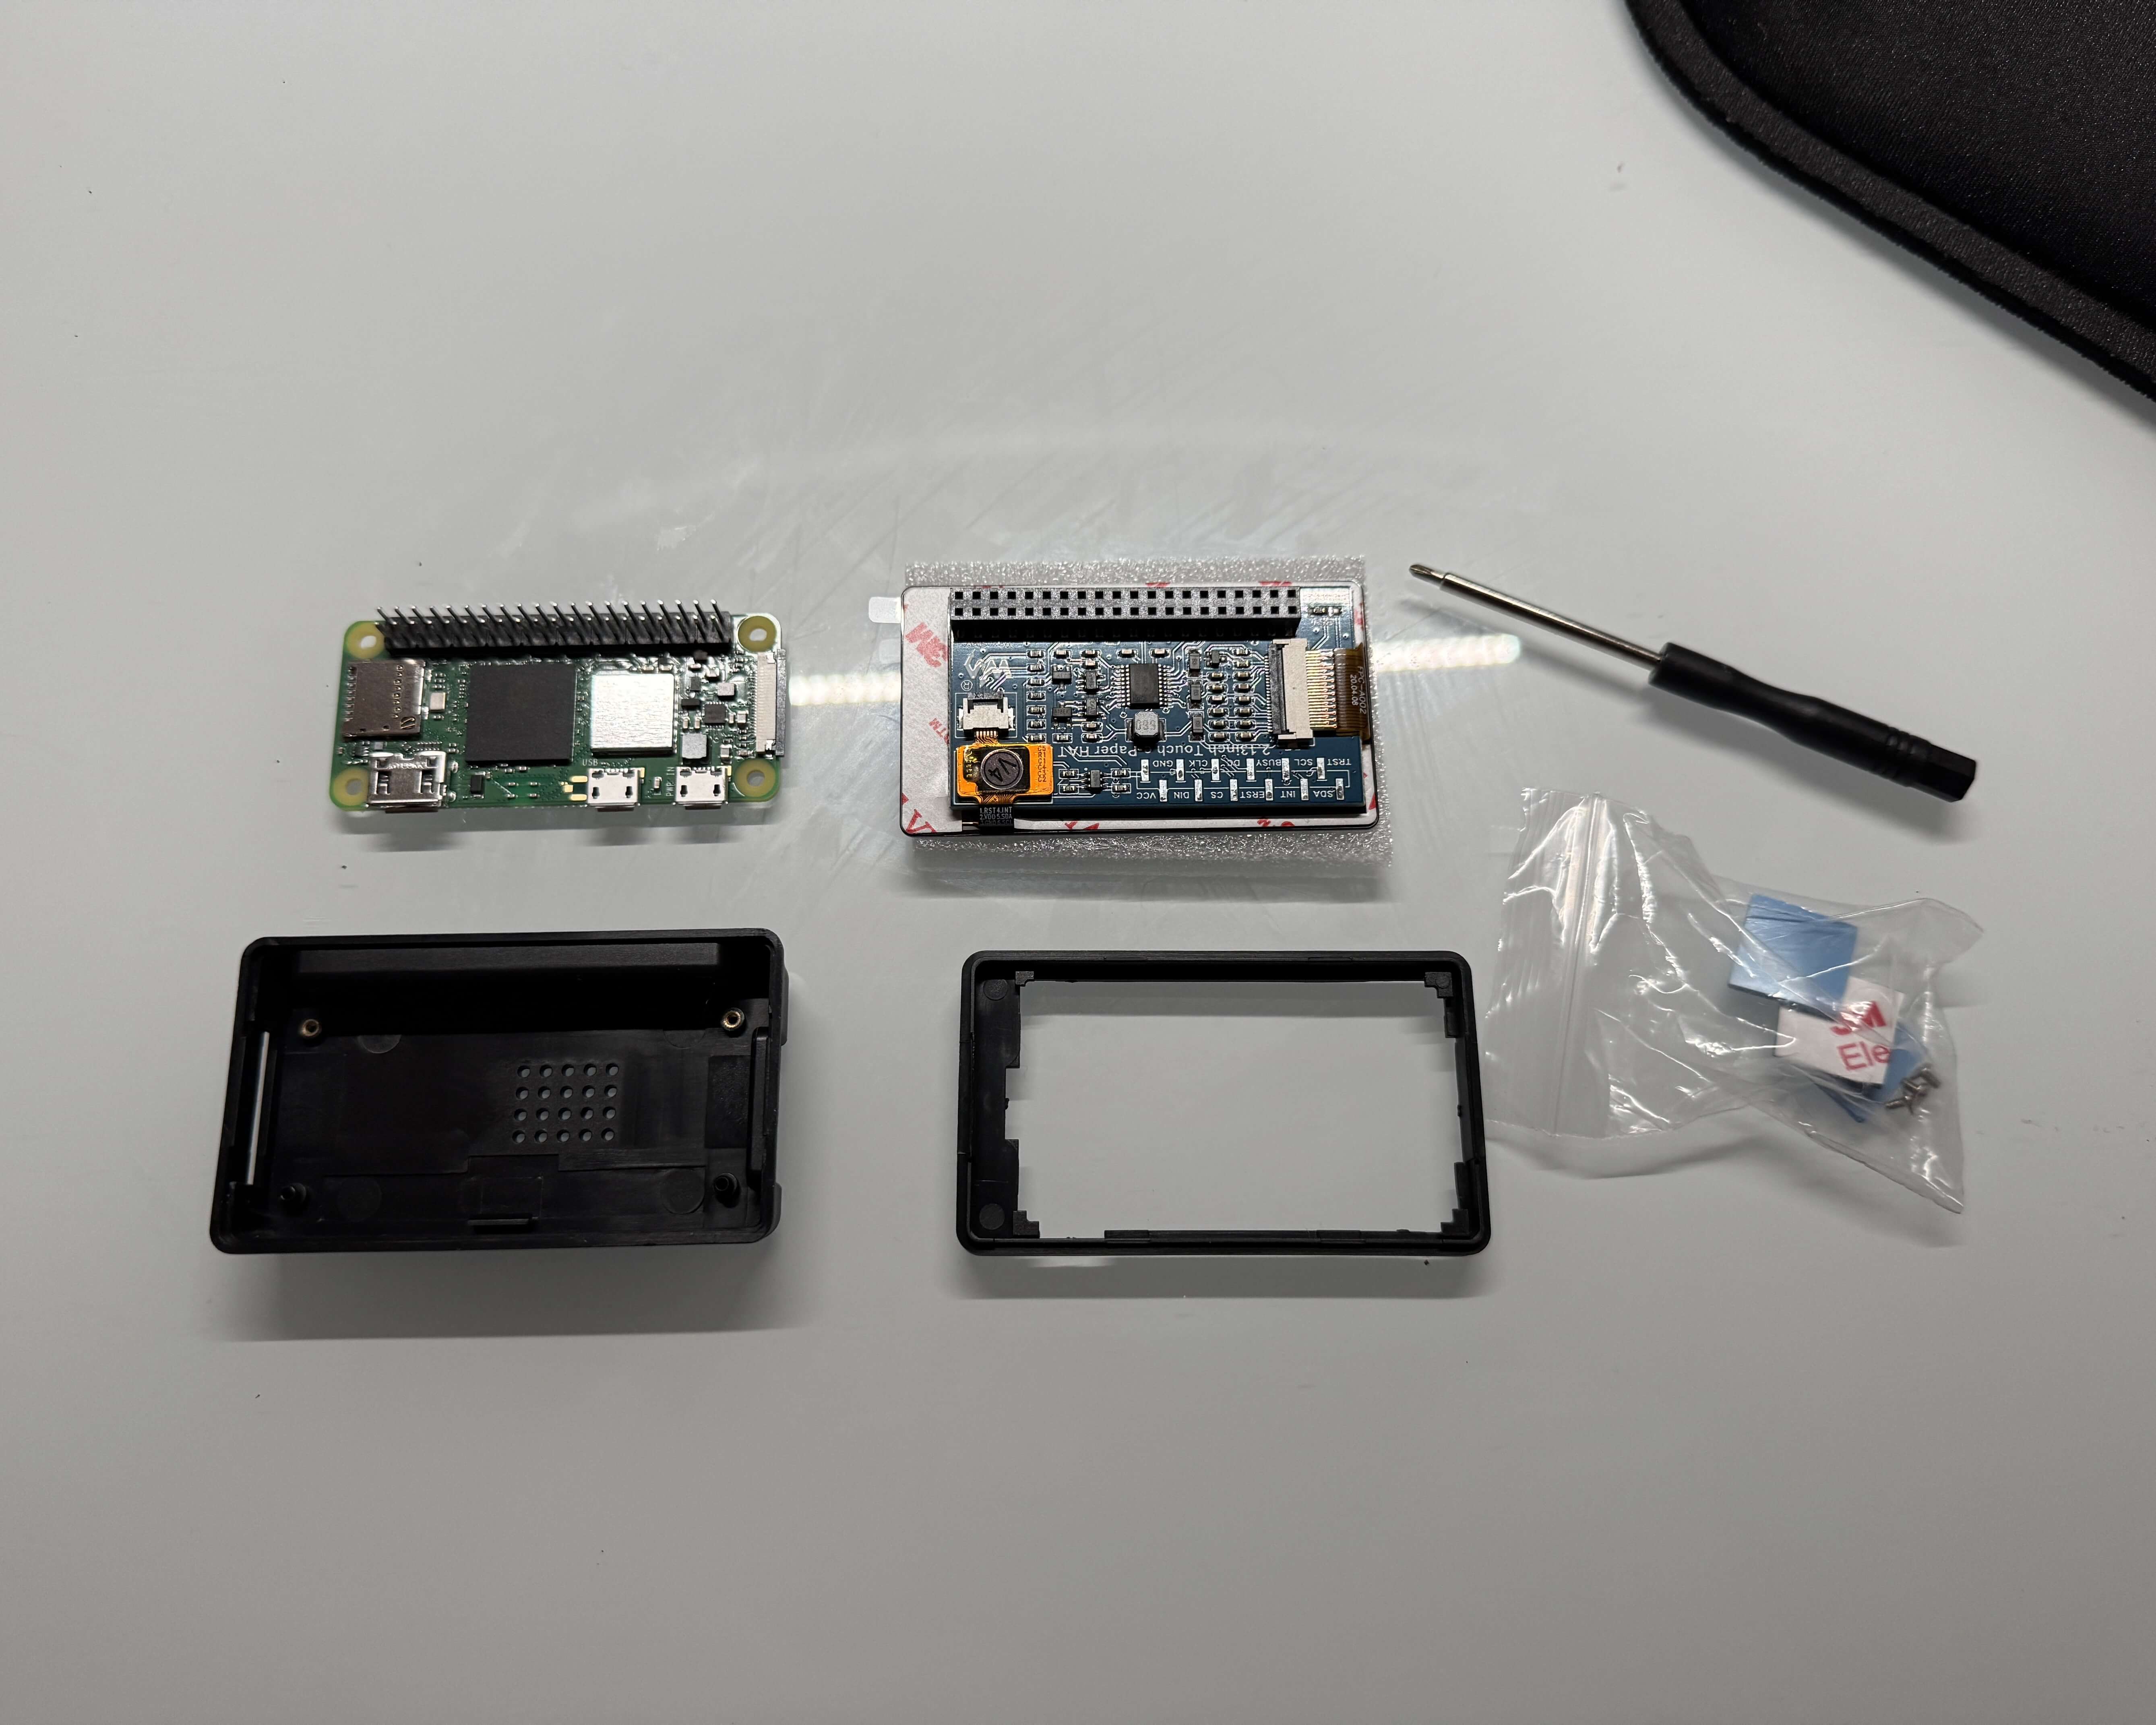
- Hardware Used: Raspberry Pi Zero 2 W, Waveshare 2.13-inch e-Paper HAT, Class 10 MicroSD card.
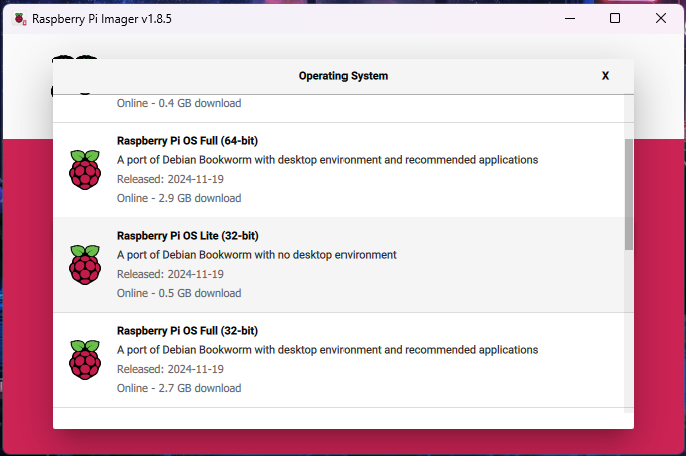
- Software Used: BJORN software, Python, Raspberry Pi OS Lite (32-bit, Debian Bookworm).
- Skills Learned: Raspberry Pi configuration, Python dependency management, e-Paper display setup. Amazon Link for Hardware used
2. Resources and References
The following resources were essential for setting up BJORN:
-
Resource 1:
Title: Bjorn - The Cyber Viking - Installation and Demo
Usage: Provided a visual guide for hardware assembly and running the automated installation script. -
Resource 2:
Title: BJORN GitHub Repository
Usage: Supplied the official installation script and documentation for software configuration and troubleshooting.
Additional Notes: The YouTube video offered practical setup visuals, while the GitHub README provided detailed command-line instructions, making them complementary resources.
3. Steps Taken
The step-by-step process to build and deploy BJORN is outlined below:
-
Step 1: Hardware Assembly
Description: Connected the Waveshare 2.13-inch e-Paper HAT to the Raspberry Pi Zero 2 W using GPIO pins.
Challenges: Ensured correct pin alignment and avoided pushing pins too far into the e-Paper HAT to prevent damage.
-
Step 2: OS Installation
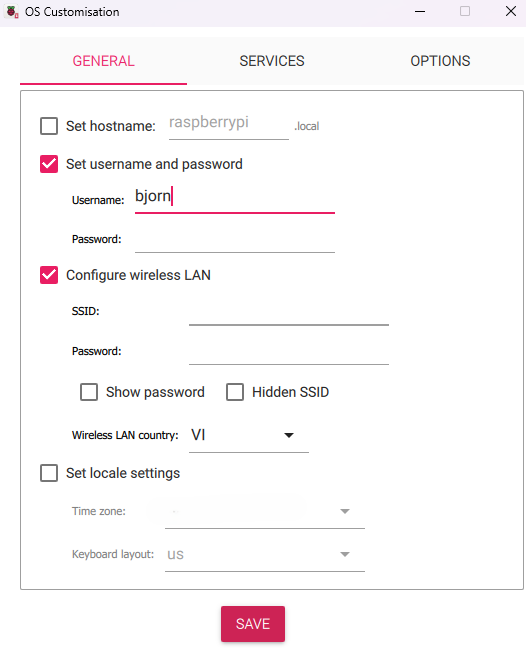
Description: Flashed Raspberry Pi OS Lite (32-bit, Debian Bookworm) onto a Class 10 MicroSD card using Raspberry Pi Imager. Configured settings in Imager: set hostname to "bjorn," defined username and password, and added Wi-Fi credentials (SSID and password) for automatic LAN connectivity.
Challenges: Verified OS compatibility and ensured Wi-Fi settings were correctly applied to enable SSH access in the next step.
-
Step 3: BJORN Software Installation
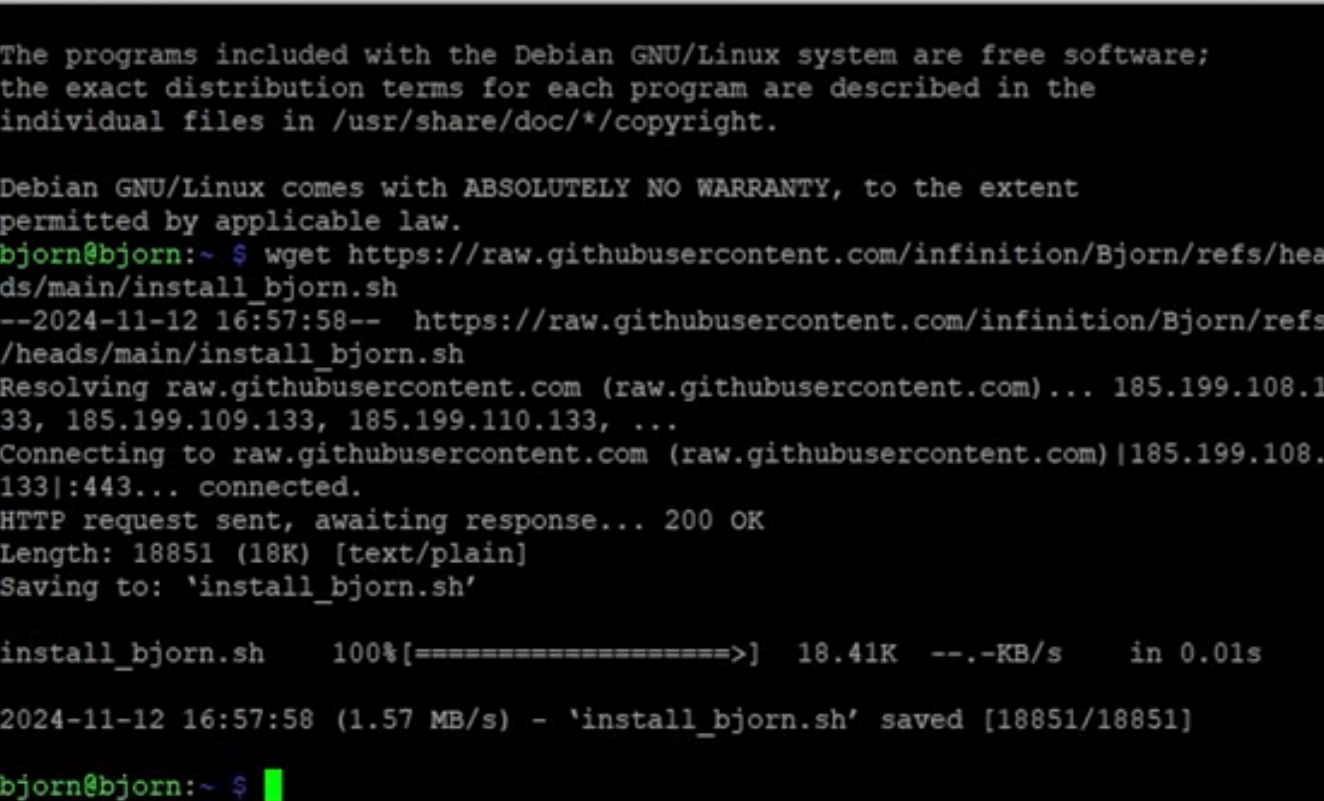
Description: Identified the Pi’s IP address on the Wi-Fi network, then used SSH (with the username and password set in Step 2) to connect. Executed commands to download and run the automated installation script (install_bjorn.sh) from the GitHub repository, which installed dependencies and BJORN software.
Challenges: Confirmed stable network connectivity before running the script to avoid interruptions.
-
Step 4: Configuration and Testing
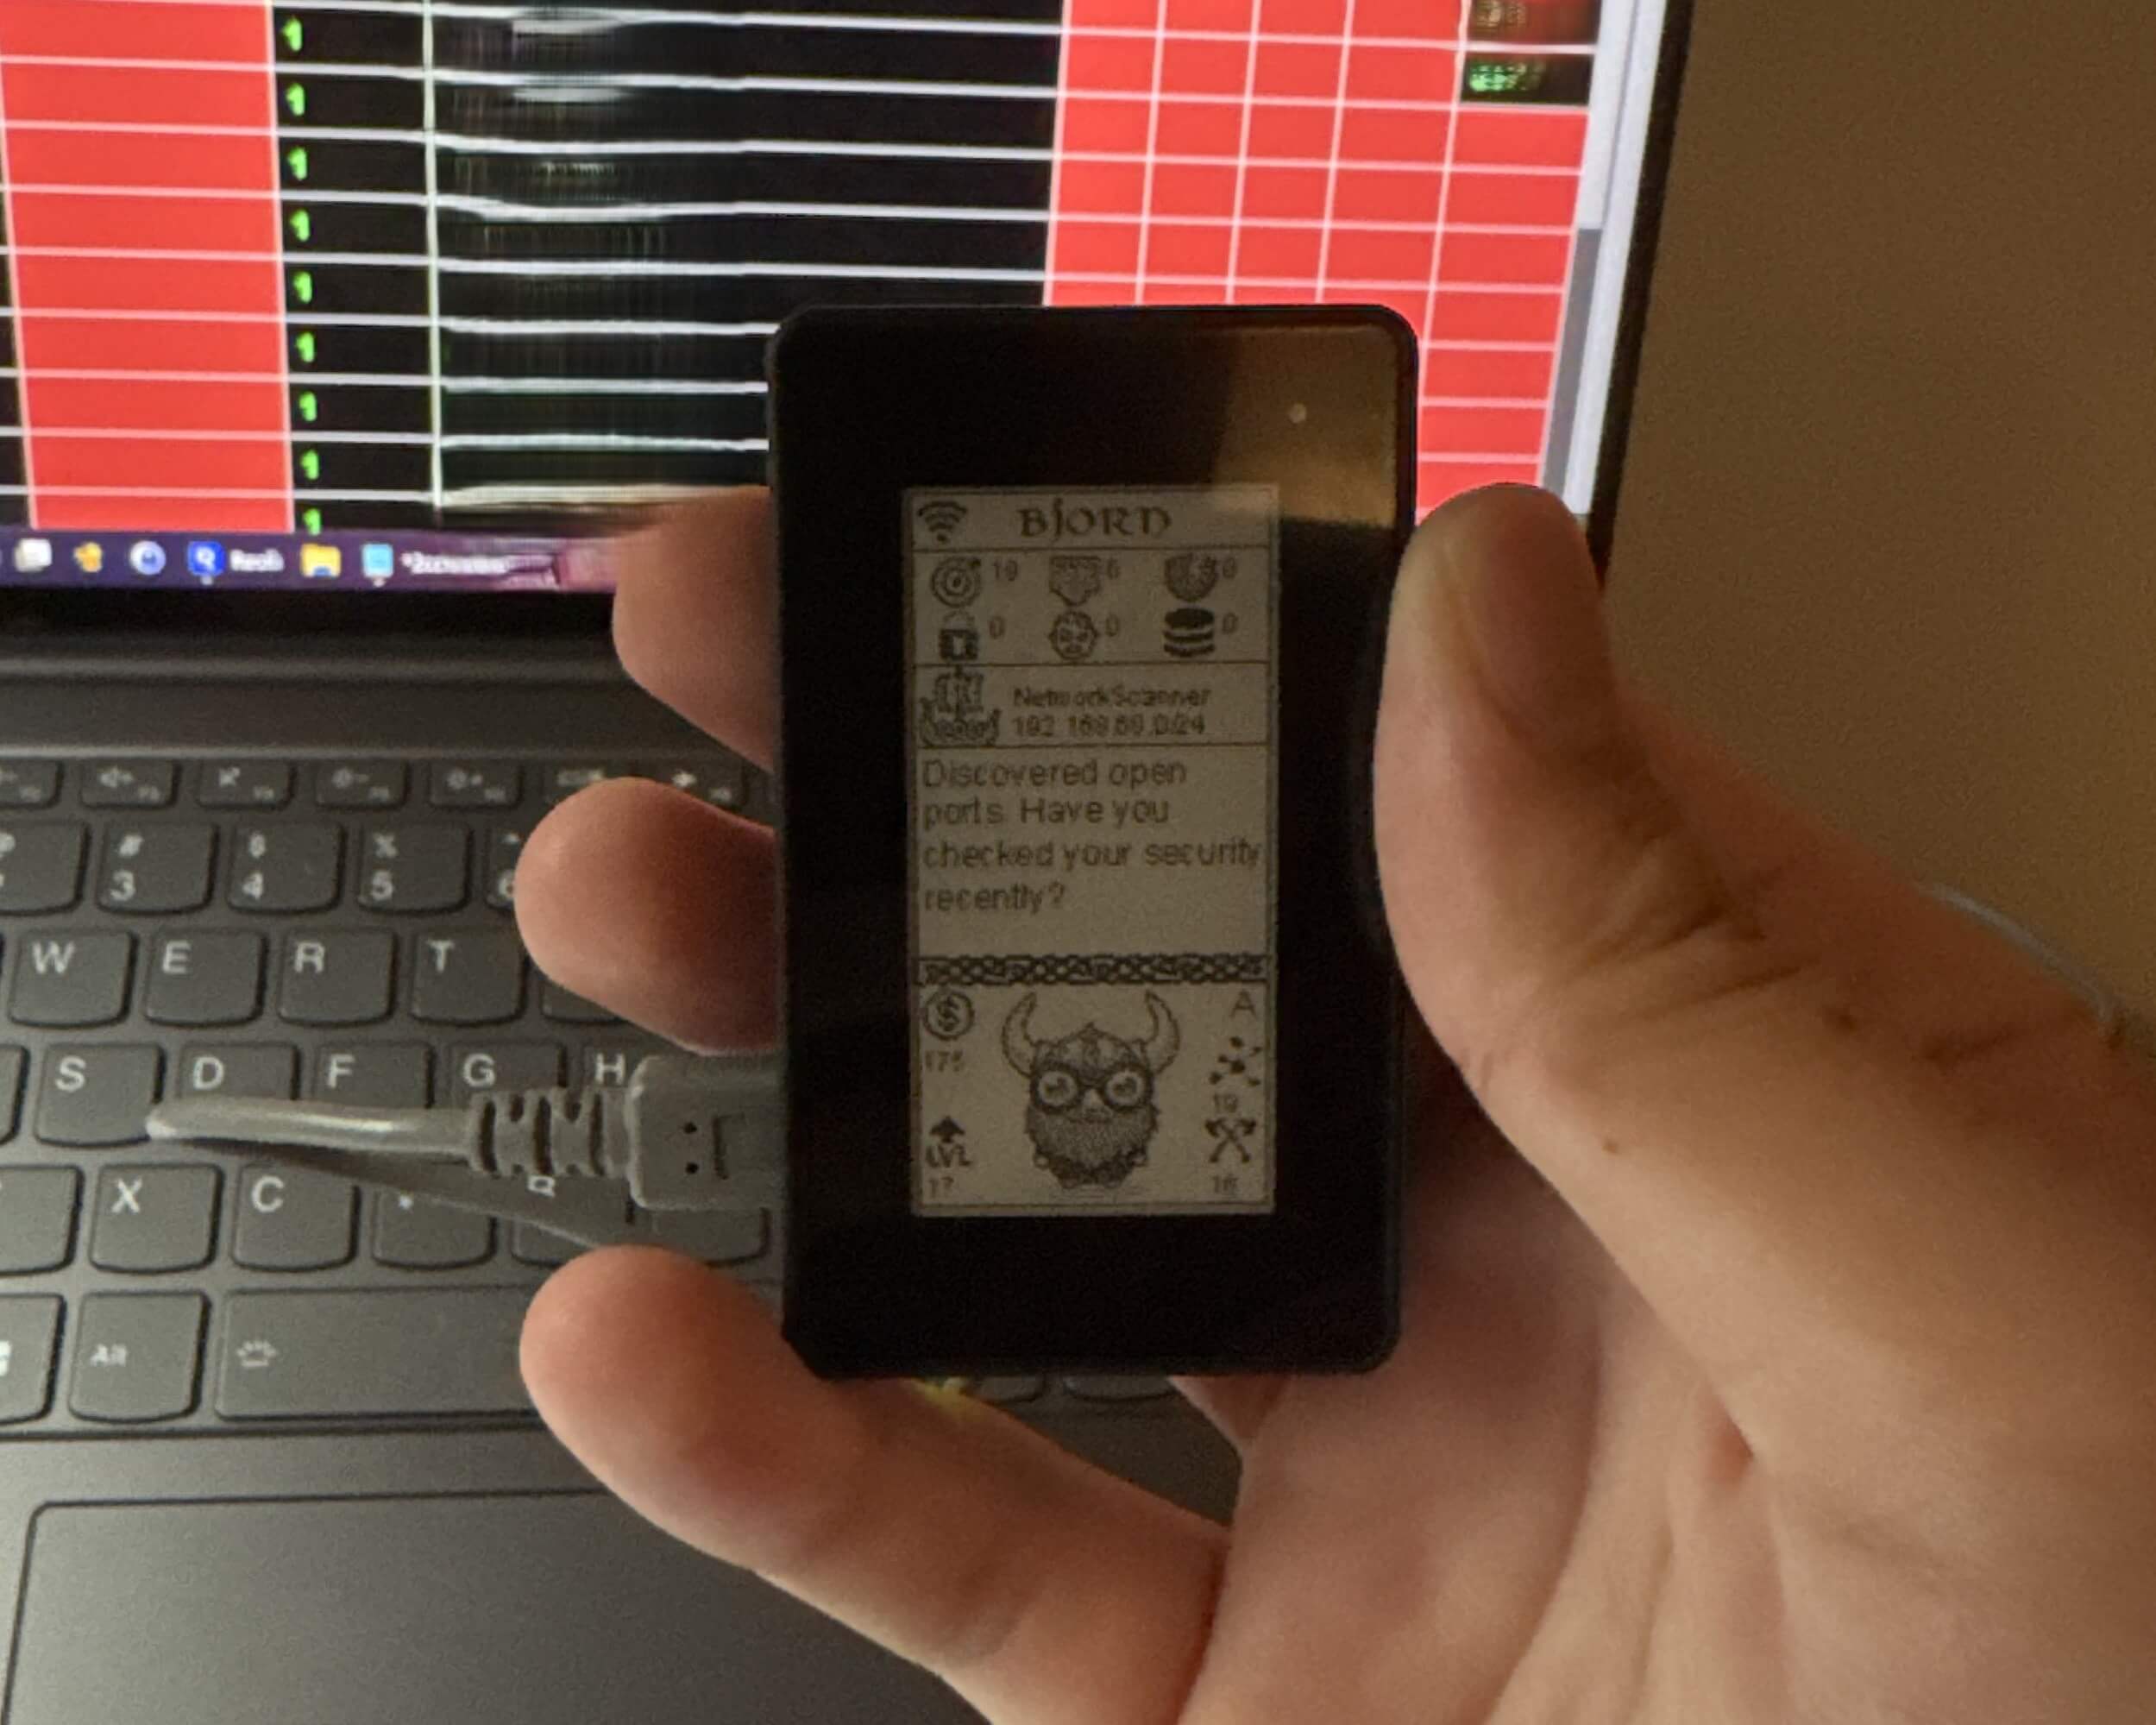
Description: Configured the e-Paper display by selecting screen version 3 inshared_config.jsonduring installation. Ran the full installation, rebooted, and validated setup by accessing the web UI at[Pi’s IP]:8000in a browser on the same Wi-Fi network. Tested BJORN’s network scanning on a local network.
Challenges: Adjusted SPI settings to stabilize the e-Paper display output.
5. Tips and Lessons Learned
Practical advice and insights gained from the project:
- Tip 1: Use a Class 10 MicroSD card to ensure reliable performance during installation and operation.
- Tip 2: Configure Wi-Fi and hostname settings in Raspberry Pi Imager before flashing to enable automatic LAN connectivity.
- Tip 3: Select the correct e-Paper screen version (e.g., version 3) during installation to avoid display issues.
- Tip 4: Access the web UI at
[Pi’s IP]:8000while on the same Wi-Fi network to validate setup. - Lesson Learned: Precise configuration of the e-Paper HAT is critical to prevent display errors.
- Future Improvements: Add an external antenna to improve Wi-Fi range for broader network scanning.
6. Conclusion
BJORN was successfully set up and tested, autonomously scanning a local network and displaying results on the e-Paper HAT and web interface. This project enhanced my understanding of Raspberry Pi-based pentesting tools and network security. Future plans include exploring custom attack scripts to expand BJORN’s functionality.
7. Additional Notes
- The YouTube video was invaluable for visualizing the hardware assembly process.
- The GitHub repository’s
TROUBLESHOOTING.mdfile helped resolve SPI-related display errors.